How to Build Endurance for Hiking in 10 Steps
If you’ve got big hiking goals, one of the main things you should be investing in is how to build endurance for hiking. This is especially true for the type of hiking that involves grueling uphills or lengthy distances or heavy packs. Building endurance for hiking will not only make your time in the outdoors safer, stronger, and healthier, but you’ll also build your confidence as you achieve new and more challenging goals. Building endurance and becoming a stronger hiker does not happen overnight. These 10 steps below will show you how to build endurance for harder, longer, and more hikes, in a safe, effective, and healthy way.

Disclosure: Below are some affiliate links-these are all products I highly recommend. I won’t make any recommendations on this page that I haven’t tested or personally used! Enjoy this guide to building hiking endurance!
Table of Contents
How to Build Endurance for Hiking
Here’s the 10 steps you should follow to build endurance, stamina, and strength as a hiker.
- #1: Establish Your Baseline Foundation – have a consistent foundation to build off of
- #2: What are your Hiking Goals? – long distance, 14’ers, casual weekend hiker, etc.
- #3: Establish Your Timeline and Build Up in Gradual Increments- how much time do you need to reach your goal safely while increasing distance and volume in gradual increments?
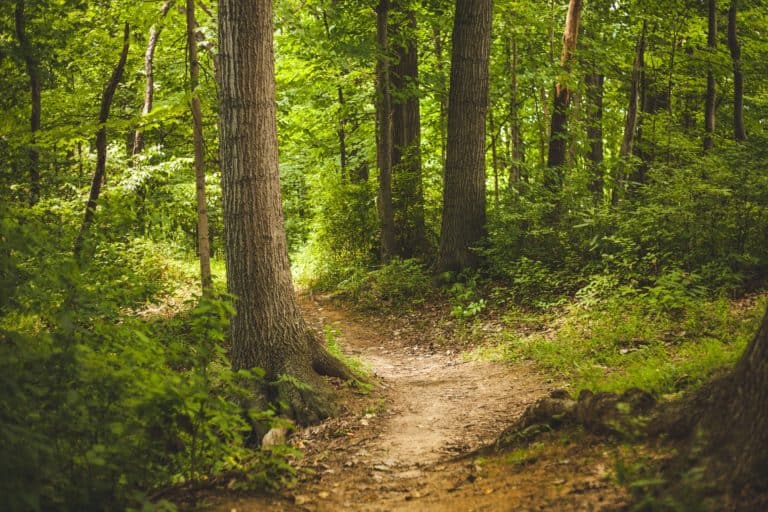
- #4: Time on Feet – the basis for bigger hiking goals. Get out there and get in the time.
- #5: Train for Uphills and Downhills – becoming a stronger uphill and downhill hiker
- #6: Strength Training and Cross Training – how to supplement endurance, stamina, and strength
- #7: Hiking Mechanics and Form – form, mechanics, posture, and stability go a long way in building endurance
- #8: Target Environmental Specifics – will you need to train for heat, high altitude, etc?
- #9: Hydration and Nutrition – how are you fueling your hiking?
- #10: Get the Right Gear – comfort and quality can keep you going longer

What goes into each of these 10 steps?
#1: Establish Your Baseline Foundation
So you want to hike a Rim to Rim for your 50th birthday, but you haven’t hiked more than 2 miles in 20 years? You absolutely should NOT make the jump from 2 miles to this Grand Canyon trail’s 24 miles without serious training and plenty of time!
Increasing mileage too quickly is one of the quickest ways to injure yourself. As with any endurance training, you MUST go slowly, but it also is extremely beneficial to have a baseline foundation to build off of.
What exactly is a baseline foundation?
For hikers, I would recommend 30 minute moderate cardio workouts 2-3 times a week, consistently, before working on increases and/or targeted training.
This could vary widely depending on your hiking goals, of course. Are you just wanting to build endurance to be able to hike your local 5 mile trail once a week? Then a good baseline foundation might be spending a month prior hiking 2 or 3 miles once a week, and then working up to 5 miles once a week.
If your goal is to hike Mt. Whitney, the highest point in the lower 48 states with over 6,000 feet of elevation gain and over 20 miles in length, then your baseline foundation should probably be something more like minimum 60 minute cardio workouts 3-4 times a week consistently, before upping your volume and mileage.
If your goal is to climb steep and grueling 14’ers in Colorado, then your baseline foundation would probably need to include a couple months minimum of moderate elevation gain training (60 minutes cardio workouts that involve leg work or moderate elevation gain practice, 3-4 times a week consistently), before upping the volume, intensity, or mileage.
My main point is, decide what type of hiking goals you have, or a specific trail that you are training for, and give yourself enough time to establish a baseline foundation to build off of. This will give you a stronger base and help to prevent injuries, overuse, and burnout. Plus, if you take the time to establish the right hiking baseline, you are much more likely to be able to continue to build off of that baseline well into the future, instead of being a “one and done” type hiker who checks off one particular goal and then retires.
This brings me to point #2: What are your hiking goals?
#2: What are your Hiking Goals?
In order to establish your baseline, and also to continue with the next steps in the process, it helps to know what your hiking goals are. There are different motivations and different types of hikers, and it helps to know which kind of hiker are you? Of course, these can change over the years, as you build experience and confidence, or unfortunately sometimes due to injuries, lifestyle changes, etc. But an educated idea of your goals is a helpful starting point to help guide you.
Are you just looking to hike recreationally more consistently? Do you have a particular iconic trail in mind that you are training for (a 14’er summit, a Rim to Rim in the Grand Canyon, the 50 state high points, etc)? Do you have a big backpacking trip planned with friends? A thru hike somewhere? Someone training for a week long backpacking trip through the Sierras needs to train differently than someone wanting to hike recreationally more often. A goal of simply getting out and hiking more consistently is always a good place to start if nothing else.
I’m a combo type hiker from the list above – a large part day hiker, a large part long distance hiker, a large part trail runner, a large part summit and peak bagger (in my pursuit of the 50 state high points of the U.S.), and a smaller part backpacker. I love to pair day hikes and long distance hikes together, one of my repeating favorites being the Grand Canyon’s Rim to Rim hike. I love trail running events in National Parks and internationally, like Greenland’s Polar Circle Marathon, and the Yellowstone National Park Half Marathon. And one of the best checklists I’ve ever pursued in hiking has been checking off the 50 state high points in the U.S., among which California’s Mt. Whitney, Arizona’s Humphrey’s Peak, Utah’s Kings Peak, and Virginia’s Mt. Rogers have topped my list! My favorite places to backpack and camp would have to be my own home state’s two National Parks, Big Bend and Guadalupe Mountains National Park!

#3: Establish Your Timeline
If you don’t give yourself a realistic, intentional timeline, you’re a lot less likely to hold yourself accountable to it. I speak from experience here. Whether you want to improve your recreational hiking or achieve a bucket list hike, a timeline keeps it visual, and breaks your goal into smaller, more achievable parts.
For example, if you are wanting to train to hike Mt. Whitney in California (one of my all time favorite hikes), you’ll probably want to give yourself at least 16 weeks to complete a targeted training plan (plus the necessary time to establish a baseline foundation, if necessary). This is to adequately allow enough time to build up your mileage volume and distance to be able to handle the actual hike.
Even if your goal is just to get out and hike more consistently, give some numbers to your goal! For example, I want to hike 5 times a month by the end of this month, and 8 times a month by the end of next month, etc. Plan it in advance, and put it on your calendar!
The biggest recommendation I could ever give anyone training for anything, is to schedule out your training days IN ADVANCE, on your calendar. If you tell yourself you’ll get around to it when you have the time, something will always come up and you’ll be tempted to talk yourself out of it. If you have it scheduled a month in advance (or two or three months like I frequently do), other things that come up have a way of working themselves out, and you’re able to stick to your plans and your goals.
What happens when you don’t give yourself enough time? When you bite off too much, too quickly, it’s a recipe for injury. And sometimes, injuries can completely derail a goal, and even worse, some you can’t fully come back from.
Often I’ll talk with hikers who have a massive goal they’re aiming for, but they don’t allow adequate time to train for it. They might be training to complete a 45 mile hike with 10,000 feet of elevation gain, but they only give themselves 2 months to train. They’re making weekly jumps from a 5 mile training hike one week, to a 12 mile training hike the next week, to a 18 mile training hike the next, etc. Often this scenario does not end well.
A much safer way to build endurance for hiking is to give yourself enough time to build small, gradual increments. Overall, a safe rule of thumb is the 10-15% rule. This rule states that your training increments should increase by no more than about 10-15% percent each week.
What this might look like is:
- 10-15% increase in hiking mileage week to week (Week 1 – 5 miles, Week 2 – 5.5 miles, Week 3 – 6 miles, etc).
- 10-15% increase in time spent on gym equipment each week (Week 1 – 30 minutes on the elliptical, Week 2 – 35 minutes on the elliptical, Week 3 – 40 minutes, etc).
- 10-15% increase in elevation gain training (Week 1 – climb 500 feet, Week 2 – climb 550 feet, Week 3 – climb 600 feet, etc.)
- etc….
While there’s give and take with this rule, what’s important is that you DON’T make HUGE LEAPS and GAINS without building up slowly and in gradual increments.
Whatever your goal is, start by working backwards. How long will it take to train for your goal, allowing for gradual increments, and work backwards from your goal date to get your starting date. If you need time to establish a good baseline foundation before any type of targeted training, work additional time in for that as well.
*Want support establishing a timeline and developing a targeted training plan for your hiking goals?
I offer 1:1 Coaching Consults for Hikers – fill out this INTEREST FORM to reserve your spot today!
#4: Time on Feet
More than training to climb, more than training for environmental factors, I would argue that if you want to build endurance as a hiker, time on your feet is the priority to focus on. Even when I work with “flatlanders” training for hefty ascents and descents, time on your feet is where we start. I frequently work with hikers on Rim to Rim training plans for the Grand Canyon, and the biggest thing I recommend focusing on, even for a trail of that nature, is time on feet. Training the body to give consistent, sustained output is a foundation you can build anything off of. So just get in more time on your feet in any way you can.
Don’t have mountains to climb? Get in time on your feet, even if it’s on flat terrain, and then supplement for the elevation gain (more on that when I get to cross training and strength training).
Always increase the time on your feet in gradual increments, especially if the time you spend on your feet includes natural elevation gains and descents.
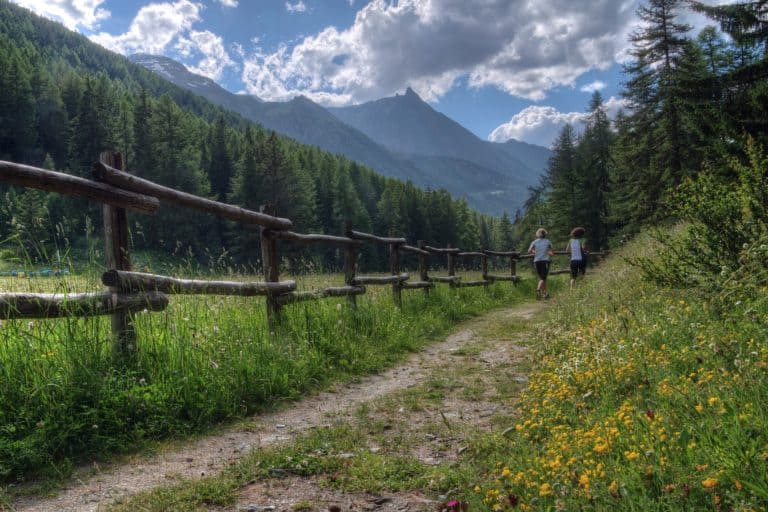
#5: Train for Uphills and Downhills
If your hiking goals include elevation gains and descents, you’re going to want to target that in your training, as you build endurance for that type of hiking in particular. While time on your feet is the building block, you will want to address uphills and downhills as well.
As with anything, do it gradually and in increments.
So, if you have a handful of great training trails with good climbing to practice on, then by all means take advantage of that. But don’t go from hiking a 500 foot elevation gain trail one week, to a 3,000 foot elevation trail the next week.
If you’re new to this type of hiking, start with gains of 100 or 200 feet for a couple weeks. Then move up to 300 feet. Spend some time building a foundation of up to 500 feet of elevation gain. After that, you can continue in increments until you reach your goal.
When it comes to downhills, you’ll want to practice intentionally on those as well. Watch your pace, and don’t go too fast on downhills. Don’t overstride or overextend, as that can be one of the main culprits when it comes to experiencing pain when hiking downhill. Don’t be tempted to burn through too much energy on a downhill, and don’t automatically assume it’ll go faster than the uphills.
If your hiking goals involve uphills and downhills, but you don’t have good natural terrain to train on (maybe you’re a “flatlander” like myself), then you’ll have to get creative. You might hear some people recommend things like running stadium stairs, but I tend to keep that as a last resort option. More often than not, I find that with a little creativity and research, you can find better solutions. Because I rarely if ever find anyone who WANTS to run stadium stairs for training. And that type of repetitive motion and impact can actually cause overuse injuries for many people.
First, consider those humble, shorter trails. Maybe they don’t jump out at you because they only contain 300 feet of elevation gain, and you want to train for 3,000. But if you do a bunch of loops on those humble trails, will it get you to where you need to be? Sometimes these opportunities are overlooked without realizing the potential.
Second, are there trails (or even roads), near you that have at least one big hill? You can do hill repeats to get your gain.
Lastly, can you supplement with gym equipment or at home workout equipment? For example, you can do weighted or non-weighted step ups and step downs from the comfort of your own home while you watch Netflix. Or if you’ve got access to a gym, you can hop on an elliptical, stairmaster, or Jacob’s Ladder machine.
For a more in depth dive into hiking uphill and downhill, check out these two additional guides – my Uphill Hiking Training Plan and Downhill Hiking Training Plan.

#6: Strength Training and Cross Training
I highly recommend you pair any hiking goal with some strength training and cross training on the side, to help support your hiking game. How do strength training and cross training benefit you as a hiker?
Both help to keep your body working in harmony, utilizing all the various muscle groups while building strength, stamina, flexibility, endurance, and most importantly – injury prevention.
Strength training and cross training do not have to be complicated, or expensive. Strength training could be a simple “choose your own path” at home workout like this one, that targets moves like lunges, squats, and deadlifts. Strength training could be going for a rucking hike, that builds strength in the legs through weighted hiking. I personally can attest to the benefits of rucking, as I started doing weekly weighted rucks after my son was born. At first, it just started as a way to bond and bring him along on our hikes. Now, it’s a weekly tradition that continues, with him in his Osprey Poco Carrier, and me doing a weighted rucking hike with a 30+ pound toddler. Be sure to work up in weight and distance if doing rucking hikes.
Strength training and cross training can also be gym time or working with a trainer, for those that prefer that method. Bottom line, if you want to be stronger at any physical goal you have, strength training is a hugely supportive player. Same goes for cross training.
What is cross training, in a nutshell?
- Cross training is the practice of engaging in multiple sports / exercises / workouts in order to improve performance in one’s main sport. It’s the art of training your body in more than one role.
What does cross training accomplish?
- Reduces the risk of injury
- Improves muscular strength and endurance
- Combats burnout and overuse by switching up your training to provide a mental and physical break
- Engages the full body and all muscle systems
- Improves exercise economy and efficiency
- Creates a “multi-purpose” athlete
- Accelerates recovery
You can see how cross training can help you become a stronger overall athlete, as well as build endurance for hiking. I always recommend to keep cross training fun. Do something you enjoy doing for your cross training, because it’s important to have variety and diversity. And you need to want to do it!
I personally enjoy cycling as one of my main forms of cross training, whether I’m training for a big hike, or a big race (since I’m a long distance runner as well as hiker).

#7: Hiking Mechanics and Form
If you want to become a stronger, better hiker, as well as build more endurance for hiking, don’t overlook hiking mechanics and form. Improper mechanics and form can mean less efficient hiking, and more wasted energy. It can also cause issues with things like stability and posture, which can make hiking much more difficult.
A few basic rules to follow:
- Shorten your stride on uphills and downhills. Don’t over-extend or have too long a stride.
- Keep upright – don’t lean too far forward on uphills, or too far backwards on downhills. Maintain an upright position when you attack those uphills and downhills.
- Sidestep on uphills and downhills, instead of climbing them with your feet facing them straight on.
When I first started implementing some of these mechanics, it didn’t always feel natural. A lot of them I learned about from first hand experience when I hiked technical Mt. Hood in Oregon with a guide. Having half a day to talk and learn about mechanics and form from someone who does a challenging, technical climb up a glaciated peak every day was eye opening.
It does take some time to become a habit, and at first it might even feel like you’re moving slower. But give it a chance, and you’ll notice that by shortening your stride, keeping upright, and utilizing sidestepping, your approaching hiker with a form that’s better for posture, strengthening, efficiency, and reduced injury. Approaching trails, especially the uphills and downhills, with improved mechanics and form, can do a lot to offset some of the aches and pains that can plague hikers, like calves flaring up after a downhill hike.
#8: Target Environmental Specifics
Do you have specific environmental factors to tackle with your hiking goals? Do you need to build particular endurance for heat, altitude, etc.? You’ll want to include that as you build endurance for hiking. As always, in gradual increments. If you plan to tackle 14’ers, part of your endurance training needs to include acclimating. If you’re planning to do a day hike in desert, part of your endurance training needs to include heat acclimating. If you’re expecting rain, you’re going to need to know how to safely handle hiking in the rain.
You can have all the physical endurance in the world, but if you haven’t practiced with environmental endurance and acclimation, it could all be for nothing.
Increments can look like spending an hour, then two, then three, on consecutive high altitude hikes. Or if you are heat training, spend 15 minutes simply walking outside in the heat. Then 20 minutes the next time. Then a 30 minute hike. And so on…all while having a proper hydration and fueling plan of course! Which brings me to hydration and fueling as part of building endurance for hiking!

#9: Hydration and Fueling
This is an often over-looked or under-estimated facet of building hiking endurance. Especially for longer and more grueling hikes, you need to fuel and hydrate your body BEFORE, DURING, and AFTER your hikes.
No matter what physical, endurance goals you are pursuing, a consistently healthy and balanced nutrition plan will make a huge difference. But especially if you are engaging in some type of targeted training to build hiking endurance, make sure to focus on hydration and nutrition as part of that plan. Even if you’ve built up hiking endurance in your legs and core, you can still bonk if you don’t give your body the fuel and hydration it needs. It’s a crucial part of being able to endure longer and more effectively.
Aggressive hiking can actually do small damages to muscle tissues and fibers, but that’s not bad news. It just means you need to help your body recover, and therefore, GET STRONGER! After a challenging, lengthy, or aggressive hike, make sure to help your body repair and replenish by focusing on healthy carbs and protein. You can get a handy list of the best proteins for athletes here.
Start to learn what hiking snacks work the best and settle with your stomach the most during hikes. Here’s a full list of some of the best hiking snacks compiled from decades of personal testing! Typically lightweight, compact, minimal trash, calorie dense, higher carb, medium protein type snacks are ideal. A few of my favorites are RX bars, boiled and salted baby potatoes, dried fruit like apricots and dates, trail mix, fruit snacks, beef sticks, and meat and cheese sandwiches.
If it’s going to be hot, make sure that you also have a plan in place for electrolyte and sodium replacement, which can include drink supplements like Liquid IV, salty snacks like chips, olives, and beef sticks, or tablets like electrolyte tablets or salt tablets. You can also look into drinks like pickle juice shots (a personal favorite of mine) or coconut water for natural electrolytes.
Even if the outside temperatures aren’t going to be super hot, make sure to always carry enough water on you. This could be a hydration vest with internal water hydration bladder, a backpack with water bottles, or something similar. If you are backcountry hiking or backpacking, make sure to be aware of natural water sources for re-filling, and have an adequate water filtration system in place. As a rule, I always bring a backup filtration system with me on just about every hike. My favorite is the Katadyn BeFree filter, because it is quick and easy to use, but also compresses down to take up barely any space. And speaking of gear…
#10: Get the Right Gear
You may not think gear has anything to do with building endurance for hiking, but if you’ve ever hiked in subpar gear, you’ll know this isn’t true! A trusty pair of hiking footwear can greatly supplement the endurance training you’ve been doing by keeping your feet feeling fresher and stronger, longer! The wrong socks can lead to a blister, which can derail a hike faster than anything! Lack of a sufficient hydration system can stop a hike short! Endurance training is about training to endure, and the right gear can absolutely help with that!
Here’s a few quick link recommendations for day hiking gear basics:
- Trail Runners: HOKA One One Speedgoats
See why I’m “team trail runners” in my guide to Hiking Boots vs. Trail Runners
- Socks: Hilly Twin Skin socks
The “twin skin” layers help to prevent the friction that can cause blisters.
- Water Hydration System: couple good options below, each with different pros
- Platypus 3 Liter Wide Mouth Hydration Bladder
- LifeStraw Hard Sided Water Bottle with Internal Filter
- Katadyn BeFree Collapsible Water Bottle with Internal Filter
- Grayl Water Filter (arguably the heaviest/bulkiest, but fastest and most efficient)
- Sawyer Squeeze (simple, compact. and adaptable squeeze filtration)
- Nalgene Water Bottles (a trusted traditional)
My personal favorite and most used method is the Platypus 3 liter hydration bladder inside my daypack, along with a backup filter, my Katadyn BeFree. Love that the Platypus provides on the go hydration, with a wide mouth that’s easy to fill, clean, and empty. Love the Katadyn BeFree because it’s simple and easy to use with the internal filter, and collapsible and lightweight when not being used.
- Daypack: my two favorites are the Camelbak Helena 20 Liter Daypack and the Osprey Daylite Daypack
- Environmental Protection: couple basics for defending against the elements
- Chapstick
- Sunscreen
- Sunglasses
- Hat / Visor
- Headlamp
- Cooling Towel
- Gaiters (optional)
- Emergency/First Aid Kit: always have these in your pack
- Salt Tablets
- Hiking First Aid Kit
- Pain Relievers
- Blister Protection
- Whistle/Signaling Mirror Combo
- Gear Aid Tape
- The Right Layers: depending on the season, here’s a few of my go to’s
- Non Chafing Pocketed Shorts
- Water resistant insulated fleece leggings
- Wool base layer #1
- Wool base layer #2
- Wool mid layer
- Sun shirt
- Synthetic hiking top
- Waterproof Outer Shell
Emergency Shelter: lightweight, compact, low cost – no reason not to have one
- Personal Items: creature comforts and optional items
A note on trekking poles – yes, they’re expensive. I recommend this pair because it’s literally the only pair I’ve ever owned and used. They’re that reliable and have lasted that long. And I love the cork handles that are anti-slip if your hands get sweaty, unlike a lot of other rubber or plastic handled poles. Not everyone wants or needs to use trekking poles, but find out for yourself before hand. Especially if you have concerns with knees, ankles, joints, etc.
Need a comprehensive backpacking gear checklist for those longer, multi-day treks?
And there you have it, how to build endurance for hiking in 10 steps! As you can see, there’s no shortcuts to building true hiking endurance. But if you take your time and work through these 10 steps, you are guaranteed to become a stronger, more confident hiker, capable of achieving harder hikes with longer term goals, all while staying safe and more injury free!
Be sure to check out these related hiking resources!
- 1:1 Hiking Training Consults – RESERVE YOUR SPOT today!
- The 6 Hardest Bucketlist Day Hikes in the US!
- Backpacking for Beginners Step by Step Guide
- What Exactly Does an Out and Back Trail Mean?
- National Park vs. National Forest: What’s the Difference?
- The Top 5 Hiking Mistakes to Avoid on the Trail
PIN for LATER!