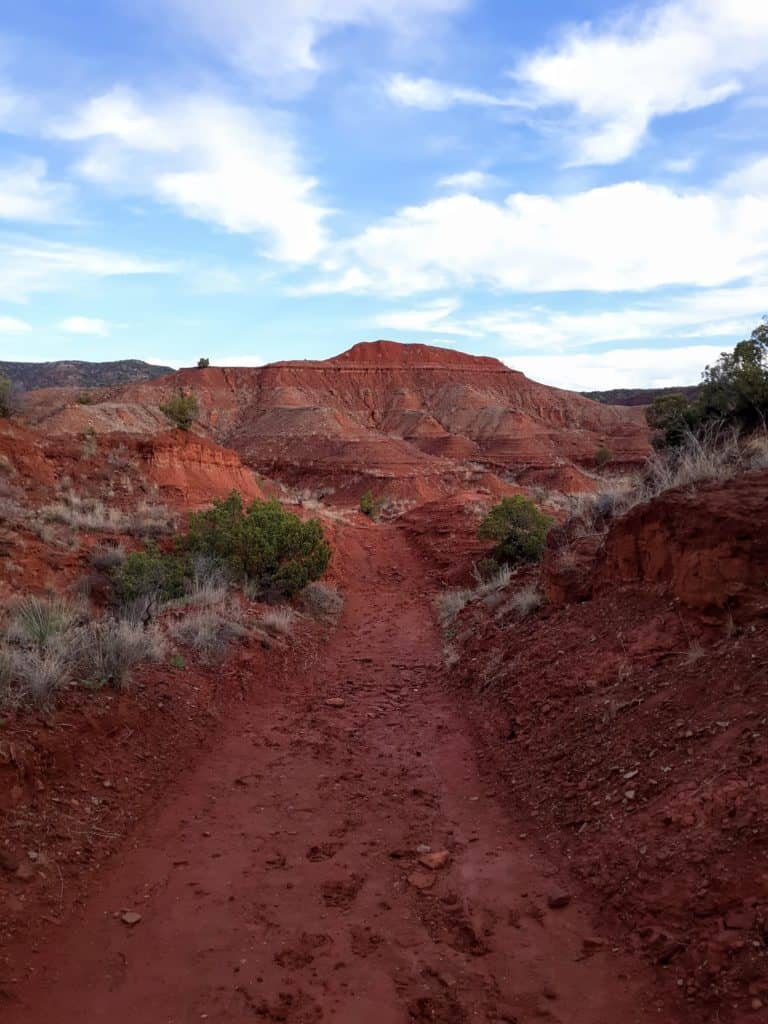
Guide to Climbing Mount Whitney in One Day
Climbing Mount Whitney in California is one of the most iconic hikes in the country. It is awe-inspiring, intimidating, exhilarating, overwhelming, and rewarding all wrapped into one amazingly challenging hike. Just getting to the trailhead of the Mount Whitney Trail is a journey in itself (check out this post on how to obtain a Mt Whitney permit), and once there, the journey has only just begun! 22 miles, over 6,000 feet in elevation gain, to a summit that literally and figuratively towers as the highest point in California and the lower 48 states at over 14,000 feet tall! Taking on the goal of hiking Mount Whitney involves careful preparation, dedication, and drive, and a guide that will prepare you in advance with everything you need to know and expect to climb Mount Whitney in one day!

Disclosure: Below are some affiliate links-these are all products I highly recommend. I won’t make any recommendations on this page that I haven’t tested or personally used! Enjoy this guide to climbing Mount Whitney in one day!
Table of Contents
Guide to Climbing Mount Whitney in One Day
This guide will walk you through every step of climbing Mount Whitney in ONE day:
- Get to Know the Highest Point in California
- Quick Facts on the Mount Whitney Trail
- Why One Day?
- When is the Best Time to Hike the Mount Whitney Trail in One Day
- Getting your Mount Whitney Day Permit
- Logistics and Preparations for Hiking Mount Whitney in One Day
- Full Report on the Mount Whitney Trail
- Tips for Climbing Mount Whitney in One Day
- FAQs on Climbing Mount Whitney in One Day
- Gear Recommendations for Hiking Mount Whitney in One Day
- Training to hike Mount Whitney in One Day
Get to Know The Highest Point in California
Writing this guide comes from years of personal experience chasing the 50 state high points of the U.S., which led me to Mount Whitney, the highest point in California and the lower 48 states, as my own #45! While not as technical as some of the other state high points I have completed, like glaciated Mount Hood in Oregon, climbing Mount Whitney in one day is still a daunting task, and one that should not be underestimated. As with any high altitude mountain climb, you should prepare thoroughly and properly, and pay this trail the respect it deserves. This guide will walk you through all the steps to get there so you can have a safe and responsible hike.
This guide to hiking Mount Whitney will walk you through everything you need to know, from starting the step by step permit process, to training and gear, to a thorough trail report based on climbing Mount Whitney in one day.

Quick Facts on the Mount Whitney Trail
- Trailhead Location
- Roundtrip Length: 21.2 miles out and back
- Rating: Very Difficult
- Maximum Elevation: 14,505 feet
- Elevation Gain: 6,663 feet
- Estimated Time to Climb Mount Whitney in One Day: 12 – 16 hours
- Best Time to Hike Mount Whitney: June – September
- Estimated Start Time for Climbing Mount Whitney in One Day: between 1 – 3 AM (aim to be descending by noon at the latest)
- Recommended Route: the Mount Whitney Trail from Whitney Portal in Lone Pine
- Quota Season (permit required for day and overnight hikes): May 1st – November 1st
- Daily Quotas During Quota Season: 100 permits per day for day use hikers / 60 permits per day for overnight hikers)
- How to Get a Mt. Whitney Permit during quota season
- Parking and Facilities: there are multiple parking lots and bathroom facilities at the trailhead
- Pet Policy: leave the pets at home for this one
Why One Day?
So, why hike the Mount Whitney Trail in one day?
Hiking hefty roundtrip distances in one day like Mount Whitney might seem crazy, especially when you can do it as an overnight backpacking trek (still need a permit for this as well). But there are some PROS to climbing Mount Whitney in ONE DAY which make it worth it:
- Don’t have to carry as much backpacking gear essentials
- Only need day hiking gear and a smaller pack
- Slightly easier to secure a day permit
To be clear, during quota season (May 1st – November 1st), you have to have a permit to hike the Mount Whitney Trail whether you do it in one day or overnight. But if you do it in one day, you will have a better chance of scoring a permit, as there are more day use permits given out each day than overnight permits (100 vs. 60), and you won’t have to carry all of your backpacking essentials on your back. (I’ve lost the lottery applying for overnight permits, but won it applying for day permits – not the case for everyone certainly, but it worked for me).
I will always choose climbing Mount Whitney in one day for those reasons. I like to move quick and carry less personally. It has worked well for me on Mount Whitney, just as it has on other long distance hikes like the Grand Canyon’s Rim to Rim hike.
Location of the Mount Whitney Trail
Mount Whitney is located in the Eastern Sierras, in eastern-central California. The closest small town is Lone Pine, California. Mount Whitney is located in close proximity to several National Parks, including Death Valley, Sequoia, Kings Canyon, and Yosemite National Parks. The closest airport is the Eastern Sierra Regional Airport in Bishop, California, approximately 1 hour and 30 minutes from the Mount Whitney Trail.
Location of the Mount Whitney Trail near Lone Pine, California
When is the Best Time to Hike the Mount Whitney Trail?
You may find differing answers on this, but my strong recommendation for hiking Mount Whitney in one day is SUMMER (JUNE – SEPTEMBER). Here’s why:
- Does NOT require technical skills, mountaineering skills, or technical gear
- Minimal to no snow on the trail
- Most favorable weather
- Less gear to carry
What is considered SUMMER on Mount Whitney?
In order to avoid snow on the trail as much as possible, attempt a hike between June and September. You may still encounter some lingering snow in June, and there may be some early snow in September, but it likely can be manageable. July and August are your best months to attempt a no snow hike.
What are the CONS to hiking in Summer?
There are some cons to hiking in the summer, mostly the difficulty in securing a permit to hike Mount Whitney. This is a good time to point out again that you have to have a permit to hike Mount Whitney in the summer, which is during quota season. Permits are very hard to secure, and are given out in a lottery system (keep reading to find out more on this below). Without a permit, you won’t be able to hike the entire Mount Whitney trail in the summer.
*Note: you can hike Mount Whitney year round, but hiking in the late fall – early spring months (non quota/permit season) requires more advanced gear, mountaineering knowledge, and technical skills that will not be covered in this post.
Aside from the pesky lottery system that dictates summer hiking of Mount Whitney, the other major con is the trail will be more crowded during the summer months. As someone who has hiked the Mount Whitney Trail in the summer, however, I personally don’t see this as much of a con.
Consider that there is a quota of hikers in the summer, so the crowds are limited and managed. Then there’s the immense length of the Mount Whitney Trail, over which said hikers are spread out. Lastly, on a grueling hike like this, I don’t mind running into other hikers. It gives me a much needed morale boost, allows me to pick others brains on what might be coming up on the trail, and gives me a backup plan in case I need to rely on others for something (especially nice if you are hiking Mount Whitney solo, like I have).
Okay, so how exactly do I start the process for climbing Mount Whitney in one day?
Where to Start?
You cannot show up on a whim and just hike to the top of Mount Whitney (well, actually, you can technically hike the first 3 miles of the Mount Whitney Trail, but more on that later). Climbing Mount Whitney requires a permit during quota season (May 1st – November 1st).
*Note: you can climb Mount Whitney during non quota season, but this guide is focused on climbing Mount Whitney in one day during quota season, as that is the recommended time to hike Mount Whitney. Non quota season requires advanced technical and mountaineering skills that will not be covered in this post.
To summarize, there are 2 kinds of permits to hike Mount Whitney: day permits and overnight permits. Although you can hike Mount Whitney all year, recommended summer season is also quota season: May 1st – November 1st.
***Note: you CAN hike without winning a lottery permit in non quota season, but the likelihood of snow makes that a technical climb which is ONLY recommended for those with winter technical hiking/mountaineering backgrounds. You CAN also hike Mount Whitney during quota season from a different trailhead (such as Cottonwood or John Muir), but this guide will focus on climbing Mount Whitney in one day from the Mount Whitney Trailhead at Whitney Portal in Lone Pine.
During the summer months, the Mount Whitney Trail is almost entirely free of snow, making this climb a non-technical one that does not require any additional skill sets other than grit, stamina, and persistence. There are several trails that lead to the summit of the highest point in California, but this guide will focus on climbing Mount Whitney in one day via the standard Mount Whitney Trail. The trailhead for the Mount Whitney Trail can be found in Whitney Portal, outside Lone Pine, California.
So which permit will you want, and how do you secure it? Every year, there is a lottery beginning February 1st, in which permits are given out according to the set quota of 100 day permits and 60 overnight permits given out daily, during quota season (May-November). So your first step in climbing Mount Whitney is to determine whether you envision yourself a day hiker or an overnight hiker. As my preference and experience deal with day hiking Mount Whitney, that will be the perspective of this guide.
There are several steps in applying for the Mount Whitney permit and actually obtaining and finally holding that permit in your hand before your hike! For a full breakdown, be sure to check out my post on how to snag your own Mount Whitney permit. It is vitally important that you follow all rules, regulations, and steps in obtaining a permit. You cannot hike Mount Whitney without one during quota season. Yes, rangers monitor the Mount Whitney Trail for unpermitted hikers, and will escort them down along with a fine.
To Summarize the Important Points:
- Quota Season is May 1st – November 1st
- Permits for Quota Season are 100 day hike permits and 60 overnight permits issued per day
- The annual Mount Whitney Lottery opens FEBRUARY 1st! (this post covers all the details of applying for your Mount Whitney permit).

Full Mount Whitney Trail Report
The Mount Whitney Trail from Whitney Portal in Lone Pine
So, climbing Mount Whitney in one day is already iconic and intimidating for being a 14’er, the highest point in California, the highest point in the lower 48, and a hard to obtain permit to hike. Throw in the 21.2 roundtrip miles, the hefty elevation gain of over 6,600 feet, and the dazzling yet unbelievable scenery, and you get a hike that can make your head spin.
Aside from knowing how to get a permit for climbing Mount Whitney in one day, most hikers next want to know what to expect on such a long distance hike that will easily take them all day, through multiple ecosystems, and up into high altitude. So, first, a trail report on hiking Mount Whitney in one day, and second, a few answers to some other commonly asked questions.
Quick Facts on the Mount Whitney Trail
Length: 21.2 miles roundtrip out and back
Elevation: 14,505 feet
Elevation Gain: 6,663 feet elevation GAIN

Rating: Very Difficult (but not technical during quota season)
Dog Friendly: No
The Mount Whitney Trail traverses a astonishing variety of terrain along its 10.6 miles up and 10.6 miles down. A moderately gentler start below pine covered treeline, an emergence into stark white cliffs and basins interwoven with gentle threads of alpine streams and lakes, to a final push above barren, jagged, and moon like landscapes towering over the Sierras. Getting to know each individual aspect of this trail will help you prepare for, gauge, and pace yourself towards a successful summit of the highest point in California and the lower 48 states.

The trailhead for the Mount Whitney Trail can be found in Whitney Portal, about a 20 minute drive from Lone Pine, California. There is one road from Lone Pine directly to the parking lot at the trailhead in Whitney Portal, so it is a very straightforward and easy drive in to locate your starting point, though it does climb some hefty elevation in a short distance.
There are several campsites in the immediate area for those that wish to camp:
- Lone Pine Campground
- Whitney Portal Campground
- as well as several smaller lodging options and/or vacation rentals in Lone Pine. There are hotels in Lone Pine, and also in Independence, California, 20 minutes or so from Lone Pine.

There is considerable parking available at Whitney Portal adjacent to the trailhead, though it can get busy during peak summer weekends. There are 2 main lots, an upper and lower lot. The upper lot will be on the left when you first arrive at Whitney Portal. The upper one will fill first, so you can check the lower lot if needed. Just continue down the road, past the Portal Store, and into the second lower lot.
There are bathroom facilities available at the parking lot near the upper lot, directly across from the trailhead (the only toilets on this hike), bear “bins” for proper storage, and the Whitney Portal Store, which sells gear, clothing, accessories, and food. Also, don’t miss the waterfall at the back of the lower lot parking area!
*make sure to properly store any food items or scented items in the bear bins located in the parking area. Bears have been known to break into cars in search of scents. In fact, the US Forest Service warns to:
- not leave your pack unattended
- never store food in tents
- secure ice chests and food in food storage lockers
- do not leave food in your car
- bears have been known to break into car trunks, rvs, and camper shells

Mount Whitney Elevation Chart
As you can see in this elevation chart, the climb up Mount Whitney is a steady uphill climb, with no real significant breaks. While the steepness varies some throughout the hike, you need to be physically and mentally prepared to tackle this persistent elevation change.
Mount Whitney Waypoints
Mt Whitney Trailhead: Mile 0
Lone Pine Lake: Mile 2.8
Outpost Camp: Mile 3.6
Trail Camp: Mile 6
Trail Crest: Mile 8.6
Mt Whitney Summit: Mile 10.6
Mt Whitney Trailhead: Mile 0
As previously mentioned, the trailhead for Mt Whitney is located directly across from the bathrooms, and next to the Whitney Portal Store. There is a large wooden awning structure at the entrance.
The approximate first 3 miles of the Mount Whitney Trail are what I like to refer to as the “easiest” section of the hike. Overall, the 6,663 feet of elevation gain over the entire 21.2 miles of this hike average out to be about 550 feet of elevation gain per mile. But obviously, the Mount Whitney Trail is not concerned with being exactly mathematically correct, therefore that average skews more or less depending on which part of the trail you are doing. Those first 3 miles skew towards the gentler side of that elevation gain average.


These first 3 miles are still flirting with treeline, though the trees in this region naturally are sparser than other thicker forests in the West. Even below treeline, you can sense that the true show stoppers on Mount Whitney are the enormously stark and moonscaped cliffs and jagged peaks that make up this Sierra range.
The other somewhat misleading and gentler aspect of the first 3 miles is the multiple stream crossings and threads of water and small pools that dot the lower elevation here. These “gentler” aspects will tease you just a little bit into thinking that climbing Mount Whitney in one day may be less imposing than originally anticipated. But don’t worry, these gentler aspects soon morph into more intimidating ones.

Lone Pine Lake: Mile 2.8
Just short of Mile 3, hikers will pass a sign directing them off to Lone Pine Lake, sitting just shy of 10,000 feet elevation. You can add on this little detour to Lone Pine Lake, or keep plugging ahead. After these first 3 miles, hikers will begin to emerge from the treeline, into a more open, barren, and exposed like environment. There are little “basins” here and there, and again the grade is mostly moderate here, with a few sections of more aggressive uphill. Streams and pools still dot the sidelines of the trail.
*Just past Lone Pine Lake is the sign for the John Muir Wilderness – your permit is REQUIRED to hike past this point (you can hike to Lone Pine Lake without a permit).
Outpost Camp: Mile 3.6
About 1 mile past Lone Pine Lake is Outpost Camp, a clearing and camping spot for overnight hikers to stay. From my understanding, and based on my own personal observations, it is a less popular overnight camping spot than further up the trail at Trail Camp.
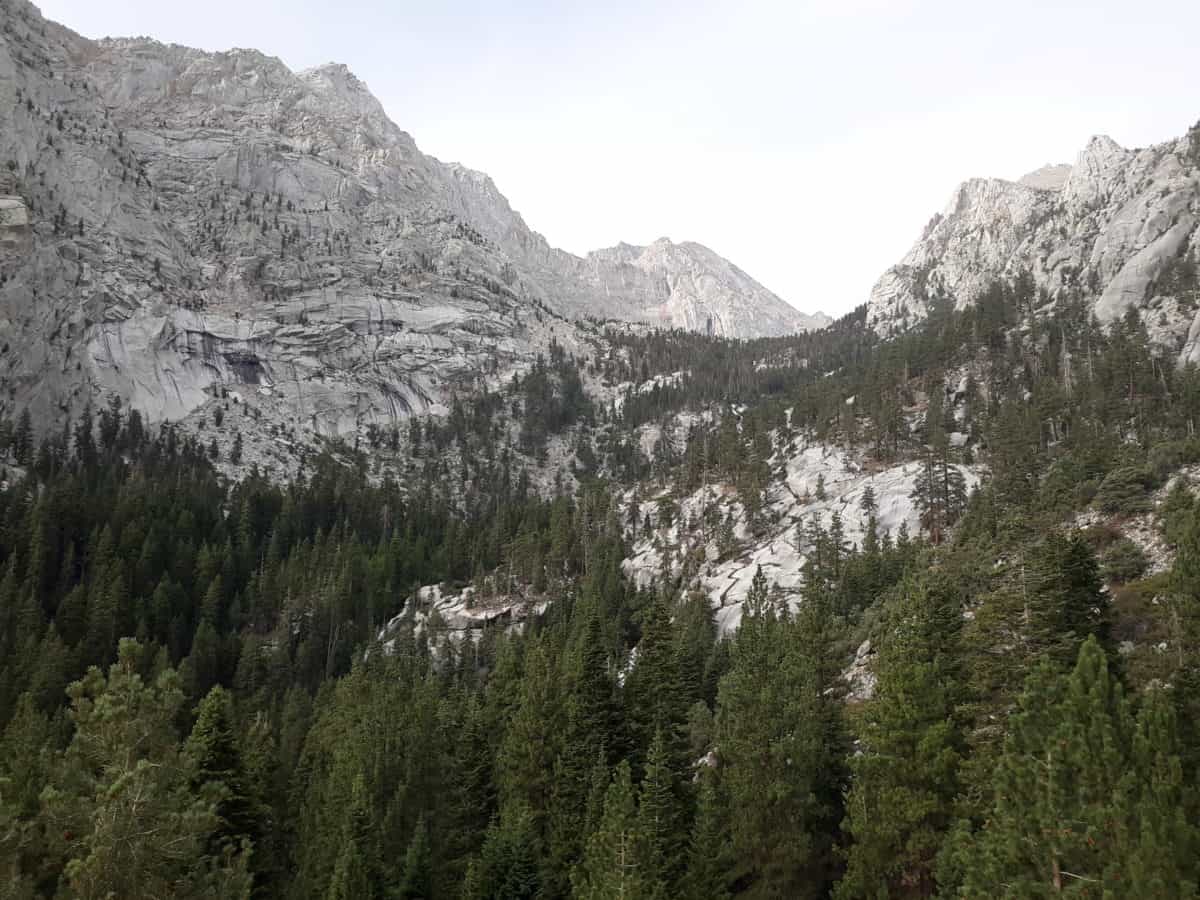
This growing exposure and emergence into the moonscape continues on for about another 2 miles after Outpost Camp, passing a surprising patch of vibrancy at Mirror Lake, a gentle weaving stream at Trailside Meadow, until you reach Trail Camp sitting nicely at just a few feet over 12,000 elevation. Things will start to get a little more real after Trail Camp!


 Trail Camp at the base of the 97 switchbacks up the Mount Whitney Trail!
Trail Camp: Mile 6
Trail Camp is the first place you really get a sense of the majesty of the range that calls Mount Whitney home, as well as the truly daunting task of climbing Mount Whitney in one day! It is a completely different feeling staring up at those peaks from Trail Camp, than it is staring up at them in the distance standing in Lone Pine! It is the closest I’ve ever felt to what standing on the moon must feel like. It’s hard to describe how a place so seemingly void can still pulse with life. One of the most shocking displays of life is Consultation Lake lying adjacent to Trail Camp. It becomes even more stunning in appearance from above as you proceed up the notorious 97 switchbacks.
At Trail Camp, hikers will have completed about 6 miles of the 10.6 miles up, and day hikers will likely encounter a large majority of the overnight hikers who have tent camped here and will be making their summit push on the morning of their second day. Again, you have to have a permit to hike here and/or camp here. Trail Camp is considered the most popular place to overnight camp, as it makes for an easier summit push.
The immediate walk through Trail Camp, at the base of the next big uphill push on the 97 switchbacks, is flat, brief, and easy. Enjoy this part, because arguably the roughest part of climbing Mount Whitney in one day is immediately after. Trail Camp is a great spot to take a break and have a snack, and there are also water sources for those that want to filter and replenish any of their water. This is the last reliable spot for water until you return from the summit.


After meandering through Trail Camp, you will immediately begin what most consider the most strenuous part of hiking Mount Whitney. The infamous “97 switchbacks”, which comprises about 3 miles of nonstop, switchback filled, uphill climbing. There’s no imagining otherwise or getting around how challenging this section sounds. It is just that, a series of back to back to back switchbacks that climb the side of a barren mountain.
The “97 switchbacks” is considered to be the hardest part of climbing Mount Whitney in one day, and I would have to agree. Also, the elements become a little more apparent and contemptuous at this point. There is no shade, full sun and wind exposure, and no real ease up from the more aggressive uphill grade. Again, this section of “97 switchbacks” lasts about 3 miles, from just after Trail Camp, to the saddle ridge at the top of the switchbacks at Trail Crest.
Trail Crest: Mile 8.6
The last 2 miles of the Mount Whitney hike begin at the top of the “97 switchbacks”, where you will find a nice little saddle along a ridge called Trail Crest, before proceeding on to those last 2 miles to the summit (1.9 miles to be exact, as the posted signage at the saddle at Trail Crest atop the “97 switchbacks” will tell you). Take heart, because once you reach this ridge at Trail Crest, the hardest part is definitely over. From the top of the ridge at Trail Crest, you will be standing at 13,600 feet, with just less than 1,000 feet to ascend to the summit. You will also be treated to unbelievable views of Trail Camp and Consultation Lake far below!


These last 2 miles, though gentler in steepness, may test your nerves due to the sheer drop offs, heights, and more “bouldery” terrain, but the elevation grade and uphill eases way back. These last 2 miles gain just under 1,000 feet total, easing back towards that 550 – ish average per mile manageable grade.
Just don’t let your relief here distract you or allow you to ease your guard up. These 2 miles, though easier from a steepness perspective, demand careful attention and very intentional foot and body placement. There are several sheer drop offs on the left hand side of the trail as you wind your way along the backside of Mount Whitney, but they are completely manageable with careful pacing, balance, and placement. Just take your time, watch your foot placement and your balance, and maintain a hand hold when necessary.
BONUS!– these last 2 miles take part on the back side of the range, the side of the mountain that you don’t get to see when standing at its base in Lone Pine. And these last 2 miles also take part in Sequoia National Park, so hiking Mount Whitney also allows you to check off a National Park visit in one of the most unique and memorable ways! And finally, the saddle at Trail Crest is also where the iconic John Muir Trail coming in from Guitar Lake in the east meets up with the Mount Whitney Trail!


After tracing along the precarious backside of Mount Whitney’s jagged spine, you will finally emerge out onto the final rocky and slab covered summit push. Just prior to the summit, you should be able to see the stone warming hut welcoming you.
Though it may seem like a suitable place to ride out bad weather, there are posted warnings that it will not protect you from lightning strikes. That is why mountain advice 101 is always to be coming down off any summit by noon, to avoid afternoon showers. Hence, the reason to start climbing Mount Whitney very early at 1, 2, or 3 am! You can, however, visit the register at the stone hut and record your name as a summiteer of Mount Whitney, before moving on up to the actual summit for your congratulatory views!


Mt Whitney Summit: Mile 10.6
The summit of Mount Whitney overlooks a range of surroundings, from Sequoia National Park on one side, to Trail Camp and Consultation Lake below, and Whitney Portal and Lone Pine even lower and further in the distance. What appeared to be inhospitable barrenness and jaggedness from below, now opens up to a comfortably flat and large summit area, where there are geographical markers to pose with, and a handful of colorful signs to choose from for hikers to hoist into the air at the conclusion of their summit!
To descend, return the way you came. Trekking poles will come in handy here and are highly recommended (I strongly recommend these Black Diamond Cork Trekking Poles), as your legs will likely start to feel the length, elevation gain, and steepness of the Mount Whitney Trail on the way down. The sun will likely be stronger and higher in the sky, so take more care to use sun protection as well. Sunscreen is definitely something you want to have packed in your day pack for this hike!
Tips for Climbing Mount Whitney in One Day
Tips Before Starting Your Hike:
- Train – this should be done at least months in advance – check out my targeted 16 week training plan for Mt. Whitney (you can download an example Mt. Whitney hiking training CALENDAR HERE!)
- Know your fueling strategy for an all day hike like this – part of your training plan
- Acclimate with nearby high altitude hikes for 3 – 4 days prior to hiking Mount Whitney (if not already acclimated)
- When you pick up your permit in person (don’t forget this step), ask the ranger for weather updates or other alerts
- Check the forecast for Mount Whitney specifically at mountain-forecast.com
- Check out recent trip reports from previous hikers on Mount Whitney
- Do a final gear check the night before
- Don’t forget to lock your vehicle doors and store all food and scented items in the provided bear boxes in the parking areas before hitting the trailhead
- Let someone know your plans, your intended itinerary, your estimated timeframes, and when you “expect” to be finished. Know that you may likely take longer than expected, but provide a “contact emergency services” time, if you are, for example, 24 hours overdue. Provide emergency contact information in such a case that you are significantly overdue. You can use a Hiking Safety Contact Form like this one and leave in your vehicle console or glovebox to help expedite an emergency situation.
- Download all maps you want to use beforehand
Tips While Hiking:
- listen to your body
- take breaks as necessary
- pace yourself
- watch for signs of altitude sickness
- watch for signs of developing weather
- save some steam for the descent
- hydrate and fuel consistently – know what works for you beforehand, and how often you need to fuel
FAQ’s on Climbing Mount Whitney in One Day
Below are some of my answers to common questions that I myself asked prior to climbing Mount Whitney in one day, and questions I have been asked since completing the Mount Whitney Trail.
>How Long Will It Take Me?
The average day hiker can hike Mount Whitney in between 12-16 hours. This number largely depends on your prior training and established hiking pace, your ability to maintain that pace and stamina on the uphill, and the amount of breaks you take. Having an idea of how long it might take you to climb Mount Whitney in one day will also help you establish when you should start the hike (I recommend between 1 – 3 AM). Follow Mountain 101 and aim to be descending from the summit by noon at the latest. I personally aim for 10 or 11 am at the latest, to be on the safe side. Always good to allow for extra bubble room.
>What is the Average Elevation Gain Per Mile?
550 – ish feet per mile. This is not consistent throughout, however. The “gentlest” parts are the first 3 miles below treeline, and the final 2 miles to the summit after the “97 switchbacks”. And of course, the entire downhill of the last 10.6 miles ;).
>Do I Have to Start Hiking Early?
Basically, yeah. I would highly recommend starting early (as will the rangers when they review your permit pick up with you). This means you will need to hike with a headlamp those first couple hours. Make sure it is fully charged! It is recommended to start hiking Mount Whitney between 1-3 AM for day hikers, but know yourself and your pace well enough to know if you need to possibly start earlier. This is to allow enough time to complete the hike by dusk-ish at the latest.
In order to determine how early you should start, it is extremely beneficial to know what kind of hiking pace you can consistently maintain over a significant distance and uphill grade like the Mount Whitney Trail. In order to gauge my own start time and anticipated finish, I utilized my previous practice in my regular weekly training hikes, as well as my experience hiking the Grand Canyon’s 24 mile long Rim to Rim hike in one day. I would recommend hiking a 15 – 18 mile day hike at least once (but the more the better) before attempting to hike Mount Whitney in one day, to determine your anticipated pace. I will go more in depth on how to train for climbing Mt Whitney in one day below.
>Will I Experience Altitude Sickness, and How Can I Acclimate?
The best thing you can do to offset the possibility of altitude sickness, is to acclimate, especially if you live at lower elevations (like myself!). I live in one of the flattest, lowest parts of Texas, but I was able to create an acclimatization plan that prevented me from being affected at all by altitude while climbing Mount Whitney.
I did a day hike near 13,000 feet about a week before Mt. Whitney. Then I spent 4 days prior to hiking Mount Whitney in the surrounding region doing high elevation, easy, warm up hikes each day. I looked for hikes that began at no less than 9,000 or 10,000 feet in elevation, with a moderate elevation gain of between 500 – 1,000 feet of gain over a couple miles. I hiked 2-3 miles each day, spending at least an hour minimum at higher elevations each day for 4 days in a row, prior to climbing Mount Whitney. This helped immensely. Again, these were easy hikes, and the goal wasn’t intensity, mileage, or pace, but simply time spent at altitude.
The warm up hikes I completed were Mono Pass to Mosquito Flats near Bishop, California (my absolute favorite and also the best to acclimate on as the trailhead starts at 10,000 feet), Horseshoe Meadows outside Lone Pine (around 9,000 feet), and the first couple miles of the Mount Whitney Trail (the first 3 miles to Lone Pine Lake does not require a permit to hike). The Cottonwood Lake Trail outside Lone Pine was another good warm up acclimation hike if you have the time for an additional one.
Aside from acclimating, it is also critical to hydrate and snack while hiking Mount Whitney. Hydrate consistently, drink to thirst, and take advantage of snacking on quick and easy snacks that have worked for you during training! Snacks that work for me, are bananas, dates, chips, bars, energy gels, boiled and salted baby potatoes, beef jerky or beef sticks, and olives. I also stopped and had one “bigger” snack break, in which I ate a pre-made sandwich I had brought along. Classic peanut butter and jelly or meat and cheese are great.
>What To Do If I Get Altitude Sickness?
Descend immediately. Whether you are 10 miles or 1 mile from the summit, turn around. Altitude sickness can KILL you. It is not something you push through. If you start to experience any of the following symptoms on any high altitude hike, turn around!
- Sharp, Intense Headache
- Nausea
- Faintness
- Swelling
- Loss of Appetite
- Diarrhea
- Vomiting
>Can I Hike Mt Whitney Without a Permit?
You can actually hike the first 3 miles up (to Lone Pine Lake) of the Mount Whitney Trail without a permit. Do not attempt to go further, you will see signs at Lone Pine Lake indicating the end of the non-permit hiking area when you enter the John Muir Wilderness.
While you may only be able to Lone Pine Lake without a permit on the Mount Whitney Trail, there are other ways to make it to the summit, if you are open. You can climb in non quota season (basically winter), but this is only recommended for those with a technical background in winter climbing. You can also approach from a different trailhead, like the John Muir Trail, which meets up with the Mount Whitney Trail at Trail Crest, if you are open to a longer hike.
BUT, to hike the traditional route on the entirety of the Mount Whitney Trail, during quota season, you absolutely need a permit!
>Is There Water on the Trail?
Yes, there is a surprising amount of water on the Mount Whitney Trail. Some people prefer to utilize these sources along the way by filtering and replenishing water mid hike, or on the way down from climbing Mount Whitney. Personally, I choose to start out with 3 liters of water for my hike, and that ended up being all I needed. But I did bring my Katadyn BeFree filter along with me on my hike in case of an emergency. The last reliable water source is the Trailside Meadow / Trail Camp area, so if you are low heading into there, you are going to want to fill up, or you likely are not going to safely make it up the “97 switchbacks” and final push to the summit.

>What is the Hardest Section of the Mount Whitney Trail?
This is probably different for different hikers, but for me, it was the “97 switchbacks”, both mentally and physically. But, it was not as bad as I had imagined it to be in my head leading up to the climb. It went by faster than I thought it would.
If heights and sheer drop offs are what freak you out, then you may have a harder time with the last 2 miles to the summit, where the trail drops pretty sheerly on the left hand side, and there are some more precarious spots along the backside of Mount Whitney’s peak. But with careful pacing and intentional placement and movement, I did not find it bad at all.
>Is There Cell Service on the Mount Whitney Trail?
Mostly, NO. There are some spots where you can get a bar or two, but don’t count on it. If you want to download any offline maps, do so beforehand. Personally, I have had some reception on the first 2 or 3 miles, and that is about it. The nice thing about that was I was able to let family know when I was almost finished, and actually talk to them from the trail!
>What Will the Weather Be Like?
There’s no one size fits all answer to this question, as Mount Whitney exists in an alpine environment where weather can change quickly and drastically. Always check the weather forecast ahead of time. Your best bet is a mountain specific forecast, which you can find out at mountain-forecast.com, as weather on a mountain summit is often quite different than weather at the base. For example, you might be in for a big surprise if you expect the weather forecast for Lone Pine to be the weather forecast at 14,000 feet on the Mount Whitney Trail. Afternoon storms are quite frequent at higher altitudes, and can include sleet and even the freak snow storm even in the summer. All the more reason to start early and descend early (by noon).
If the forecast is bad, save the hike for another day. During your hike, keep a constant eye on any potential storm clouds developing on the horizon. If the weather turns bad unexpectedly in the middle of your hike, turn around.
>Would You Hike Mount Whitney Multiple Times?
Absolutely. And that’s not something I can honestly say about every mountain (sorry, Mt. Hood, only doing you once!). I love Mount Whitney! I will continue to enter the annual lottery each year, and hike it ever time I win!
Gear Recommendations for Climbing Mount Whitney
Gear Recommendation Quick Links:
HOKA One One Speedgoat Trail Runners
Platypus 3 Liter Water Bladder
IceBreaker Merino Wool Baselayer
Outdoor Research Helium II Ultralight Waterproof and Windproof Jacket
IceBreaker Merino Wool Midlayer
Emergency Signaling Mirror and Whistle
Squeezable Peanut Butter Packets
Now let’s dive into the details of each of these recommended items!
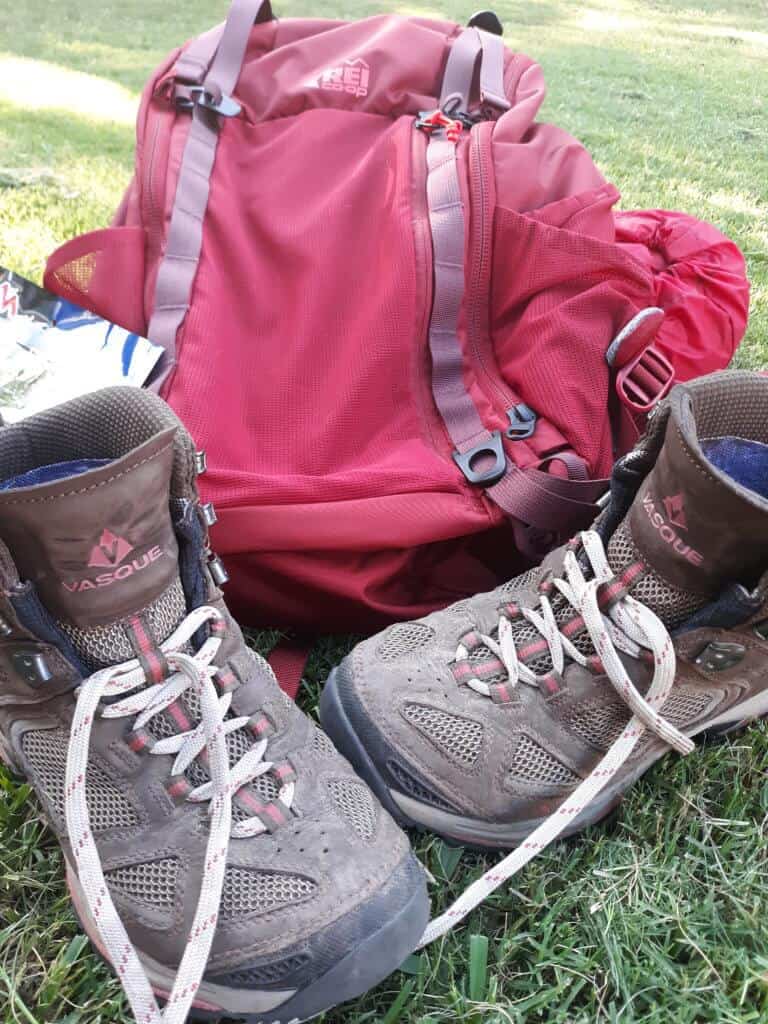
One of the biggest advantages to climbing Mount Whitney in one day is having to carry less gear, specifically, you do not have to carry any overnight backpacking gear. That being said, this is still a formidable hike that needs to be taken seriously and prepared for with precision. That means hiking the Mount Whitney Trail with every necessary item you need for a long day hike of this nature. There’s the mandatory must haves of gear, plus a few extras that will just make life a little easier and make climbing Mount Whitney in one day a little more enjoyable.
First up, you need good shoes. There’s some difference of opinions on this, but I lean towards recommending trail runners over hiking boots. I learned this from my experiences hiking the Rim to Rim in one day, another brutally long day, but like the Mt Whitney Trail, non-technical.
When you are going to be hiking on your feet for 20+ miles in one day, having something that is light and primed to enable quick movement is a bonus for me. Trail runners are lighter than full hiking boots. And the terrain on Mt Whitney, being non-technical, is primed for trail runners. Trail runners simply keep my feet feeling “fresher” for longer on these types of all day hikes. And the best trail runners out there without a doubt are Hoka One Speedgoats. You cannot beat the cushioning, traction, and grip on these trail runners. Just ask a seasoned trail runner!
The next item to secure is an absolute must when climbing Mount Whitney in one day! If you heed literally everyone’s advice, you’ll start early before sunrise (like 1 or 2 AM), which means you will need a headlamp! I love this BioLite headlamp, because it is USB rechargeable, lightweight, small, compact, yet has a long battery life and provides a surprisingly strong beam of light! I have now tested this out multiple times on early morning starts like climbing Mount Hood in Oregon and climbing Mount Whitney, and it lasts for 5+ hours without a charge. Also, if you are both a trail runner and a hiker like me, it is a great cross over piece of gear, as it is specially designed for “no bounce” which is perfect for runners!
I don’t always use trekking poles, but this is a hike I would strongly recommend them for. There are some big steps up and down, and of course there is relentless grade to deal with, both uphill and coming down. Trekking poles will go a long way in saving your knees, legs, and feet when climbing Mount Whitney. I LOVE my Black Diamond trekking poles with the cork handles, because the cork actually helps to absorb and neutralize sweat that can “build up” on other rubber type handles. I have noticed a big difference in more reliable grip and comfort with the cork handles, and the rest of the construction on these Black Diamond trekking poles is unbeatable and trusty as well.
Next up is a reliable water transportation system. There’s also differing opinions on this. Some Mount Whitney day hikers like to start off with what they think they’ll need, while others like to start with less to save on weight, and fill up from the water sources along the way with a filter. It mostly depends on what your experience tells you that you prefer, but also whether you value weight or speed more.
I tend to go more for speed. Therefore, I started off with 3 liters of water, and did not plan to stop and use any time to refill with a filter. That being said though, there are plenty of water sources to filter from up until the Trailside Meadow and Trail Camp area. Just make sure you have PLENTY of water before starting up the 97 switchbacks after Trail Camp!
Whatever system you use, make sure that you have sufficient water at all times. The upper 5 miles in particular on the Mount Whitney Trail have full exposure and no water sources. I prefer to do long distance hikes with my 3 liter wide mouthed Platypus water bladder. This particular water bladder is easy to clean and dry with the wide opening, and as I mentioned early, I value speed and efficiency when hiking, so I prefer on the go hydration options.
Nalgene bottles are also a good option if you do not have a bladder. I always recommend carrying a backup water filter as well on lengthy hikes like this one, such as my Katadyn BeFree filter. Lightweight, collapsible, and easy to use.
You will need some way to not only carry your water transportation system, but also all the other necessities you should hike Mount Whitney with. If you are doing a day hike, you can utilize a smaller pack (and save on weight) nearer the 20 liter size. This should provide ample room for several liters of water, layers for inclement weather, emergency supplies, snacks, and other miscellaneous gear. My favorite day pack is the Camelbak Helena 20 liter, which has seen me through not only the Mount Whitney Trail, but also other iconic day hikes like the Grand Canyon’s 24 mile long Rim to Rim hike!
Speaking of what to include in your day pack, what exactly will come in handy on the Mount Whitney hike? First off, layers. Even in August, if you start the Mount Whitney Trail at 2 am, it’s gonna be on the chilly side. Once you near the “97 switchbacks” and the summit, you very likely will encounter stronger winds, stronger sun, and the chance of a stray mountain shower. As you descend in the afternoon, it might just warm up enough to shed some layers. So there’s always a good time to bring layers when hiking Mount Whitney in one day.
On day hikes like these that encompass lots of potential weather and elements, I usually hike in my favorite pair of hiking pants. These KUHL’s pants are stylish and functional, with a super durable build, but slim enough to not hinder movement. Also, the breathability is fantastic, which is great for when it’s on the warmer side, and the zippered ankles accommodate varieties of footwear.
You will probably want to bring along a wool base layer as well, for the early morning or when encountering weather nearer the summit. My favorite brand for base layers is always IceBreaker. I love their wool products, because nothing is more moisture wicking, quick drying, breathable, insulating, and odor resistant than wool. Any of their wool base layers are a solid investment, but this is the one I personally do all my alpine hiking in. I like to keep another lighter synthetic tank or short sleeve in my pack to swap into when the weather warms up, and then the final component of my layering system is always my weather proof outer shell.
On the tops of mountains, it is crucial to have a fully waterproof and windproof outer shell. I get the need to save on weight though, which is why I always recommend the lightest fully waterproof and windproof shell on the market. Literally, it’s a couple ounces and highly compressible and packable, yet fully waterproof and windproof. It’s pretty difficult to achieve lightweight and fully weatherproof together, but Outdoor Research’s Helium II jacket does just that.
*if you are hiking in the winter (or overnight), you will probably want to invest in an additional insulating layer like a puff jacket or more substantial midlayer, like one of my favorites from IceBreaker here.
And don’t forget the extremities: make sure to remember your hands, feet, and head when it comes to layering. Yes, even in August gloves are necessary, and waterproof ones are recommended. Make sure to have something to protect your head and ears from potential wind and cold. For me, I never hike anywhere without my handy Buff head accessory. This is probably one of my favorite hiking accessories ever for its multi-functionality! You can pull it down to cover your neck, mouth, or nose if necessary. You can use it to protect your neck from sunburn. You can roll it and use it to cover your ears, and as a headband to keep hair and sweat in place. If you are not a fan of Buffs (for some reason), SmartWool also makes a fantastic cuffed wool beanie that will get the job done as well!
And finally, don’t forget to take care of your feet, because they are a big part of the engine that will be driving your hike up Mount Whitney. Your shoes are only as good as the socks you invest in. I used to be very blister prone, but I have had zero issues with blisters on long distance day hikes or runs since discovering Hilly Twin Skin socks. These socks come with a built in liner that neutralizes friction and therefore blisters! They’ve been a lifesaver for me, and they are all I ever hike or run in now. On a hike the size of Mount Whitney, it is not a terrible idea to bring 2 pairs of socks, in case you need a fresh pair.
After you have your layering system squared away, it’s a good time to look at your emergency gear. I learned the hard way about having adequate emergency gear when I unexpectedly spent a night alone in Utah’s Uintas, vastly underprepared, in an earlier life. Now I always prepare for the possibility of hikes going wrong. You should never hike under the false assumption that you can control every aspect of the hike and nothing will ever throw you off. Now I always bring along an emergency tent, an emergency blanket, and a SOL bag, which is basically an emergency sleeping bag. The awesome thing about all three of these items is they are all lightweight, easy to pack and carry, and affordable. The best thing is they can go a long way in keeping you safe in a bind.
I also like to carry a compass, my AllTrails app, a backup battery charger, a printable handheld map or a topo map when available (also check out this individualized map of Mt Whitney that I studied beforehand and carried with me on the trail), an emergency mirror and emergency whistle to help signal in the event of becoming immobile or non-verbal, a fire starter kit for dire emergencies, a hiking first aid kit with Ibuprofen, Chapstick, sunscreen, bug spray, band aids, antiseptic, etc, and finally, plenty of snacks and fuels!
Snacks and food deserve their own separate article really, as it is so important to fuel an undertaking like this one properly. Food is necessary for a hike like Mount Whitney, for the necessary energy and stamina, as well as replenishing those glycogen stores (carbs). Keep in mind foods that are easily digestible, high energy, and compact, lightweight, and easy to carry. Beef jerky, trail mix, squeezable peanut butter packets, protein bars/energy bars, squeezable applesauce packets, energy gels, boiled and salted baby potatoes, bananas, dates, and tuna packets are a couple of my go to’s. On really long day hikes like Mount Whitney, I may also throw in a pre-made sandwich or two for at least one more substantial food break. As simple as peanut butter and jelly or meat and cheese.
CHECK OUT: the Best Hiking Snacks
Make sure to not only bring along beneficial foods, but to have a solid breakfast before hand. You should know what works for you on long distance hikes before attempting to hike Mount Whitney in one day, and do not experiment with any new foods the morning of. Learn what works for your fueling on your practice hikes prior. What works for me is oatmeal or muesli, a small bowl or pouch of applesauce, a piece of toast with peanut butter, and a banana, but it is crucial that you know what works for you and your body.
And in case you are wondering about going to the bathroom while hiking Mount Whitney, the permit process actually has you covered on that! Every permit holder gets a WAG bag either at permit pickup, or directly at the “kiosk” at the Mount Whitney Trail trailhead. Instructions are pretty self explanatory, and that is how you will do your business. And it is a “pack it out” policy on Mount Whitney – always LEAVE NO TRACE!
Training for Climbing Mount Whitney in One Day
The intimidating and imposing thing about climbing Mount Whitney in one day, is that many think you have to have a mountain climbing background, or regular access to steeply graded, high elevation, hiking to be ready and able to tackle the highest point in California. I can tell you that it is possible to prepare to hike Mount Whitney from sea level, or without regular weekend ventures up Colorado 14’ers. I do not have any of that myself, but I have been able to confidently tackle climbing Mount Whitney in one day.
If you have access to steep uphill climbs and/or high altitude hikes, by all means that is what you should be doing on a regular basis to prepare for hiking Mount Whitney. If you do not, you are going to need to get a little more creative and intentional in how you train, but it is totally doable. This is coming from a “flatlander” Texan.
The most important thing to do is train your body to give its utmost for its most sustainable amount of time, which equates to time on feet. This can be achieved reasonably anywhere. The Mount Whitney Trail is an all day endeavor, and one that requires consistent and sustainable physical output and stamina. Get your body used to hiking 15+ miles at a sustained moderate pace during training. Find the highest elevation that you can, and go after it with a vengeance. For me, that means repeating loops on short local trails with humble elevation gain, until I get in the desired mileage and elevation gain I’m after. When I do these loops, I approach them as I would for the real deal. I hike as fast as I can sustain long term, with as few breaks, to begin to gauge just what kind of sustainable long term output my body is capable of.
You want to get to those 15 + mile distances gradually and incrementally. Don’t go from 2 miles to 15 miles in a week. I would recommend training for Mount Whitney for no less than 4 months, and following a specific training calendar with weekly increments in distance, like the one you can find HERE.
CHECK OUT: this post dedicated entirely to TRAINING FOR THE MOUNT WHITNEY HIKE
You need to know this gauge before taking on the Mount Whitney Trail. That is why it is necessary to do these long hikes with as much elevation gain as possible at least weekly for at least 4 months out, before climbing Mount Whitney in one day. Again, I go into much more detail in my sister post on training for Mount Whitney in one day.
The second thing I would recommend is regular cross training and strength training. In addition to the minimum weekly long distance hikes you should be doing at a sustained pace, you should also be fine tuning all aspects of your body and muscle systems to work harmoniously in high gear. I am consistently amazed at how cycling, yoga, kayaking, swimming, strength training, HIIT routines (high intensity interval training), and running all work together to make me a better hiker, and vice versa. Each of these things done regularly will also help to build a foundation of hard output and cardio base that your body is going to need to engage in when climbing Mount Whitney.
Finally, the most specific yet crucial thing you can do to prepare for hiking Mount Whitney is to acclimate appropriately, especially if you are coming from lower elevation and do not have regular exposure hiking at high altitude. Doing a few “warm up” hikes beforehand will help you immensely. Jump back in this post just a bit if you missed my recommendations for “warm up” hikes local to Mount Whitney, or check out the brief summary below.
Sample “Warm Up” Itinerary Before the Mount Whitney Hike:
- Day 1: 4 miles on Mono Pass Trail near Bishop
- Day 2: 3 miles on Horseshoe Meadows Trail near Lone Pine
- Day 3: 3 miles on Cottonwood Lake Trail near Lone Pine
- Day 4: 3 miles on the Mount Whitney Trail (to Lone Pine Lake)
- Day 5: Mount Whitney Hike
So I know vacation time is sometimes hard to come by, and it’s hard to carve out time, but I would recommend setting aside at least 4 days to get ready for and to hike Mount Whitney, and here’s why. It’s not a hike that you can guaranteed take on whenever you want, you have to win a lottery to have that chance. Considering how much goes into being able to just set foot on this trail, you don’t want to jeopardize your shot at it and not complete the Mount Whitney Trail by not acclimating appropriately, and then having to go through the hoops all over again. Do it right the first time. You are not guaranteed a second time climbing Mount Whitney.

I prefer at least 3 days of “warm up” hikes prior to hiking Mount Whitney to help acclimate. I’ve outlined a few ideal candidates in my post on training for Mount Whitney, which has served me well in the past. Bottom line though, find a few trails that take you up into at least the 9,000 foot range minimum (10k or 11k even better) and spend at least a couple hours a day in that elevation range, for as many days as you can prior to hiking Mount Whitney (I recommend at least 3 warm up days before the Mount Whitney hike). 4 days of warm up hikes = zero altitude sickness issues for me on Mount Whitney on day 5, and again, I’m a native Texan who does most of her hiking at very humble elevations.
*If you are serious about climbing Mount Whitney in one day, and want to do it responsibly, safely, and successfully, I also offer 1:1 Coaching Plans for Mt. Whitney! These coaching plans include training plan development, monthly ZOOM / phone calls, support for gear, fueling, and trail logistics, itinerary building, permit and lodging arrangements, and answering general questions.
You can find out more info below – fill out this INTEREST FORM to get started today!

Other Attractions Near Mt. Whitney
Besides the above list of awesome warm up hikes to do near Mount Whitney prior to your big hike, the immediate area surrounding this giant is actually pretty awesome, considering it appears to be largely desert and small towns at first glance. Resident Lone Pine is a humble yet quirky old west town with several museums and other spots of interest. There are a handful of local hikes as well, though in the summer you are going to want to knock those out real early!
- Check out the Manzanar National Historic Site, a sobering yet important chapter of history to be aware.
- The Eastern California Museum in Independence, just a few minutes from Lone Pine, is a quaint little museum with a surprising amount of early mining history and relics, as well as artifacts from wildlife and early Native American history.
- Another cool museum option is the Film History Museum in Lone Pine, which chronicles early western film history, and ties in nicely with my next recommendation!
- Perhaps one of the most interesting places in all of the Eastern Sierras are the Alabama Hills! It is hard to describe this alien-esque landscape filled with “potato” rocks, but it is breathtaking. It is also the filming location for hundreds of movies, including Gladiator, Tremors, and Star Trek. The incredible juxtaposition with the towering Sierras range in the backdrop is mesmerizing and is a can’t miss in Lone Pine!


DON’T FORGET!
- Complete Mt. Whitney Training Plan
- How to Apply for and Secure a Mount Whitney Permit
- Mount Whitney Gear Checklist
How Much Would 4 Months of Accountability and Coaching Mean to You?
Did you know that I offer 1:1 Coaching Services for the Mt. Whitney hike?
COMPLETE THIS INTEREST FORM to get started today!
PIN for LATER!