First Timers Guide to Hiking the Grand Canyon Rim to Rim in One Day
You can find the Grand Canyon Rim to Rim hike on many lists of hardest hikes in America! It also tops the list as one of the most diverse, thrilling, and rewarding hikes on the planet! As exhilarating as a Rim to Rim hike in the Grand Canyon can be, it is a endeavor that demands respect and preparation in order to pull it off! The Grand Canyon is both welcoming and hostile, and completing a Rim to Rim hike in one day requires careful planning, humbleness, and realistic expectations! This first timers guide to hiking the Grand Canyon Rim to Rim hike in one day covers all the logistics you need to know in advance, from how to train for a Rim to Rim hike, trail reports on all 3 corridor trails, transportation, logistics, accommodations, where to start and finish, what to expect along the way, how to pace, and how to prepare for the Grand Canyon elements. There’s few truer tests of strength, grit, determination, and adventure for hikers than accomplishing a Grand Canyon Rim to Rim hike in one day!

Disclosure: Below are some affiliate links-these are all products I highly recommend. I won’t make any recommendations on this page that I haven’t tested or personally used! Enjoy this guide to the Grand Canyon Rim to Rim hike!
Table of Contents
Hiking the Grand Canyon Rim to Rim in One Day
This guide is a Rim to Rim playbook for beginners. If you know absolutely nothing about how to hike the Grand Canyon Rim to Rim in one day, this will take you step by step. It is important to know exactly what your plan is, and not to improvise anything the day of your Rim to Rim hike. It is just as important to start preparing far in advance for your Rim to Rim hike, by giving yourself plenty of time to train, choose your route, familiarize yourself with the corridor trails, get your gear, and work out logistics. Use this guide as a checklist for best results for a successful and safe Rim to Rim hike in the Grand Canyon.
Interested in some 1:1 Coaching? Need to Know If You Are Ready for Your R2R Hike?
Fill out this Interest Form to get started!
For the purposes of this post, I will approach all recommendations from the perspective of a first timer looking to hike the Grand Canyon Rim to Rim in one day. This means I will be covering logistics from the perspective of the most approachable season to hike Rim to Rim, the recommended routes to take, and tips on how to best manage hiking Rim to Rim as a beginner.
There are multiple options for attempting a one day Rim to Rim hike in the Grand Canyon, but I believe the most approachable and gentlest way with the best odds of success for a 1st TIMER SPECIFICALLY is to attempt the hike in early to mid October (or as close as possible), descending from the North Rim and the North Kaibab Trail, to the South Rim and ascending the Bright Angel Trail. This guide will go in depth into each of these factors. I will also explain more about why these trails are the optimal trails to use for a first timer’s Rim to Rim hike.
***Ready to hike into the Grand Canyon, but not ready for a full Rim to Rim? Check out a shorter alternative Rim to River hike then!

What to Expect from this Rim to Rim in One Day Guide
This guide is meant to be a one stop shop for preparing for a Rim to Rim hike in one day, as a first timer. It is a step by step plan, that walks you through everything you need to know, in a logical, simple, and straightforward manner. Here’s the outline:
- Quick First Timer Tips to Hiking the Grand Canyon In One Day
- So What Exactly Is a Rim to Rim Hike?
- Why One Day?
- Location of the Rim to Rim Hike
- Choosing Your Direction and Corridor Trails
- When to Hike the Rim to Rim
- Logistics of the Rim to Rim Hike: Transportation, Lodging, Etc
- How to Train for a Rim to Rim Hike in One Day
- Checklists Before the Rim to Rim Hike
- Gear Recommendations
- Full Corridor Trail Reports
Quick First Timer Tips For Hiking the Rim to Rim in One Day
- plan your hike for the 1st or 2nd week of October (or as close as possible). This allows for temperatures to hopefully cool off some.
- start on the North Rim (North Kaibab Trail) and finish on the South Rim (Bright Angel Trail). I will explain more about the reasons for WHY.
- once you’ve decided on your preferred route, make your reservations ASAP! Lodging fills up quick. Take care of logistics including lodging accommodations, shuttle and transportation arrangements, etc, early! If you wait too long, your route may be decided for you based on availability.
- train and prepare, train and prepare, train and prepare! Give yourself enough time to train for at least 4 months, but even more if you need to develop an appropriate baseline foundation before targeted R2R training. 6 months to a year of training prior is common.
- Get your gear, and start using it during your training hikes! Replicate hiking conditions with the gear and accessories you plan to use on the actual R2R!
- Same goes for fueling and hydration – figure out what works for you in terms of hiking snacks, hydration and hydration systems, and supplements to address electrolyte and sodium levels. Replicate what you plan to use for the actual R2R on your training hikes. Your fueling and hydration plan are just as important as the physical training!

So What Exactly Is a Rim to Rim Hike?
A Rim to Rim hike is basically a hike from one rim of the Grand Canyon to the other, either North to South or South to North. Along the way, you will reach the bottom of the canyon at Phantom Ranch and Bright Angel Campground, and cross the Colorado River.
There are two directions you can hike a Rim to Rim: North to South or South to North.
North to South is typically done via the North Kaibab Trail and the Bright Angel Trail.
South to North is typically done via the South Kaibab Trail and North Kaibab Trail.
There are 3 corridor trails available for a Rim to Rim hike: the North Kaibab Trail (North Rim), the South Kaibab Trail (South Rim), and the Bright Angel Trail (South Rim). All 3 connect to each other at the bottom near Phantom Ranch and Bright Angel Campground.
You can read more in depth about the 3 corridor trails in Grand Canyon National Park here.

As you can see in the picture below, all 3 corridor trails intersect at the bottom of the canyon at Phantom Ranch and Bright Angel Campground.
QUICK FACTS on the Rim to Rim Hike:
Length: 23.7 miles roundtrip point to point (North to South) or 21 miles (South to North)
Rating: Very Difficult
Elevation Gain: 4,380 feet (North to South) – 5,760 feet (South to North)
Estimated Time to Hike: 12 – 18 hours
Best Time to Hike: late September – mid October (or later into October and November if you can make certain transportation and lodging arrangements – more details on that later!)
Pet Policy: pets are NOT allowed on Rim to Rim trails
Permits/Reservations: Permits are NOT required to complete a Rim to Rim hike in one day. Reservations are only required for camping on multi day/overnight Rim to Rim hikes. You can find more information on camping along the corridor trails HERE.
The Rim to Rim hike is a extremely difficult hike, especially when done in one day, and that is why it is so important to prepare for it. The 3 corridor trail options for a Rim to Rim hike in one day are below.
North Kaibab Trail to Bright Angel Trail Route (North Rim to South Rim) – Recommended for 1st Timers
South Kaibab Trail to North Kaibab Trail (South to North)
Bright Angel Trail to North Kaibab Trail (South to North)
Why One Day?
So why attempt to hike the Grand Canyon Rim to Rim in one day? The most straightforward answer is that it is way easier logistically. You can make this a multi day/overnight backpacking trip, but that requires securing a lodging/camping spot along the trail, which is extremely hard to do, and requires a reservation way, way, in advance. Especially if you are trying to snag a spot at Phantom Ranch, which is secured via a lottery system.
There are 2 campgrounds along the North Kaibab Trail – the Cottonwood Campground and Bright Angel Campground, and 1 campground on the Bright Angel Trail – Havasupai Garden Campground, but these campgrounds are hard to get spots for. A day hike of the Rim to Rim requires no permits, reservations, or advance notice on trail accommodations, and therefore is considered to be somewhat logistically easier to plan and execute.
The other main advantage to a day hike of the Rim to Rim is the ability to carry less on your person. If you are camping overnight, you will need to carry all that extra gear with you (unless you score a coveted Phantom Ranch spot – this is not the case for the majority of hikers). That may sound doable, until you start going up those last couple grueling miles of the Bright Angel Trail or North Kaibab Trail! I promise you, I have never seen a fully loaded backpacker finishing a Rim to Rim with a smile on their face. It can absolutely be done, but I prefer the lighter packing and carrying of a day hike!

Location of the Rim to Rim Hike
The Rim to Rim hike is located in Grand Canyon National Park, and stretches from the North Rim to the South Rim. Grand Canyon National Park is located north of the Arizona mountain towns of Flagstaff, Tusayan, and Williams. The North Rim is more secluded, with less lodging and accommodation options, while the South Rim is considered to be more touristy, contain more infrastructure and facilities, and and be much more heavily visited.
Closest Town(s) to the North Rim:
- Jacob Lake, AZ: 1 hour
- Fredonia, AZ: 30 minutes
- Kanab, UT: 2 hours
Closest Town(s) to the South Rim:
- Tusayan, AZ: 15 minutes
- Williams, AZ: 1 hour
- Flagstaff, AZ: 1 hour and 30 minutes
Closest Airports to Grand Canyon National Park:
- Grand Canyon Airport, AZ
- Flagstaff Pulliam, AZ
- Phoenix Sky Harbor International, AZ
- St. George Regional, UT
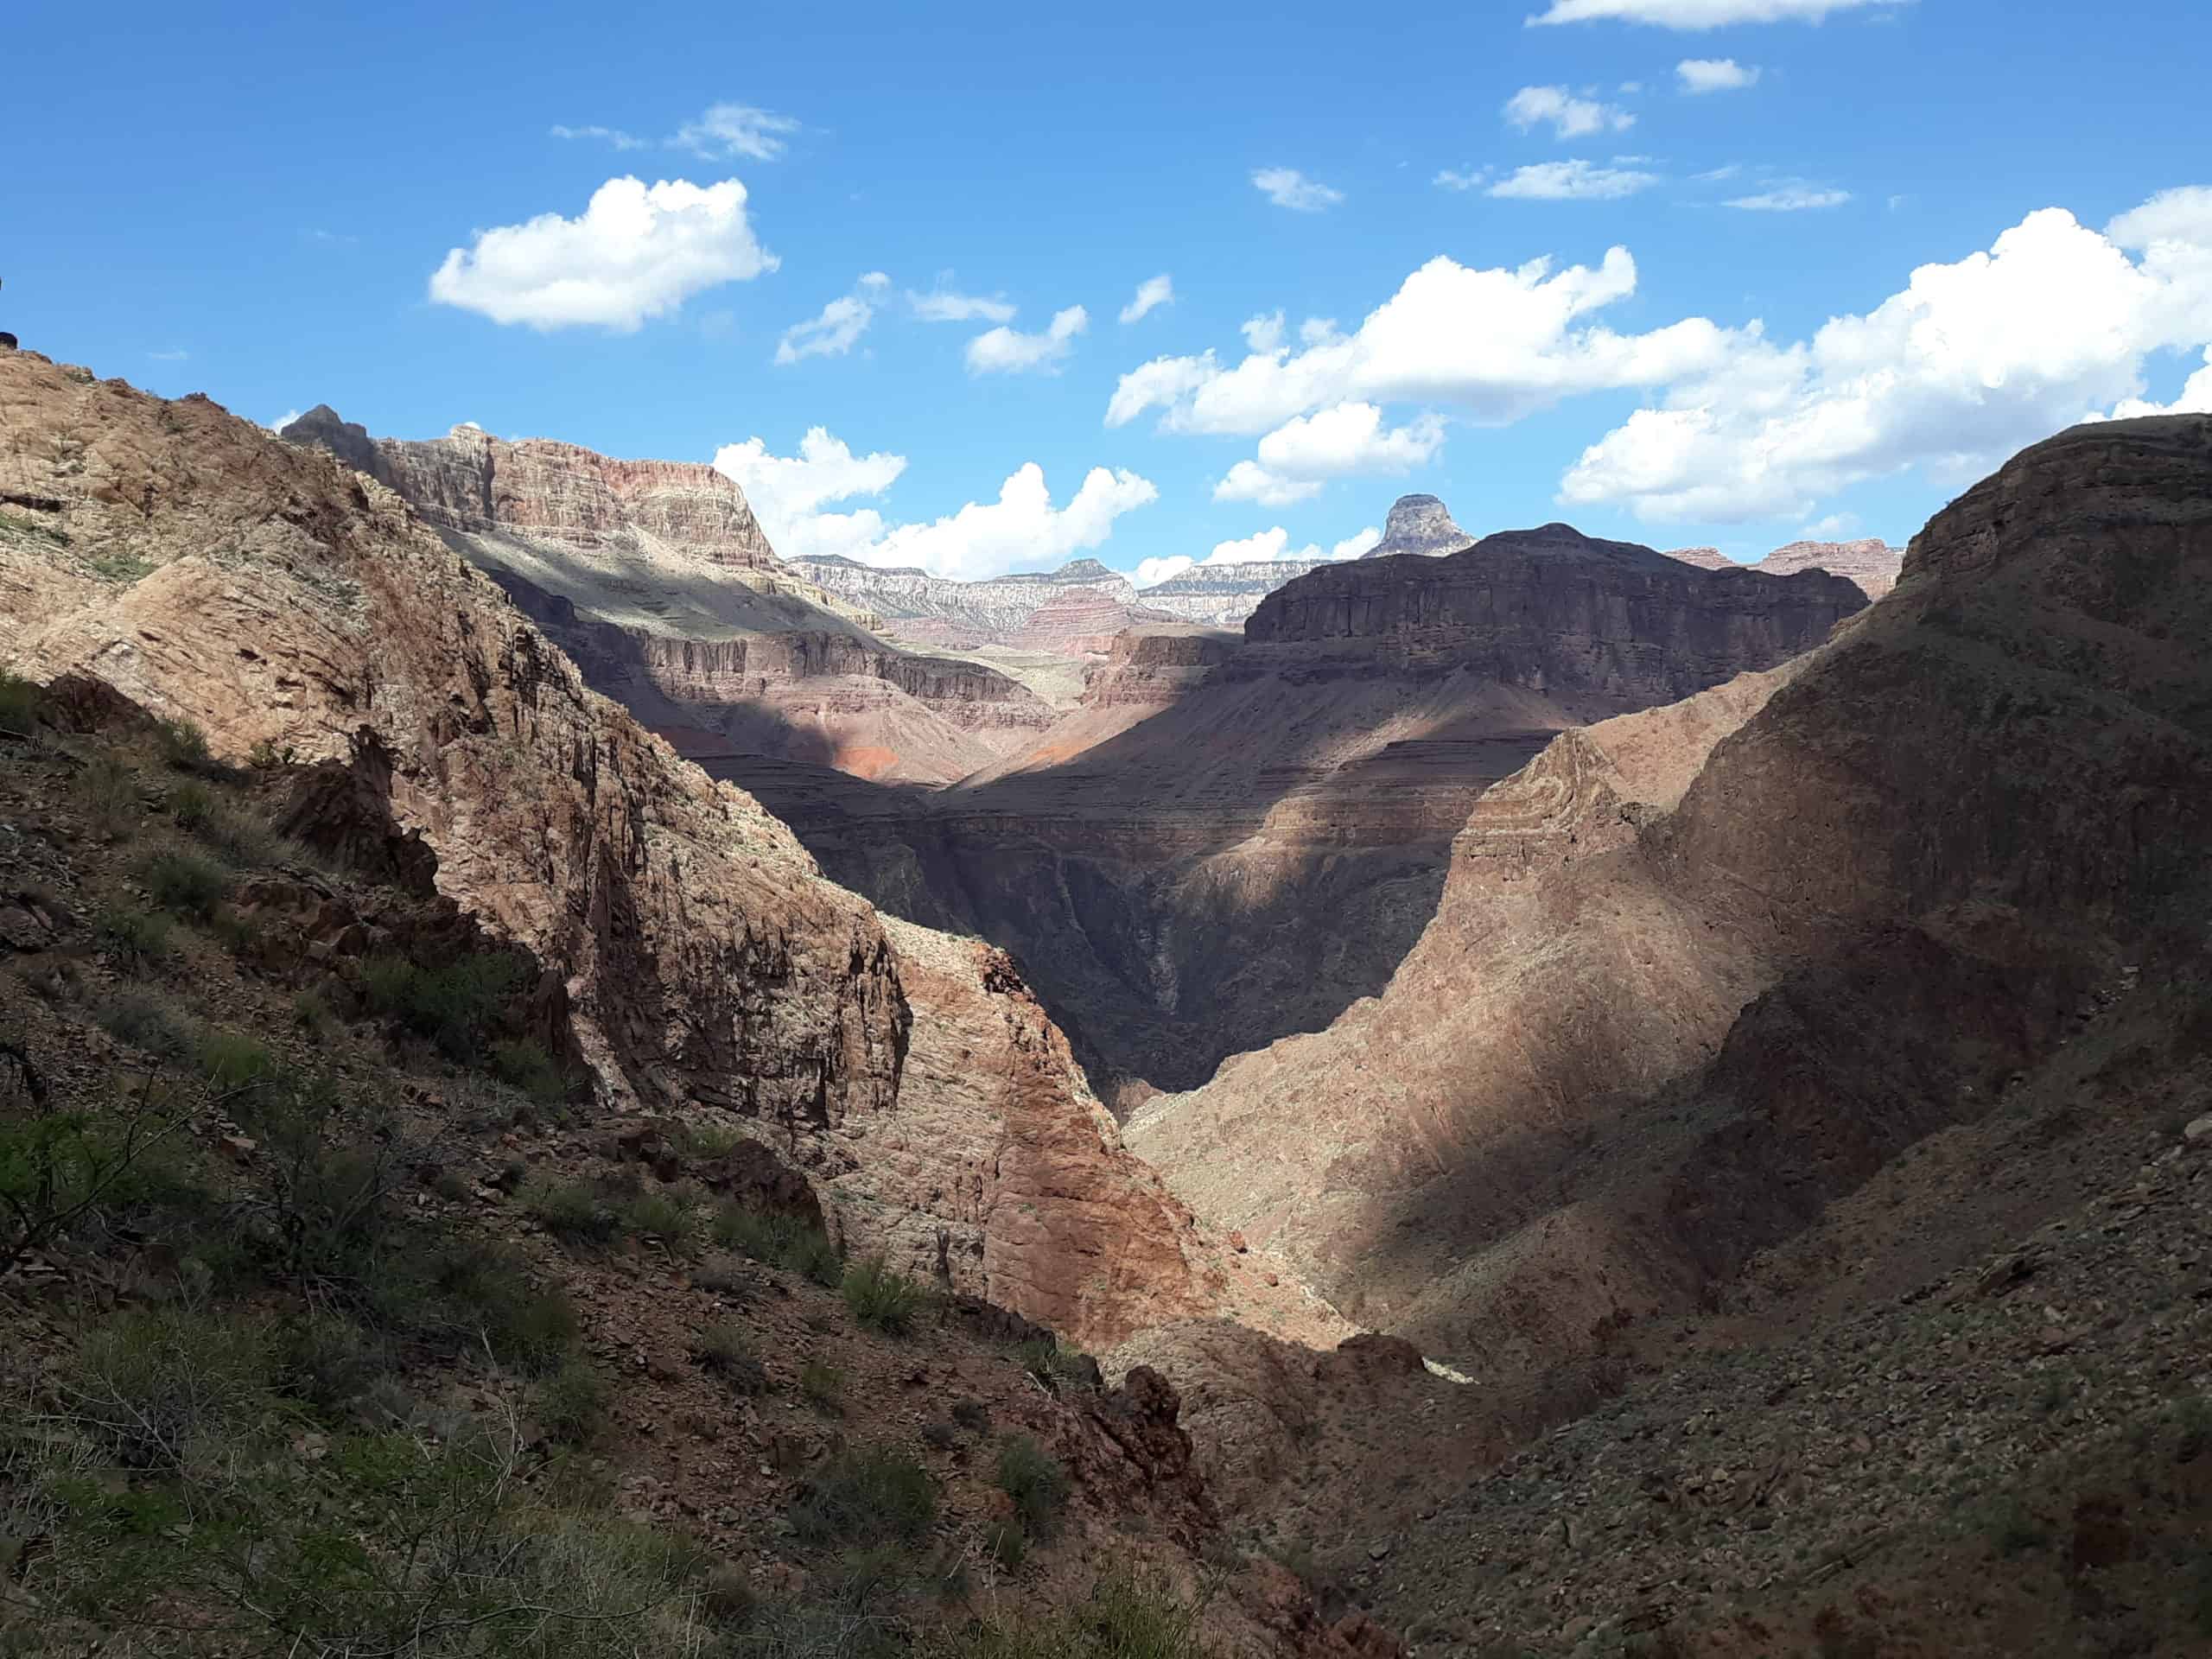
 Looking out over the course of the Rim to Rim hike!
How to Prepare for Hiking the Grand Canyon Rim to Rim
The battle to conquer a Rim to Rim day hike doesn’t just take place on the day of your hike. It starts months in advance with logistics, plus the proper training. To pull off hiking the Grand Canyon Rim to Rim in one day, you MUST be ready to handle both!
Looking for a simple, straightforward, VISUAL summary of Rim to Rim planning? Check out my Rim to Rim Visual Guidebook for 1st Timers, full of downloadable PDFS and CLICKABLE checklists, including route maps, gear, snack, and supplement checklists, training calendars, customizable strength training workouts, checklists of helpful websites and #’s for logistics planning, trail overviews, sample itineraries, and more!!! Everything you need in one place, yours to keep forever!

This should NOT be a hike you decide to try the day before without proper preparation. This is NOT a hike that you plan to get in shape on and during. This is NOT a hike that you take on without proper food and hydration. That could literally become a life threatening situation.
The Grand Canyon is lethal, and that cannot be stressed enough. It has deadly potential, and must be taken seriously and given proper respect. If you need any more proof of this, read “Death in the Grand Canyon“, a humbling guidebook on respecting the Canyon.
As well known and well visited as this National Park is, don’t let its popularity lead to your false sense of invincibility. Hiking these canyons can be deceptive. Even experienced hikers have struggled and failed here. Take the Rim to Rim seriously, and stick to a well constructed and thought out Rim to Rim training plan.
Interested in some 1:1 Coaching? Fill out this Interest Form to get started!
So what exactly goes into training for a one day Rim to Rim hike? You should be prepared to handle the length, elevation, heat, and pace of the Grand Canyon’s Rim to rim, all in one day and 21 – 24 miles (depending on route).

The Rim to Rim hike is just a hair under 24 miles long at 23.7 miles (if you hike the recommended North to South route), or 21 miles (South to North) and encompasses varying characteristics of its resident trails. No matter how you slice it though, it is still a whopping amount of mileage in one day! There are downhill sections, flat sections, switchbacks, and steep uphills between the North Kaibab Trail on the North Rim to the South Rim’s trails.
The elevation loss can be just as intimidating as the elevation gain on a Rim to Rim hike. Training for both the uphills and the downhills are important. Also, psychologically it is more challenging to know that the steepest climbs are at the very end of this hike and the end of a long day of hiking.
Quick Overview of All 3 Corridor Trails
Before we jump into getting familiar with all 3 corridor trails that can be used on a Rim to Rim hike, these charts below can give you a quick overview. You can also take a deeper dive in my article “The 3 Inner Corridor Trails in the Grand Canyon“.

Which Rim to Rim Route Should You Take?
Here’s where things start to get real. You have to choose which route to take, as there are 3 corridor trails involved in a Rim to Rim hike, and you pick 2! You also have to choose the direction of your hike, either North to South, or South to North. These two choices go hand in hand, as your directional choice can ultimately affect your corridor trails choice, and vice versa. So let’s get into the pro’s and con’s of all the corridor trails, as well as the 2 directional choices.
To recap, you must choose:
- North to South or South to North?
- If South to North, Bright Angel or South Kaibab?
*My recommendation for a first time Rim to Rim hike is to go North to South!
North to South VS. South to North
Time to figure out choice #1: WHICH DIRECTION?
First of all, it is completely possible to go either direction, and there are pros and cons to each way. Keep in mind that this guide is aimed at a Rim to Rim FIRST TIMER, and thus, many of my recommendations come from that angle, despite the fact that I myself may have completed a Rim to Rim hike both directions, and can see the pros of both.
To help visualize the decision you must make, here is a helpful chart of the pros and cons of each direction.

As someone who has successfully completed multiple crossings of the Grand Canyon on one day Rim to Rim hikes and R3 hikes, here is my personal recommendation for a first timer: NORTH to SOUTH.
Why NORTH to SOUTH?
ELEVATION GAIN! The North Rim sits at a higher elevation than the South Rim. The elevation of the North Kaibab Trailhead is 8,240 feet. The elevation of the Bright Angel Trailhead is 6,840. That is a worthwhile amount of elevation difference, when you put it in terms of which to ascend (over 1,000 feet of difference).
This means that if you ascend the South Rim, you will have less elevation gain to climb at the end of a long day. It is true that the North Rim’s elevation gain is spread out over more miles on the North Kaibab Trail, but it’s still extra elevation gain for a 1st timer to climb, who doesn’t always know exactly how their body is going to handle the full mileage of either direction. You may hear people say that you don’t notice the elevation gain as much because it’s spread out more (until you get to the actual base of the North Rim wall at Manzanita Rest Area), but I would argue that you DO feel the elevation gain the entire way from Phantom Ranch to the North Kaibab Trailhead, even if it is not significant along the bottom of the canyon. Psychologically, I think it is also gentler to hike North to South because you can tell yourself that you are hiking downhill for more than half of the entire hike. If you hike South to North, you are hiking downhill for less than half, and hiking uphill for more than half). For your first go around in the Canyon, I think it’s always best to go with the gentler route, and for these reasons I believe that is North to South. The image below can help to visualize the elevation differences of all 3 corridor trails, courtesy of the NPS.

To be clear, no matter which route you go, climbing out will be EXTREMELY HARD. The South Rim is not necessarily a “shortcut” around this. I strongly believe for a first timer though, ascending the South Rim may be easier than the North Rim.
Not only does the elevation difference between the North Rim and South Rim mean more elevation gain to scale on the North Rim, but it also means that if you were to ascend the North Rim’s 8,000+ feet of elevation, you’re also facing the slight potential for more altitude issues than ascending the lower South Rim 6,000 plus feet of elevation. If you are someone who struggles with altitude, ascending the South Rim should be less of a concern for you.
Besides that, there are a few other reasons why I recommend North to South for a first timer.
- You will clear the hottest part of the Rim to Rim hike, the “Box” between Phantom Ranch and Cottonwood Campground at the bottom of the canyon, during the 1st half of the day, which is definitely to your advantage. If you go South to North, there is an increased chance you may hit this portion of the trail in the hotter afternoon hours.
- Another reason I recommend North to South is that as you ascend the South Rim at the end of your hike, you will likely encounter more fellow hikers. This can be a slight advantage if you should run into trouble and require some form of assistance from others. There is a ton of support and morale to be found on the South Rim on Bright Angel, and I think that’s something special every 1st timer should get to experience. The North to South route will be more trafficked.
- For those that do choose to hike South to North, it is generally recommended to descend the South Kaibab Trail to take advantage of the shorter overall mileage – 21 miles vs. 23.7 on a North to South. South Kaibab undeniably has the better views on the South Rim, and many will argue over the North Rim too. This is why some people will ultimately choose this route. Keep in mind, however, that the descent of South Kaibab is probably the hardest on the knees of all 3 corridor trail descents, which for a 1st timer can be a big con to the South to North route. I believe the descent going North to South using the North Kaibab Trail can be easier on the knees, which is a good thing for a 1st timer who is still figuring out how everything is going to feel on that first Rim to Rim hike.
- Finally, another advantage to going North to South is that you will finish on the South Rim, where there are plenty of amenities to welcome you. Accommodations, restaurants, etc., which tend to be greatly appreciated by exhausted hikers. The North Kaibab Trailhead is several miles from amenities, and many South to North Rim to Rim hikers find themselves walking or hitchhiking an extra couple of miles from the North Kaibab Trailhead to their accommodations (the closest being the North Rim Lodge – 2 miles from the North Kaibab Trailhead), if they don’t have someone to pick them up. Nobody REALLY wants to add any extra length onto their Rim to Rim hike at the end of the day, no matter how beautiful the North Rim is! There are shuttles that can pick you up, but you will have to wait for the scheduled time, and they are only a couple pick up times a day. However, if you finish on the South Rim, you can walk a few feet to lodging, food, a shower, a bed, whatever sounds good to you!
Rim to Rim Corridor Trails
- As for the North Rim, luckily there is only one option – the North Kaibab Trail.
- On the South Rim, you have 2 choices: The Bright Angel Trail, and the South Kaibab Trail.
This NPS map below shows how all 3 corridor trails connect at the bottom of the Grand Canyon at Phantom Ranch/Bright Angel Campground.

Hopefully, you’ve given some thought to which direction you want to hike first, either NORTH to SOUTH or SOUTH to NORTH, as that does help make this second decision somewhat easier. So what are your corridor trail options for both directions?
Corridor Trails for North to South
If you choose to hike North to South, your corridor trail choices are somewhat more straightforward:
- Descend the North Kaibab Trail on the North Rim
- Connect to the Bright Angel Trail after Phantom Ranch/Bright Angel Campground and crossing the Colorado River
- Ascend the Bright Angel Trail to the South Rim
You may be wondering right about now, what happened to those 2 South Rim trails? What about ascending the South Kaibab Trail? Most every person who has any knowledge of hiking the Rim to Rim in one day will agree on this. Don’t ascend the South Kaibab Trail. Why? There is NO WATER! This is not a risk to take at the end of a long day hiking across the Grand Canyon. Plus the South Kaibab Trail is exposed, which is brutal during peak Rim to Rim season.
The Bright Angel Trail, on the other hand, has several water refill stations, and that is why it is HIGHLY RECOMMENDED to ascend the Bright Angel Trail if you are hiking North to South.
If you’re hiking outside of standard Rim to Rim season (May 15th – Oct 15th) such as later into the fall, once temperatures drop it’s less of a concern to hike up South Kaibab. Hiking at night is another caveat to mention when it comes to safely hiking up South Kaibab.
Corridor Trails for South to North
If you do choose to hike the Rim to Rim from South to North, you have 2 choices for which trail you choose to descend the South Rim: the Bright Angel Trail or the South Kaibab Trail. They each have their pros and cons, which you can see below.


Let’s talk a little bit about the graphic above. You have to make a choice here if you are hiking South to North, so here’s the summary.
- ELEVATION – there is a slight difference in elevation and elevation gain (about 400 feet). South Kaibab is higher in trailhead elevation than Bright Angel.
- LENGTH-There is a difference in trail length. South Kaibab is shorter, Bright Angel is longer. To be exact, it is 7 miles from the South Kaibab Trailhead to Bright Angel Campground, and 9.5 miles from the Bright Angel Trailhead to Bright Angel Campground. What does this mean for you as a Rim to Rim hiker? South Kaibab is slightly steeper because it is shorter. That means a harder downhill, but you might save some time with the shorter distance. However, if you are having to slow your pace because the steeper downhill is taking a toll on your knees, you might not end up saving that significant of an amount of time. Bright Angel is not as steep, as the elevation gain/loss is spread out over a greater distance and it is lower in elevation.
- WATER! – There is NONE on South Kaibab, which is why it is never recommended to use South Kaibab to finish a Rim to Rim hike, only as a potential start going South Rim to North Rim. In theory, you would be fine starting off with several liters of water from the South Kaibab Trailhead, before it is hot, and reaching the water refill station at Bright Angel Campground/Phantom Ranch. However, some hikers prefer to know that there is water available, period. Bright Angel has several water refill stations.
- BATHROOMS– there are bathrooms on both trails.
- VIEWS – South Kaibab has the better views. However, consider that if you are planning a Rim to Rim hike from South to North, and you are planning to start early (for example, 3 am), you may not even see the better views on most of South Kaibab.
- LOGISTICS – Bright Angel is easier to access. You can park in Grand Canyon Village’s multiple lots and walk to the trailhead, or even walk from your accommodations on the South Rim. You will need to take a park shuttle (which only run at certain times), taxi, or be dropped off and walk 3/4ths of a mile in, to access South Kaibab, as you cannot drive a personal vehicle or park your own car at the trailhead. Park shuttles to South Kaibab are free and easy to catch, but they only run at certain times. You can check out the park shuttle service’s current schedule here.
- AMENITIES – Bright Angel has more, in terms of lodging, dining, etc, directly at the trailhead. South Kaibab has none at the trailhead.
- CROWDS – Bright Angel will almost always be more crowded, because it is easier to access.
Before you continue on, give some thought to these first 2 decisions:
- #1: Which direction? North to South, or South to North (North to South is my recommendation for 1st timers)
- #2: If you are hiking South to North, which South Rim Trail? Bright Angel or South Kaibab? (South Kaibab is my recommendation for the better views and shorter distance, but know it can take a greater toll on your knees due to the more brutal downhill)
What I have found helps most people to decide on which South Rim trail to descend, is what do you value most? Views and saving some distance on South Kaibab, or easier access and a gentler downhill on Bright Angel? While most people want the views understandably, a lot of people also will need to plan to start their Rim to Rim hike way before dawn to ensure a safe passage through the hottest parts of the hike after Phantom Ranch, which in many ways makes this factor mute.
- Are you concerned about the toll going downhill on a steeper trail will take on your knees? Then opt for Bright Angel.
- Do you want to experience the better South Rim views? Then go with South Kaibab.
- Do you want the easiest option logistically speaking? It’s Bright Angel, but just barely.
- Do you want to to save on distance? The answer is straightforward there – South Kaibab.
These are the kinds of questions to consider when deciding which South Rim Trail to hike. If I personally am going to hike South to North, I’m going to choose South Kaibab over Bright Angel. But again, my recommendation for first timers remains: hike North to South.
When to Hike the Grand Canyon Rim to Rim in One Day
The North Rim is open from May 15th to October 15th – *with a few caveats. Technically the North Rim closes to overnight use on October 15th (this includes the North Rim Campground and North Rim Lodge), but the Kaibab Lodge located about 16 miles north of the North Kaibab Trailhead, and the Jacob’s Lake Inn located about 40 miles north, are open longer. The Kaibab Lodge remains open through late October-ish, and does run a shuttle service. Jacob’s Lake remains open year round, but you won’t be able to access the North Rim from Jacob’s Lake Inn past December 1st. And that is because – Highway 67, the road to the North Rim, closes completely on December 1st or the 1st big snow! And it’s important to note that the 1st big snow could happen before December 1st! This current year, the 1st snow happened on October 18th!
This is why people broadly say that the North Rim is open until October 15th, although technically you can complete a Rim to Rim hike later in October, which I have done. You just have to know how you are getting to and/or from the North Kaibab Trailhead from either Kaibab Lodge or Jacob’s Lake Inn.

So your window for completing a traditional Rim to Rim hike in the Grand Canyon is relatively small. The window for completing a Rim to Rim hike while avoiding the hottest temperatures of the summer is even smaller.
I would not recommend a Rim to Rim day hike in June, July, or August. The summer heat can be dangerously excessive even for prepared hikers, especially at portions of exposed trails like the infamous “Box” stretch along the bottom, between Phantom Ranch and Cottonwood Campground on the North Kaibab Trail, where the canyon walls close in and the air can become quite stifling. Or the Devil’s Corkscrew, a series of full exposure switchbacks you have to climb from the Colorado River in order to reach Havasupai Garden Campground on the Bright Angel Trail. The best time to hike the Rim to Rim is the two open weekends in October (or as close as possible at the end of September).
Temperatures in the notorious “Box” (the portion of close walls and oven like conditions between Cottonwood Campground and Phantom Ranch on the North Kaibab Trail) will still likely climb into the 90’s or 100’s during the hottest part of the day, even in October, but this is much more bearable than deadly temperatures that climb into the 115’s or 120’s in the dead of summer. A good rule of thumb is to try and clear this portion of the trail before 10 AM, to take advantage of cooler temps and shade. Just another reason for an early start and efficiency when hiking the Rim to Rim.
In October, your early morning start on the North Rim at the North Kaibab Trail will likely still be cold, as in near freezing temps, at daybreak. As soon as the sun peeks through and you descend, the temperatures will quickly warm. Some prefer to bring a light outer layer for starting out, and others just tough it out for a bit and avoid having to carry an extra layer the rest of the 24 miles. Either way, you’ll likely shed a layer quickly once you get moving. By the time you are reaching the bottom of the Grand Canyon at Bright Angel Campground, Phantom Ranch, and the Colorado River crossing, you will need to be more wary of monitoring your hydration and electrolyte levels due to the sun exposure and climbing temps.
The South Rim is lower in elevation than the North Rim, so expect your finish at the South Rim, even if nearing dusk, to be a tad warmer than your early morning start at the North Rim. I have not needed an extra layer when finishing around 6 pm on the South Rim.
***Insider Tip: though rare, storms can come through unexpectedly in October. Just days after one of my Rim to Rim hikes, a storm blew through Northern Arizona, dumping torrential rain, sleet, and snow into the canyon, as well as a tornado in Williams. Checking the forecast is important, and you can also pack a lightweight outer shell that is waterproof and windproof if you prefer. Outdoor Research makes the awesome Helium II jacket that is fully waterproof and windproof, while only weighing a couple ounces and compressing down to barely nothing! It is the best jacket out there for both minding weight and full protection.
Logistics of the Rim to Rim Hike
There are a lot of things to consider when planning the logistics of a Rim to Rim hike in the Grand Canyon. If you start planning well enough in advance, logistics can be easier. Early planning also ensures that you can go with your preferred choice of directional route. Waiting too long may “reverse engineer” your decisions, as you may have only limited logistical accommodations if you wait too long. This may necessitate you switching your plans and even your preferred direction. This is why I always stress to try and take care of the logistics as early as possible, as soon as you decide on your directional route preference, North to South or South to North.
*Keep in mind that the details I provide are largely coming from a perspective of hiking NORTH to SOUTH, though some details apply to either directional route.
You will need to arrange transportation, lodging, and details of your start and finish at either rim.

Transportation and Lodging
In order to hike the Grand Canyon Rim to Rim, you will need to arrange special transportation. The South Rim and North Rim are approximately 4.5 hours apart driving. This means that if you take your car to the North Rim for your start, it obviously won’t be there at the South Rim when you finish. And vice versa. This is the logistical conundrum that plagues Rim to Rim planners.
The most common scenario (for this example in a North to South route) is to park your personal vehicle at the South Rim the day before your intended hike. Then take the Trans Canyon Shuttle (the recommended R2R shuttle service) from the South Rim to the North Rim. Arrive at the North Rim via shuttle the night before your hike. If you are staying at the North Rim Lodge or Kaibab Lodge, they can shuttle you to the North Kaibab Trailhead the following morning. Hike North to South, and when you finish, your car is waiting for you there at the South Rim. And of course, these logistics can be reversed for a South to North.
Then there are some people who prefer to drive to their starting rim, hike, finish, spend the night, and then shuttle back the next day to where they left their vehicle at the start.
Then there are those who have arranged personal transportation with friends or family, which tends to make things way easier logistically. These people may have someone drop them off at the start of their R2R hike, then drive the 4.5ish hours to the other rim to meet them there at the finish to pick them up.
There are a handful of viable options, and it just takes some patience to put together the puzzle pieces the way that they work best for you. Keep in mind that the recommended shuttle service – the Trans Canyon Shuttle, also does baggage transport between the rims.
Don’t wait too long, because if your plan is to hike North to South but the North Rim lodges all fill up, you may find you have to switch your plans to South to North.
Here’s a few examples of my previous logistic arrangements: arrange a driver to take group to the North Rim the night before the hike. Spend the night at the Jacob Lake Inn at Jacob Lake, Kaibab Lodge, or the North Rim Lodge. Driver takes group early the morning of the hike and drops off at North Kaibab Trailhead. Driver then drives from North Rim to South Rim, and waits for group to finish on the South Rim. When the entire group is finished, driver takes everyone to final destination.
Or for one of my South to North examples: stay the night in Tusayan (10 minutes south of the South Rim) the night before. Call the 24 hour taxi the morning of my hike. Get dropped off at the South Kaibab Trailhead for my start. Hike South to North. Get picked up by the Kaibab Lodge shuttle from the North Kaibab Trailhead. Stay the night at the Kaibab Lodge. Shuttle back to the South Rim the following day on the Trans Canyon Shuttle.
Regardless of how you plan to arrive at your starting rim on the morning of your hike, I would strongly recommend spending the night prior at that rim. Rim to Rim hikes should start early in the morning, after a good night of sleep.
For overnight stays at the North Rim, again your choices are:
The South Rim has multiple options for lodging, as well as hotels in nearby Tusayan. You can check hotel availability for your dates in Tusayan HERE.
The time to finish a Rim to Rim hike varies, with the average being between 12 and 18 hours typically. My average for North to South is 12 hours, with a 1 hour break at the Bright Angel Campground/Phantom Ranch. My average for South to North is 10 hours, with a 30 minute break at Manzanita Rest Area. However, with more breaks, or waiting out the hottest part of the day, or a late start, it could easily edge closer to 18 hours. You will need to coordinate your pick up at either rim accordingly, especially if you are planning to be picked up at the North Rim by shuttle.
Some hikers book a room at lodges like the Bright Angel Lodge on the South Rim to use for a couple hours after finishing a North to South Rim to Rim hike, for showers, rest, or while waiting on slower hikers in their group. It is something to consider if you feel you may need a little time after finishing up your hike to recover before heading out. Or if you have arranged to drive to your final destination the following day, then securing lodging on the South Rim for the night is a great idea, and you can even grab food easily at one of the several dining options at the South Rim, like the Maswik Lodge!
*If you are planning to hike South to North, and are planning to descend the South Kaibab Trail, which is the most common option for a South to North hike, then you may want to be aware of the free park shuttle in Grand Canyon Village that takes hikers to the South Kaibab Trail. You are not allowed to park and leave a vehicle at the South Kaibab Trailhead, so your options for arriving and starting a hike at South Kaibab are to take the free park shuttle, get dropped off by family or friend and walk about 3/4th mile from the gate to the trailhead, or hire a taxi. The 24 hour taxi on the South Rim is a GREAT resource for South Rim pickups as well as Tusayan! Keep in mind that the free park shuttle only departs at certain times, which may affect your planned start time.
- Free Park Shuttle Info
- South Rim Taxi Service: 928-638-2631 or 928 – 638 – 2822

Summary of Helpful Resources:
These are some of the helpful websites and numbers that can help you plan the logistics of your Rim to Rim hike. If you are stuck, call and talk to any of them – they understand and can help answer your questions and come up with a solution!

Want these resources as downloadable, clickable PDFs? This R2R Visual Guidebook for 1st Timers includes all your pdf downloads, trail overviews, clickable gear checklists, snacks, and supplement checklists, training calendars, customizable R2R strength training workouts, clickable helpful websites and #’s lists, sample itineraries for hike day, and more! Designed to give you a simple, straight to the point summary of helpful info for prepping for your 1st Rim to Rim hike! GRAB YOURS HERE!

Where to Start and Finish the Rim to Rim Hike
As previously stated, my strong recommendation for first time Rim to Rim hikers is to start the hike on the North Rim and finish on the South Rim. There were several reasons why that I outlined earlier in this article involving elevation, elevation gain, amenities, and a few more. You can review those reasons in more detail below:
I’m not saying that the North to South route is better in any way. In fact, I would argue that the South to North may have the slight edge in views. But I do believe it is a slightly better choice specifically for 1st timers!

The North Rim descent occurs on the North Kaibab Trail. The trailhead for the North Kaibab Trail is a straight shot and about a 45 minute forested drive on Highway 67 from Jacob Lake, 20 minutes from Kaibab Lodge, or 5 minutes (2 miles) from the North Rim Lodge.
The recommended start of a Rim to Rim hike in Grand Canyon – the North Kaibab Trail

The trailhead for the North Kaibab Trail is clearly marked on Highway 67, though expect parking to fill up quickly on peak days. The North Rim Campground parking lot is a viable backup if the North Kaibab parking lot is full.
There is a water fill station and bathrooms at the trailhead of the North Kaibab Trail. Expect possible lines for both upon arrival.
After reaching the bottom of the canyon on the North Kaibab Trail and crossing the Colorado River, hikers have two true hiking trail options for ascending the South Rim. These two trails are the South Kaibab Trail, and the Bright Angel Trail. I have one straightforward recommendation for first time Rim to Rim’ers – ascend on the Bright Angel Trail! I reviewed this earlier, but here it is again:

If you are hiking South to North, then the preferred route is the South Kaibab Trail to North Kaibab Trail. Remember that private vehicles are not allowed to drive to the South Kaibab Trailhead, so you’ll need to go with your other options:
- Get dropped off by friend or family member at the gate and walk ~ 3/4ths mile to the trailhead
- Take the park shuttle from Grand Canyon Village and get dropped off at the trailhead (park shuttle only runs at certain times)
- Take the taxi (which picks up from anywhere in Grand Canyon Village and Tusayan) and get dropped right at the South Kaibab Trailhead. Note there may be a wait for the taxi.

Training for a Rim to Rim Hike in One Day
Once you have made those first decisions regarding direction, corridor trails, and logistics, it is time to conquer the next step in preparing for a Rim to Rim hike: training!
Before you start training, you need to 1st assess if you have a baseline foundation on which to build off of. If you haven’t hiked a single mile in 10 years, you need to back up your training timeline to first build up a baseline foundation before beginning targeted Rim to Rim training.
What does a baseline foundation look like for a hike of this kind? 60 minutes of moderate cardio output 3 x a week, consistently and comfortably.
That means that you should be able to do 60 minutes of moderate to high intensity workouts at least 3 times a week, and you should be able to do that consistently and comfortably. This could include:
- 60 minute cycle
- 60 minute strength training workout or HIIT workout
- 60 minute hike
- 60 minute elliptical workout
- 60 minute run
These are just a handful of examples, and while not ALL of your baseline foundation has to be 60 minute hikes, at least some of them should be. Once you have your baseline foundation in place, you are ready to begin targeted Rim to Rim training. This baseline foundation is so crucial, because targeted Rim to Rim training is tough, and there are also going to be gradual increments in mileage distances and volume.
Now let’s talk about targeted Rim to Rim training plans!
4 Elements to Train For:
- Elevation Gain and Loss
- Heat
- Distance
- Pace
How do I approach these elements through training – with 8 parts!
My Rim to Rim training plans include 8 parts:

- #1: Time on Feet – working up to long weekly hikes, with the longest being between 16 – 20 miles, depending on the individual. My training plans include one shorter weekly hike, and one longer weekly hike, with the longer hikes building gradually in weekly increments.
- #2: Training for the Uphills – I’m not going to sit here and tell you that you have to run bleachers or office stairwells. Not that you can’t, but that shouldn’t be the main focus. Training for uphills incorporates a lot of background, a background that I dive deeply into when I coach and consult with clients. If you have natural trails to practice on with plenty of elevation gain, then by all means that’s what you should use! If you don’t, there are other ways to get in some practice. Yes, sometimes that can be bleachers and stairwells, but it can also be gym equipment like ellipticals, stairmasters, and Jacobs Ladders. Or it could even be doing weighted step ups from the comfort of your own home while you watch Netflix. Or it could be rucking to gain more strength. Again, don’t worry if you don’t have natural elevation gain trails to train on by you, there are other ways! Training for the uphills also involves hiking form, posture, and mechanics, as well as strength training and cross training, which we will get into next.
- #3: Training for the Downhills – again, whether you have it naturally or not, you can supplement with strength training exercises, as well as a focus on stability training, posture, hiking mechanics, and the use of special gear like trekking poles.
- #4: Stability Training – this involves proper hiking posture, mechanics, and form. Learning to attack uphills by not leaning forward into them, and downhills by not leaning back. Keeping your body up with your chest upright. Also keeping your feet flat when you go up inclines, instead of lifting that back heel up and pushing off with just the front of your foot. Other posture, mechanics, and form training involves how to incorporate the benefits of sidestepping on uphills and downhills, shortening your stride, as well as targeted strength training exercises that can increase the strength in certain muscle groups involved in stability training. Addressing hiking posture, form, mechanics, and stability training is largely under-addressed I think, and it’s something I talk at length about with coaching clients. Not only will implementing proper posture, form, and mechanics help keep you injury free, it supplements strength training in a highly beneficial and noticeable way.
- #5: Strength Training – this goes hand in hand closely with stability training. It means incorporating strength training movements and exercises into your normal workout routine to strengthen the muscle groups that benefit endurance hikers. Think exercises like lunges, squats, and heel raises. In my Rim to Rim training plans, I actually provide plenty of FREE resources that you can use to create and customize your own strength training workouts, specifically tailored to Rim to Rim training. Simple workouts that are targeted, beneficial, and can be done from anywhere!
- #6: Cross Training – can (and ideally should) include strength training, plus additional cross training workouts you do on a weekly basis while training for the Rim to Rim. I always advise to make sure your additional cross training is something you enjoy! Some common cross training I see is cycling, swimming, walking, and running.
- #7: Pacing – While it is important to hike your own hike and enjoy the moment of the Rim to Rim, there’s still a case for having a healthy pace with a 21 – 24 mile long day hike. Aim to finish during daylight hours for safety. A healthy pace can get you through the hotter and more dangerous sections faster before temperatures rise. And there are a few other reasons as well. While you don’t need to set a blistering pace, especially on the uphills, I would still encourage a 2+ mile an hour overall average pace for a Rim to Rim, which often requires intentional training for.
- #8: Rest and Recovery – crucial to any training plan for any endurance event! Your body actually gets stronger when it is allowed to rest. A rest day doesn’t mean you have to just sit on the couch and not move all day – active recovery can include yoga, a short easy walk, foam rolling, etc. Plus don’t forget to refuel, rehydrate, and get plenty of sleep!
This is just a brief overview of the 8 parts of my Rim to Rim training plan. You can find more in depth information in my sister article “Complete Rim to Rim Training Plan“, or by checking out the 1:1 Coaching Plans and Consults I offer for the Rim to Rim hike!

While most people are first and foremost concerned about training for the elevation gain, I would argue that it takes all 8 of the above parts working in harmony. But ultimately, time on your feet is the most important thing, even more so than training for the elevation gain.
Which is good news for you “flatlanders” out there just like me! You CAN hike the Rim to Rim even if you don’t live next to 14’ers in Colorado! All you really, truly need to start with Rim to Rim training is somewhere where you can hike and work up to 18ish miles. That doesn’t mean you have to have an 18 mile long hike – I do dozens of loops on my local 1.5 mile long loop trail frequently.
My Rim to Rim training plans absolutely address the need to prepare for the ascents and descents of a Rim to Rim hike, but rest assured, if you incorporate all of the above 8 factors into your training, you can train from anywhere!
So how exactly do you build a consistent and realistic training plan for hiking the Grand Canyon Rim to Rim in one day, while taking into account the 4 main elements of elevation gain and loss, heat, distance, and pace? Start by looking over this brief summary:
Tips for Developing a Rim to Rim Training Plan:
- Train at Least 4 Months in Advance
- Complete Multiple and Regular Long Distance Practice Hikes – Time on Feet
- Practice Maintaining Pace
- Train for Uphills and Downhills
- Cross Train and Strength Train
- Focus on proper hiking form, posture, and mechanics
- Acclimate to Heat
- Mimic Real World Conditions – train with the gear, accessories, and snacks you plan to use
- Develop a Visual Training Calendar
“Develop a Visual Training Calendar” might be last on this quick list, but it really should come first! Below I will discuss the reasons why you should develop a very intentional, visual, training calendar for your Rim to Rim hike. You are much more likely to stick to your training plan with a tangible, visual, detailed training calendar, than you are without one.
If you are feeling a little overwhelmed at this point, and not sure exactly how to develop a Rim to Rim training calendar, good news! There are a few ways I can support you with this. I mention these options below because I feel strongly that developing and sticking to a training calendar is CRUCIAL to your success on a Rim to Rim hike, no matter how you develop that training calendar. Don’t ever forget, the Grand Canyon is a lethal environment, and hiking across it needs to be taken very seriously!
Ways to Help Develop a Rim to Rim Training Calendar:
- #1: Visit this sister guide to Complete Step by Step Training Plan for a Rim to Rim Hike. And check out this example 16 Week Rim to Rim Training Calendar.
- #2: Receive 1:1 Coaching. I offer 1:1 coaching services, and part of that package includes developing a detailed Rim to Rim training calendar, together! This training calendar will breakdown all your weekly practice hikes, in increasing increments, plus all your cross training and strength training days and rest days. It will completely take the guesswork out of developing a training calendar. Plus, there are other bonuses to receiving 1:1 coaching, as you can see in the snapshot below. You can fill out this INTEREST FORM to get started.
- #3: Consult. If you aren’t up for a full 16 week coaching package, take advantage of a quick, 30 minute consult to discuss the basics of preparing for a Rim to Rim hike in one day, including how to train, as well as determining if you are currently ready to execute your Rim to Rim hike. You can fill out this INTEREST FORM to get started.
*To take advantage of 1:1 Coaching or 30 Minute Consults, you can fill out this
Continuing the discussion on training for Rim to Rim hike in one day…..
As you are preparing for your Rim to Rim hike and getting familiar with the trails, one way to help prepare for Grand Canyon specific training is to be aware of the heat factor. It helps greatly to know where hottest and most exposed sections are:
- The Box and the Frying Pan- basically next door neighbors found along the bottom of the canyon. Together they are located between Manzanita Rest Area and Phantom Ranch on the North Kaibab Trail. The BOX has towering, converging walls that act as an oven, and the Frying Pan is open and exposed to the sun. If you hike North to South, you’ll hit the Frying Pan first and then the BOX. If you hike South to North, you’ll pass the BOX first, and then the Frying Pan.
- Devil’s Corkscrew – located between River Resthouse and Havasupai Gardens Campground on the Bright Angel Trail, about 2 miles after the Silver Bridge.
- South Kaibab Trail – in the warmer months the lack of water and full exposure can be deadly.
In addition to knowledge of the trails, there are several others ways you can prepare for the heat in Grand Canyon:
- Timing – One strategy that is helpful is to plan on getting through “the Box” by 10 am, before the temperatures in the inner canyon begin to rise and you lose the shade from the canyon walls. Starting early from the North Kaibab Trail, hiking North to South, is a good plan to accomplish this. If you’re hiking South to North during standard Rim to Rim season, you’ll probably want to start extra early to accommodate hiking through the Box later in the day when the temperatures are hotter.
- Pacing – training to ensure an adequate pace that allows you to clear the hottest sections early and within a safe timeframe.
- Heat Acclimation – doing training hikes and workouts in the heat (safely), or using other methods such as a sauna to heat acclimate. For more background – There’s no way around it, you will likely experience some stretches of scorching temperatures while hiking the Rim to Rim. There are ways to mitigate the heat, but don’t count on escaping it or think you’ll get lucky and catch the Grand Canyon on a “cold” day. You will face the heat, and it is better if you are not facing it for the first time on the day of your hike. Since my first timers recommendation is to attempt this hike in October, before the North Rim closes and while the Grand Canyon is experiencing “cooler” temps than summer, that means that your 4 months of training will naturally take place smack over the summer season. I am not recommending that you place yourself in a dangerous situation on a regular basis while training, but it is a good idea to responsibly take on some hot workouts. Just like everything else in training, do it gradually in increments and slowly work up. And of course, it should go without saying that you need to prepare for this type of training by bringing plenty of water, salty snacks, electrolytes and sodium, the right moisture wicking and breathable clothing, and sun protection.
- Environmental Protection – the basics like sunscreen, hats, sunglasses, sun shirts, etc.
- Cooling Methods – drenching yourself in the streams found along the Rim to Rim. For this particular strategy, it can be beneficial to wear cotton as it helps with evaporative cooling and holds that cool from the stream water longer, thus lowering your core temperature. Cooling towels can also be used.
- Fabrics – your choice of fabrics can help keep you cool. Don’t wear black. Don’t go bulky or heavy. Keep it lightweight, breathable, and light colored. Cotton is something to consider for soaking in streams.
- Water Sources – there are more water sources along the Rim to Rim route than you would expect. I would advise taking advantage of them, especially when it is warmer. Soak your shirt, hat, cooling towel, etc, in every stream you can. These water sources along the trail can also prove useful as backup drinking water sources, as long as you are carrying a water filter, which is always recommended.
- Electrolyte / Sodium Replacement – I don’t recommend hiking a Rim to Rim with just plain water. You need to monitor and balance your electrolyte and sodium levels and their replacement. This can be done a handful of ways, and often it’s best to combine a few of these ways. You should include salty snacks like pretzels, chips, jerky, olives, etc. And electrolytes come in many different forms – from powder mixes like Tailwind, LMNT, and Liquid IV, to Nuun tablets, to Gatorade and Gatorade packets, to coconut water and pickle juice shots, to electrolyte chews and tablets. I also like to utilize simple salt sticks personally. I help to handcraft individualized fueling and hydration plans on all my coaching services.
 There’s plenty of sun and exposure on the Rim to Rim hike!
But there’s more than just the heat when it comes to Rim to Rim training….
First, start training months in advance, if not longer. I would recommend at least 4 months (but preferably 5 or 6 months) of intense prior training specifically targeted at this Rim to Rim hike, while having an established baseline foundation of hiking with relative ease prior.
What constitutes long distance hikes? I would recommend an established ability of being able to hike 3 + miles with relative ease before beginning to seriously train for the Rim to Rim hike. Ultimately, the goal should be able to complete some 16 – 20 mile hikes in the last couple of weeks before your Rim to Rim hike.
Once you know that you can hike 3 + miles with relative ease, then the real training begins! Again, I would give at least 4 months minimum to train intensely for a Rim to Rim day hike once you have an established foundation of consistent and regular hiking. But more time doesn’t hurt.
For your training, aim to work up to between a 16 – 20 mile long hike as your final training hike before the Rim to Rim. Let’s just say 18 miles. And a couple of these longest distances is even better if time allows.
Each week, you’ll want to gradually increase the long hike distance in small increments. Follow the 10 – 15% rule of volume increase to ensure you don’t fall prey to common injuries due to overuse. If you want to know what the 10 – 15% rule looks like, check out my sister article, Complete Step by Step Training Plan for the Rim to Rim hike, for example training plans you can actually see! These gradual increments in mileage are just one reason you should give yourself plenty of time to adequately train.
I realize not everyone has access to trails with elevation, but make the best attempt to find a trail with at least some elevation gain and loss. Don’t let this be a damper – I live in Texas where the majority of our local trails have less than 500 feet in elevation gain, but I am still able to train on them with the right approach. This often means finding a trail with 300 – 500 feet of elevation gain, and doing multiple repeats on that trail until I reach my desired “elevation gain”.
If you can, splurge and make the effort to travel to a “destination” trail with more elevation gain whenever possible, just to get in as much uphill and challenging hiking as possible.
While you are doing your weekly training hikes, make sure to prepare as you would on the day of your Rim to Rim hike. Bring the day pack you plan to use on the Rim to Rim hike, have your water system, eat the foods you plan to eat, wear the right clothes ( I’ll go into more details in my Gear Recommendations below ), and train as though your life depends on it!
In addition to your weekly long distance hikes, it is crucial to engage in cross training and strength training. I would recommend adding cross training and strength training routines in at least 2 times a week for the minimum 4 months leading up to your Rim to Rim hike. What kind of cross and strength training is beneficial?
Leg prep is critical! Do sets of exercises like lunges, heel raises, step ups, deadlifts, glute bridges, and squats. This will help you immensely on that final uphill climb! Strength training exercises will also help to strengthen your core, which is a life saver since effective hiking is a full body activity that requires all your body systems!
Grab a FREE “choose your own path” customizable Strength Training Workout HERE!
Finally, cross train to make sure all your muscles groups are engaged and firing together in harmony. For me, biking and running was a hugely beneficial way to cross train and help prepare and strengthen my legs for the Grand Canyon Rim to Rim hike. I cycle or run an additional 2 times a week for my Rim to Rim cross training. I also mix in consistent rucking workouts as well.
Running is another great way to cross train and prepare for the Rim to Rim hike. If you choose to add some runs into your training routine, be sure to toss in as many uphills as you can. I know everyone hates uphills, but training for them in advance will help you on the day of your Rim to Rim hike. If you are looking for some tips to help mentally and physically overcome running uphill, check out these 7 strategies!
There are plenty of other options for cross training and strength training, and I recommend taking advantage of whatever you have available to you, whether it is kickboxing, kayaking, rucking, stair running, cycling, running, weight lifting, Pilates, yoga, or a combination! Make sure it’s something you enjoy.
Mix in as much as possible, while still giving yourself at least 1 day a week to rest and recover. On those rest and recover days, be sure to practice active recovery as well.
Now that you know the foundation for training for a Rim to Rim hike in one day, the most important thing you can do is develop a schedule and intentionally stick to it.
I would highly recommend grabbing your calendar and looking a minimum of 4 months out from your planned Rim to Rim hike date. Write in what you will do each week in advance, making sure to include at least one short hike and one long hike a week, plus cross training and strength training days, and rest days.
*If you want 1:1 coaching support to develop a customized, individualized Rim to Rim training calendar, fill out this INTEREST FORM to get started!
By planning out your training calendar in advance, I promise you will be more likely to stick to it than if you just tell yourself you will train when you find the time each week or when you “get around to it”. Remember, the Grand Canyon is lethal, and your training must be taken seriously in order to assure you emerge safely from your Rim to Rim hike.
Here’s your chance to get your own example of a Rim to Rim Training CALENDAR!

The Weeks Before the Rim to Rim Hike
- Taper
- Healthy Nutrition – “Carb Load” and Protein
Now that your training is complete and you’ve hit that final long training hike, start your taper. The taper should occur 2 – 3 weeks out from your intended Rim to Rim. What does a taper period look like?
Once you start your taper, you should begin to ease off the VOLUME of hiking mileage. 25% less 3 weeks out, 50% less 2 weeks out, 75% less 1 week out. Sometimes tapers can vary between 2-3 weeks, but the VOLUME should decrease in a similar fashion.
During the taper, keep hiking and working out at the same INTENSITY, but no more than what you have previously been training at. Do not try to increase your pace. Keep the intensity the same, while decreasing the volume.
A taper helps you recover by:
- Reducing muscle fatigue and wear and tear from months of intense training
- Replenishing fuel stores levels like glycogen and carbohydrates
- Re-energizing your body before the big day
- Overall improving performance
WHY is the taper important?
- After months of training and putting on miles, it’s completely natural that your muscles are going to feel some wear and tear. A taper allows your body to repair any muscle and tissue damage, thus making you stronger!
- Your carb stores will also be depleted from these months of intense training, so a taper allows you to replenish those carb levels right before it matters the most. In addition to carbs, the taper restores antioxidants, hormones, and metabolic enzymes as well. A taper essentially provides you with more energy to rely on during the big day.
- Another reason to taper is that at this point in your training plan, further training won’t provide much benefit. Once you’ve built up your fitness and stamina to a certain level, there’s not a huge amount more you can do to enhance those levels in just another week or two. What you can do, though, is deplete energy, prevent recovery, or possibly injure yourself unnecessarily – all from not following a taper period. And if you are worried about your stamina and fitness levels declining by easing off, it won’t happen that quickly!
- The taper helps you prevent the fatigue that is so common at the end of an intense training period. This is where the term “burnout” comes from. Not only does the taper replenish physical strength, but also mental strength as well. Because burnout can plague both the mind and the body.
- Finally, studies have proven that tapering correctly can enhance performance considerably. Studies have also shown that continuing to train hard at the same levels right up until the big day can destroy your performance on that big race or hike.
You can read more about 6 Tips to Taper Correctly here.
During the taper period, don’t forget to stretch plenty and use a foam roller when able, as well as continue to cross train and strength train. In the last few days before your Rim to Rim, you should ease up on all workouts, with nothing more than maybe a short, easy walk to loosen your legs the day or two before your Rim to Rim.
While you may be easing up on some of the intense training this final taper, you should kick your nutrition into higher gear! Hopefully throughout your months long training period you have been fueling your body with the right types of food, but the final week-ish it is especially important, as your body will be counting on every ounce of energy store it has available to it.
During that final week, make sure to be intentional about what you eat, and take advantage of plenty of good healthy carbs as well as proteins. Get in some lean protein sources regularly, like salmon, chicken, beans, and yogurt. Drink plenty of water consistently.
The Day Before the Rim to Rim Hike
- Healthy Nutrition – Carb Load and Protein
- Hydrate
- Check Gear
- Lay Out Gear/Clothes
- Stretch
- Rest
- Check NPS Website for Last Minute Alerts
- Check the Weather
- Let Someone Know Your Plans (you can use a “Hiking Safety Contact Form” like this one to leave in your glovebox or console).
- Trim Your Toenails
Continue loading up on healthy carbs and protein the day and night before your hike. Think whole grain pasta, whole wheat bread, and proteins. Drink plenty of water. Cut out alcohol and sugar. Have all your laundry washed and lay out every article of clothing and gear you need for the following morning. Check your gear, make sure everything works. Do some stretches. Take it easy on your feet and rest. Download maps to your phone.
Make sure to let someone know at this point what your plans are. Provide the name of the trails, your anticipated start and finish time, and who they can contact in case of an emergency. Check the Grand Canyon National Park’s website for any last minute notices. Occasionally, water line breaks or other issues come up that might affect your plans. Alerts like these will be posted on the National Park website.
And check the weather! The Grand Canyon may appear like it is always a desert type environment, but snow, sleet, and rain do sometimes start making appearances this time of year. In fact, a tornado touched down in the town of Williams not days after one of my October Rim to Rim hikes in Grand Canyon, and that storm brought plenty of surprise weather to Grand Canyon as well. If the weather necessitates any last minute changes to your gear and layers, do it!
You can check the NPS weather and road conditions HERE, and get an updated forecast for Grand Canyon HERE.
Check here for Phantom Ranch specific forecasts.
The Morning of the Rim to Rim Hike
- Healthy Breakfast of Carbs, Protein, and Energy
- Final Gear Check
Eat a carb, protein, and energy heavy meal that is easily digestible for breakfast. My go to breakfast for every long hike, run, or biking event I have ever completed is a bagel or English Muffin with peanut butter, a banana, oatmeal with peanut butter mixed in, and applesauce. And water of course!
MORE: Check out why peanut butter is the ultimate power food!
Do one final check on your gear! In particular, test and make sure that if you are using a water hydration bladder, that there are no leaks. Invert it to make sure there are no leaks near the top either. Make sure that you are on schedule to start your Rim to Rim hike early! I like to recommend no later than 6 am, but 4 am or 5 am are often more ideal, especially on hotter days.
Gear Recommendations for the Rim to Rim Hike
Below are some quick links for recommended gear, and following is an in depth dive into that gear! For a full breakdown, check out my post on the complete Rim to Rim packing list you need!
Or check out this easy to use Rim to Rim Gear Checklist PDF!
Recommended Quick Links:
- Trail Runners: HOKA One One Speedgoats – unbeatable cushion
- Water Hydration System:
-
- Katadyn Be Free Filter – collapsible soft sided bottle with internal filter for emergencies
- Grayl Filter – one of the fastest ways to filter
- Sawyer Filter – small and easy to carry
- Daypack: Camelbak Helena 20 Liter Daypack
(Make sure you have plenty of carabiners attached to your daypack also)
- Environmental Protection:
-
- Sunscreen
- Sunglasses
- Hat
- Snacks:
-
- Sandwich like PBandJ, Meat and Cheese, Tuna, etc.
- Chips
- Beef Jerky/ Beef Sticks
- Trail Mix / Nuts
- Peanut Butter Pretzels
- Tuna Packets
- Applesauce Pouches
- Squeezable Peanut Butter
- Honey Stinger Waffles
- GU Energy Gels
- Energy Chews
- Banana – for cramping
- Carrots, Grapes, Oranges, Apples
- RX Bars
- Olives
- NUUN Tablets
- Electrolyte Chews
- Salt Sticks
- Electrolyte Powders like LMNT, Liquid IV, and Tailwind
- Glucose Tablets
- Pickle Juice Shots
- Gatorade and Gatorade packets
- Candy or candy bars – for morale boosters
- Emergency/First Aid Kit:
- The Right Layers:
-
- Non Chafing Shorts or Leggings
- Navigation:
- Emergency Shelter:
- Personal Items:
-
- Cash for Phantom Ranch – get the lemonade!

- footwear! I get asked a lot whether trail runners or hiking boots are best, and my very straightforward answer is trail runners. I do 99% of my hiking in trail runners. For a hike like this, the cushioning of a trail runner will keep your feet feeling more energized over the long distance, and trail runners are also more lightweight than a traditional hiking boot, which can also help your feet feel better longer, and help with speed. The grip you get with a trail runner is more than adequate for the type of maintained and groomed trails you will experience on the corridor trails in Grand Canyon. Go with a trail runner that has a proven track record like these Hoka One One Speedgoats. Your feet will definitely thank you by the end of this grueling hike! In general, trail runners leave my feet feeling “fresher” after an all day hike versus hiking boots.
- gaiters! This is an optional piece of gear that some people prefer to have, but I don’t actually think is necessary. There is a brief section of sand on the south side of the Silver Bridge, but I don’t feel it actually warrants wearing gaiters. However, if you feel more comfortable having them, these affordable and easy to use gaiters will keep the sand and dirt out of your socks and shoes!
- footwear again! This time I am talking about socks! The condition of your feet will only be as good as the condition of your socks. 24 miles can wreak havoc on your feet if you do not have proper socks. The best thing you can do is surround your feet with a superbly breathable sock that will help proactively prevent blister development. I used to get blisters all the time on my long hikes and runs, until I discovered Hilly Twin Skin socks. The “twin skin” layers help to prevent the friction that causes blisters. Haven’t had a single blister since switching to Twin Skins. Be sure to pack a second pair that you can change into if they get sandy, wet, or you just want the morale boost of a fresh pair of socks at the halfway mark. Another option for great anti blister socks are the Injinji toe socks, which also help to prevent friction and blisters.
- water, water, water, water, water, water, water, water! Have a way to transport at least 3 liters of water on your person. There are multiple water filling stations along both the North Kaibab Trail on the North Rim and the Bright Angel Trail on the South Rim (more on Bright Angel than North Kaibab), but it is critical that you have the ability to carry 3 liters at all times, as there are some stretches of several miles without a water refill station. Or, there is the rare occasion such as I encountered in October of 2022, where a pipeline issue caused two of the regular water stations to be shut off. I recommend hiking with a 3 liter water hydration bladder system like this Platypus model, which I love because the wide mouth makes it easy to fill and clean, and this form of transportation system allows you to hydrate on the go. And this hike is all about speed and efficiency. When it comes to water hydration bladders, be sure to test your bladder out before starting off to make sure there are no leaks. And on this hike, it is also not a bad idea to bring along a portable filter like this KatadynBeFree I personally love, because there are multiple natural water sources you will encounter on the Rim to Rim hike, in case of an emergency. BeFrees are lightweight, collapsible, compact, and easy to use, so there really is no detriment to packing on in your day pack as a backup water hydration system. You can also go for a Lifestraw water bottle, with the internal filter, or a small Sawyer Squeeze Filter, or a fast and efficient Grayl Filter you can fill up and immediately start hydrating straight from, as backups in the event of an emergency! Another water related item of gear that I love is an insulated cover for my water bladders. Especially when it’s hot, I love having the option to drink ice cold water instead of warm water. While this insulated water bladder isn’t going to keep your water ice cold for the entire 24 miles, it will give you at least a couple hours of extended cold water drinking.
- a day pack! A mid sized day pack, like the Camelback Helena model that I use on all my day hikes, is best for hiking the Grand Canyon Rim to Rim in one day. It comes with a 2.5 liter water bladder included, but a 3 liter water hydration bladder easily fits inside as well, which is what I personally use. A day pack of this size will also give you adequate room to pack the rest of the 10 hiking essentials, plenty of snacks, and extras like a spare pair of Hilly Twin Skin socks.
- hiking poles! You’ll appreciate a extra helping hand of support not only on the long downhills, but on the arduously long and steep descents! Make sure to have rubber tips on the bottoms, and measure them correctly. Hiking poles should form a 90 degree angle with your arm, and you should always lengthen them 5-10 centimeters for downhills, and shorter them 5-10 centimeters for uphills. Cork handles are another plus for me, since my sweaty palms won’t slide and slip around on the plastic and rubber handles of other hiking poles. These Black Diamond hiking poles are the best out there and have unwaveringly supported me on many steep uphill climbs and summits, like the 50 U.S. state high point hikes, including the highest point in Colorado at Mount Elbert, California’s iconic Mt. Whitney, or the long and rocky state high point hike of New York at Mount Marcy!
- the right fabrics! You are going to hear some debate as to what type of layers to wear, but I have tried multiple types of fabrics, and here’s what I can tell you! Normally, I preach cotton avoidance, and when doing any kind of physical activity, I am all about breathability and moisture wicking. The Grand Canyon, however, is different, as it is a dry heat. This means that any perspiration can actually be beneficial if it is allowed to cling and cool. I have hiked in breathable, moisture wicking merino wool tanks, and I have hiked in cotton tanks. Cotton cools better. One of the best things I learned was that dipping a cotton tank in every stream crossing I came upon helped cool my core temperature down drastically. Not that synthetics or something similar and moisture wicking is going to wreck your hike, but I actually do recommend cotton for the Rim to Rim, and I recommend getting it wet. Many people opt to hike in sun shirts like this one, and that is definitely an option too, I just prefer the less restrained feel of a tank. Ultimately, practice wearing what you plan to wear on the Rim to Rim during your practice hikes, and figure out what is comfortable for you. Don’t try anything new the morning of the Rim to Rim hike. Another clothing item to note is as the temperatures at the top of the North Rim are often in the teens this time of year first thing in the morning, you may also want to bring along a warmer, breathable, outer layer for the first couple of miles of the descent down the North Rim on the North Kaibab Trail. Here are my favorite merino wool clothing item recommendations:
- head covering for sun protection
- snacks, snacks, snacks! Snacks are important for energy, electrolytes, and sodium replacement when hiking the Grand Canyon Rim to Rim. Every item of food you pack should serve a purpose. I recommend going with snacks that are compact, lightweight, easy to eat on the go, easily digestible, energy packed, and salty! Salty is important in this case as you need to carefully monitor your sodium replacement. Here’s what the inside of my day pack looked like in regards to food:
- tuna packets – super lightweight and compact, and a good source of protein
- almonds – great source of easy to snack on energy
- beef jerky – a good salty food option
- RX Bars– for a carb boost
- applesauce squeezable packets – this is a personal favorite of mine, because I mostly just love applesauce, but they are nice for a little moisture content, and they are something that has always been easily digestible for me, and compact and easy to eat on the go!
- fruit snacks – more of a psychological treat if I just need a quick dose of sweet
- squeezable peanut butter packets– always a great option for a quick energy boost
- NUUN tablets – I don’t always end up using these, but I always bring them if I feel the need for an electrolyte level replacement and boost
- Salt tablets – I have used these on hot trails, as a way to monitor and replace possible sodium level loss and electrolyte loss.
- Banana – helps prevent cramping and give me a potassium boost
- GU Energy gels – for a little extra boost of energy
- and finally, a good old fashioned sandwich! – I usually make at least 2 sandwiches, either peanut butter and jelly, or meat and cheese. They don’t take up much space, are lightweight, and are quick and easy to eat, but can be quite filling!
- next is a trail map! You will likely not have service on the North Rim at all, and possibly not on the South Rim until the last several miles. Both the North Kaibab Trail on the North Rim and the Bright Angel Trail on the South Rim are well marked, well maintained, and easily distinguishable, but you should still bring along a trail map, whether it is a traditional paper one, or a downloadable one from an app like AllTrails. If you plan to download, just be sure to do so before you start due to the lack of cell service once you get down into the canyon.
***Insider Tip: I have Verizon cell service, and I lose cell service pretty much immediately after descending the North Rim, but I do start to pick it back up on the South Rim just after passing Havasupai Garden Campground. It becomes pretty reliable around the 3 mile Resthouse.
- emergency communication device! As mentioned above, you won’t have reliable cell service for the majority of the Rim to Rim hike. In case of an emergency, an emergency device will provide you a way to signal for help. While I don’t think this is a necessary gear item, I recognize that many hikers feel more comfortable with one, especially if hiking solo.
The Rim to Rim Trails
Now that you know where you should start, where you should finish, and some of the basic details of hiking the Grand Canyon Rim to Rim in one day, let’s talk about trail details and get a “glimpse” of what you should expect on both the North Kaibab Trail and the Bright Angel Trail! (I will go into more detail on these 2 trails as that is my recommended route for 1st timers, but I will discuss the South Kaibab Trail briefly).

Overview of the Rim to Rim Trails (north to South)
Below you will find a Google Maps view of the entire Rim to Rim hike from North to South, via the North Kaibab Trail and the Bright Angel Trail. Included also are some helpful graphics to get a quick glimpse of what to expect on the Rim to Rim hike.
Map of the North to South route via North Kaibab and Bright Angel
Overview of the North Kaibab Trail
As detailed already, the clearly marked trailhead for the North Kaibab Trail is approximately a 45 minute drive from Jacob Lake, 20 minute drive from Kaibab Lodge, or a 5 minute drive from the North Rim Lodge. There is a water fill station, bathroom facilities, and parking available at the trailhead, but parking does fill up quickly! Also, expect potentially long lines for the bathroom and water fill station.
Considering this is a 24 mile long hike that you are completing in one day, you should be starting early anyways, by 6 am at the latest, but 4 am or 5 am is generally more advisable. This is where knowing your average hiking pace over long distances can be extremely helpful. It can help you determine when you should start, so that you can estimate a timeframe that will have you emerging on the South Rim by dusk (6:30ish pm) hopefully. My goal is always to try and finish a Rim to Rim hike before dark (although I always carry a headlamp for early morning starts as well as potential later finishes).
Another reason to start early is to also try and get through “the Box” by 10 am or close to, therefore beating out the hottest temperatures in this bottom portion of the canyon on the North Kaibab Trail. If you are worried about the heat, this is one of the best strategies to utilize to help: get through “the Box” before the temperatures really start to rise!
Dawn breaks right around 6 am on the North Rim, which is the latest you should be starting this Rim to Rim hike. Temperatures on the North Rim in October are likely to be in the 20’s or 30’s. You may wish to bring an extra layer for the start, but consider also what you are willing to carry with you on your person for the remainder of the 24 miles once it warms up. Personally, I usually opt to just tough it out for the first 30 minutes, because after that I am usually plenty warmed up and the sun is out.

If you start the Rim to Rim hike by 6 am at the latest, it will likely be light enough to see without a light source very soon. If you wish to start earlier, which is not a bad idea, you will want to bring a headlamp to see the trail.
North Kaibab Trailhead: Mile 0
The North Kaibab Trail starts off in blazing yellow dotted forests sprouting from the bases of stark white aspens, and to witness the North Rim in this way is truly stunning in this season. The North Kaibab Trail descends rapidly down, on a soft dirt trail that is very well established, though it can be a bit jarring at times as the trail has post steps embedded to protect against erosion, which means having to step down frequently on the descent.


Coconino Overlook: Mile 0.7
Within what feels like minutes on the trail, you will reach the breathtaking Coconino Overlook, the first panoramic opening in which to drink in your first true taste of the canyon experience. From here, the scenery begins to morph from aspen draped foliage to stark red rock canyon walls.

Supai Tunnel: Mile 2
About 2 miles down the North Kaibab Trail is the Supai Tunnel, a short rock tunnel carved into the cliff. There are restrooms and a seasonal water refill station available here. A little bit past Supai Tunnel you will cross the Redwall Bridge.


Roaring Springs Day Use Area: Mile 4.7 (Currently Closed)
2.7 miles past the Supai Tunnel, hikers will encounter Roaring Springs Day Use Area, a dainty water landmark, before continuing quickly on the descent towards the nearby Pumphouse Ranger Station. Roaring Springs is currently closed. No worries though – Manzanita Rest Area is just a few tenths of a mile past Roaring Springs.


Manzanita Rest Area: Mile 5.1
There are bathrooms and water at this scenic rest area, and regardless of which direction you are hiking, this is a great spot to take a break. If you are hiking North to South, it’s probably about time to fill up on water. If you are hiking South to North, you’ll probably want to break here before tackling the immediate and unrelenting climb up the North Rim immediately following Manzanita. This is one of the nicest spots to break on the entire Rim to Rim, so take advantage of its serene beauty! And don’t miss the message board!


Cottonwood Campground: Mile 6.5
After the Manzanita Rest Area, you will have about 1.4 miles to go before arriving at Cottonwood Campground. Cottonwood Campground is what I consider to be the first “landmark” that has emerged from the surrounding canyon walls and is out in the open at the bottom of the canyon. Keep in mind that camping here requires a prior permit. Cottonwood Campground also has restrooms, a seasonal water refill station, and an emergency phone. If you are getting low on water, top off here because there’s no more water until Phantom Ranch and Bright Angel Campground, and you’re about to enter “The BOX”.


Ribbon Falls: Mile 7.9
1.4 miles past Cottonwood Campground you will encounter the side trail to Ribbon Falls. This is an optional spur trail to see the falls, if you are ok adding an extra mile or so to your roundtrip, in addition to some route finding, bushwhacking, and potential small rock scrambling. The bridge to Ribbon Falls is currently out, which means it might take a bit of confusing, slow going time to find your way there and then make your way back to the North Kaibab Trail via the “social trails”. Ribbon Falls is stunning, but I would not personally recommend it to a 1st timer. It is added time and distance to a hike that will already push you to your limits, so save it for the 2nd go!
Besides, there are several smaller but easily accessible smaller “waterfalls” in the area that you can enjoy right off the trail!


If you choose to skip Ribbon Falls, then it is 7.2 miles of flat trail from Cottonwood Campground to the Bright Angel Campground at the Colorado River crossing. Don’t forget, this portion of the trail is referred to as “the Box”. The canyon walls begin to merge closer and close in, which can create those stifling temperatures. Exercise caution here. That being said, this was the part of the Rim to Rim hike that held the most surprise for me personally.
I had always imagined that the Rim to Rim hike looked like descending the North Rim, crossing straight over the Colorado River, and then going straight up the South Rim. I had pictured this hike shaped like the letter V. Not so, thanks to these 7 miles at the bottom between the Cottonwood Campground and the Bright Angel Campground.
*The BOX: Cottonwood Campground/Ribbon Falls to Phantom Ranch
While “the BOX” is not an “official” landmark on the Rim to Rim hike, you better be aware of where it is regardless. The BOX is considered to roughly begin around Cottonwood Campground / Ribbon Falls, where the canyon walls begin to converge in, and the trail becomes more closed in. Technically, the portion of North Kaibab that is open and exposed right after Cottonwood Campground is sometimes referred to the “Frying Pan”, before rapidly closing in as you continue into the Box. In the summer, this creates stifling heat and skyrocketing temperatures. The BOX (and adjoining Frying Pan) is considered one of the most dangerous sections when hiking the North Kaibab Trail to Bright Angel Trail, because it is considered one of the hottest sections.

So how do you handle “the Box”?
One of the best strategies is to be out of it by 10 am, when the temperatures can rise quickly (even in the spring and fall, but especially in the summer) and you begin to lose the shade of the surrounding canyon walls. This is another reason why it is important to consider an early morning start, so you can be through this portion of the hike by mid morning.


These 7ish miles that trace along the bottom of the canyon are a fascinating mixture of ecosystems and environments, that are not even visible from above. Towering cliff walls, striated canyons cut by erosion and the small trickling of streams, and even the surprise lush spots of verdant vegetation! If you have ever wanted to experience that surreal moment of looking up at the walls of the Grand Canyon set to a backdrop of blue sky, you will have ample opportunity to do so on this stretch.
These 7ish miles from Cottonwood Campground to Bright Angel Campground are almost all flat, with the occasional gentle slope up or down. There are several bridge crossings, and only one very brief uphill climb before reaching Bright Angel Campground.

Phantom Ranch / Bright Angel Campground
Phantom Ranch / Bright Angel Campground: Mile 13.7
Coming from the North, you’ll pass Phantom Ranch and its Ranger Station and Canteen first, followed by Bright Angel Campground. Bright Angel Campground is reached just prior to the Colorado River crossing to the South Rim side and is adjacent to the Phantom Ranch Ranger Station. You will pass Phantom Ranch before technically arriving at the main heart of Bright Angel Campground. Phantom Ranch Ranger Station is a year round station, and contains a first aid station and emergency phone.
It is surprisingly green at Bright Angel Campground, like a little oasis at the bottom of this otherwise desert canyon setting. If you weren’t doing a day hike of the Rim to Rim, you can lodge here overnight, but that requires a very difficult to secure advance reservation. Otherwise, it makes for a very good break spot.


There is a gentle stream, Bright Angel Creek, that winds through Bright Angel Campground, surrounded by spots of tall green reeds and shady trees. There are plenty of spots to cool off, eat a snack, and take a short breather before tackling the following uphill. You can even wade into the stream here! I like to bring a second pair of Hilly Twin Skin socks, and at this point, I strip off the old pair, soak my feet in the ice cold Bright Angel Creek for a few minutes, and then swap on a my new fresh pair of socks!
*Insider Tip: so what snacks exactly are in my “lunchbox” for a Rim to Rim hike? Here’s a few of my favorites:
- peanut butter and jelly sandwich
- meat and cheese sandwich
- RX bars
- beef jerky / beef sticks
- olives
- chips
- squeezable applesauce packets
- NUUN tablets
- Trail Mix
- Salt Tablets
- Coconut Water
- Pickle Juice
Don’t miss the year round water refill station, restrooms, and canteen store at Phantom Ranch that sells supplies, small snacks, and drinks. I highly recommend a cup of their lemonade! Be sure to bring cash for this store and for the lemonade!
Immediately after passing through Bright Angel Campground is the massive bridge crossing at the Colorado River! Arguably one of the most impressive sights you can see hiking in your lifetime! As beautiful as it is, do NOT under any circumstances approach its shores or try to enter the river. The currents are dangerous, and the water icy cold. Stay on the bridge to cross safely over!


Recap of the North Kaibab Trail
Length: 14 miles from the North Kaibab Trailhead to Bright Angel Campground
Rating: Difficult
Almost entirely downhill or flat, with lower morning temperatures and more shade from cliff walls. Moderate rating due to length of 14 miles.
Elevation Loss: 5,761 feet


Overview of the Bright Angel Trail
After crossing the Colorado River, you will then begin your ascent up the Bright Angel Trail and the South Rim side of the canyon. From Bright Angel Campground to the top of the South Rim at the Bright Angel Trailhead, be prepared for 9.5 miles and 4,380 feet of elevation gain!

Immediately after crossing the Colorado River bridge, you will hang a right to continue up the Bright Angel Trail. Again, I do not recommend ascending up the South Kaibab Trail, due to the steepness and lack of water.

 Getting ready for the Bright Angel Trail
 Continuing on the Bright Angel Trail after the Colorado River crossing

Pipe Creek Beach / River Resthouse: Mile 15.5
There is a brief sandy section in the trail here, as you trace along a vista overlooking the Colorado River to your right. The first landmark on the Bright Angel Trail going up is the River Resthouse, 1.8 miles from Bright Angel Campground. There are toilets and an emergency phone here, but no water station. This is also where you will see signage for “Pipe Creek Beach”. Be warned though, that you should not actually treat this landmark like a typical beach. Do not go wading into the Colorado River here, it is too dangerous. Keep plugging onwards and upwards toward Havasupai Garden Campground.
After this, brace yourself for what some consider to be one of the hardest parts of the hike from an environmental viewpoint, the portion of the Bright Angel Trail that climbs up several switchbacks en route to Havasupai Garden Campground, lovingly referred to as the Devil’s Corkscrew. The climbing, sun exposure, and heat are amped up here on the 5 miles from Bright Angel Campground to Havasupai Garden Campground.

The challenge of any Rim to Rim hike is that even a terrific pace, you will likely hit this portion of the hike near afternoon high heat. And there is minimal shade and high exposure here, compounded with temperatures that are going to be climbing even in October. Some choose to wait it out at Phantom Ranch until later in the day when you get more shade, but I usually just opt to continue on while taking full advantage of the streams that I can soak my clothes in. Just keep in mind that you will receive a nice, shaded break once reaching Havasupai Garden Campground. You just have 5 miles to go between Bright Angel Campground and Havasupai Garden Campground.
There are also no water refill stations again until Havasupai Garden Campground, so it is IMPERATIVE that you have a full water source before leaving Bright Angel Campground, especially since this is the hottest part of the day.
As you take on the heat and sun exposure, listen to your body! Wear a hat and sunscreen. Eat some salty snacks or take a salt tablet, replace electrolytes, and drink plenty of water! Take short breaks when you do encounter a shady spot. Do not push yourself too hard here! You will pass several small trickles of streams ascending up to Havasupai Garden, and it is a good idea to possibly wet your hat and/or cotton shirt, or pour some of the cold water on your head and shoulders whenever you can. Wearing a cotton shirt is great for this suggestion, because the cotton will “cling” to that coolness in the water, and help bring your core temperature down.

Bright Angel Campground to Havasupai Garden Campground is 5 miles total. To recap, you will cross the Colorado River, traverse the sandy “beach” portion that parallels the Colorado River, and then pass the River Resthouse and Pipe Creek Beach. From River Resthouse to Havasupai Garden Campground is 3.2 miles, and once you push through this portion of full exposure climbing and reach Havasupai Garden Campground, the worst of this portion of the hike will be over. Possibly the worst part of the whole Rim to Rim hike, depending on who you ask. Once you reach the switchbacks of the last few miles of the hike on the South Rim wall, you will likely be in more shade, and dropping temperatures.
***some suggest that it is worthwhile to consider waiting out the hottest part of the day before passing through the Devil’s Corkscrew climb up to Havasupai Garden Campground. In this case, there can be some setting shade starting around mid afternoon, so if you feel unsure of the scorching temperatures, and feel confident in your ability to complete the hike efficiently afterwards before sunset, it is something to consider.
Right before reaching Havasupai Garden Campgrounds, you will pass through some rocky tunnel like parts of the trail, shouldered on the right hand side by the gentle Garden Creek. It is quite the welcome relief at this point!

Havasupai Garden Campground: Mile 18.7
Havasupai Garden Campground has a year round water refill station, year round Ranger Station, first aid station, emergency phone, restrooms, and a plethora of shady break spots. I would recommend re-cooping here for a short break, in order to re-hydrate and refuel up.

Shortly after Havasupai Garden, the encroaching late afternoon does begin to blanket the trail with more shade from the surrounding canyon walls, which will be most welcoming. There will be a section of trail that is relatively flat and in the sun for a short time after Havasupai Garden, but once you start the real climb up the South Rim, you will be largely in welcome shade. And you will know when you start the “real” climb out! From Havasupai Garden Campground to the top of the South Rim and the Bright Angel Trailhead is 4.5 miles and 3,060 feet of elevation gain, so prepare yourself!


Between Havasupai Garden Campground and the top of the South Rim, there are two Resthouses that you will pass, each with a seasonal water refill station. (These 2 Resthouses have seasonal water refill stations, and it is not guaranteed they will have water, so refill accordingly at Havasupai Garden Campground).
After Havasupai Garden Campground, you will notice the grade of the ascent changes and becomes steeper, though the terrain of the trail itself remains soft dirt and non-technical. Ascending up from this point is largely traversing switchbacks to the top, and the grade of steepness is quite challenging and consistent, and there really are no flat spots from here to be expected. These switchbacks up the South Rim wall are referred to as “Jacob’s Ladder“.
3 Mile Resthouse: Mile 20.2
1.5 Mile Resthouse: Mile 21.7
There is a 3 mile Resthouse and seasonal water refill station 3 miles from the top, and then a 1.5 mile Resthouse and seasonal water refill station 1.5 miles from the top! I would recommend using one, or both, of these bathroom facilities, even if you don’t necessarily feel like you need to right at that moment. The reason is that this portion of Bright Angel Trail becomes very heavily trafficked with Rim to Rim hikers coming up slowly, and tourists and day hikers coming down just a couple miles from the top of the South Rim. If you need to make an impromptu bathroom stop coming up these last couple of miles, you will have ZERO privacy!
Give yourself grace on this portion, as your body will be running on fumes by now, and there is no shame in taking it slow and steady on the steep grade. Even the most experienced and fit hikers out there can often slow to a mile an hour pace for these last couple miles. You will likely “leapfrog” other hikers and groups on your way out, as you trade taking breaks and pushing on up the switchbacks. Make a game out of it and enjoy the camaraderie as a way to take your mind off of the climb!

There are 2 brief unnamed cliffside “tunnels” between 1.5 Mile Resthouse and the Trailhead, with the second one being about half a mile from the finish, so that should be your last welcoming landmark before concluding the Rim to Rim hike at the Bright Angel Trailhead at the top of the South Rim!


Bright Angel Trailhead: Mile 23.2
The sun sets in October starting around 6 pm, with complete darkness arriving by 7 pm. With a 6 am suggested start time, this will give you about 13 hours to hike without the aid of a headlamp. If that timeframe makes you unsure, then it might be best to pack a headlamp and give yourself a way to hike past 7 pm if necessary. As night approaches, in the waning daylight of the final switchback, you will be able to see the lights of the South Rim lodges lighting up the South Rim and the Bright Angel Trailhead!


Recap of the Bright Angel Trail
Length: 9.5 miles
Rating: Difficult
This portion of the trail has excessive heat, exposure, and steep uphill grades and elevation gain more than 4,000 feet. It is also considerate in length at 9.5 miles to the top.
Elevation Gain: 4,380 feet


Overview of the Rim to Rim Trails (South to North)
The other option for hiking Rim to Rim is to hike South to North. This is typically done by descending the South Kaibab Trail and ascending the North Kaibab Trail.
- Distance: 21.3 miles roundtrip
- Elevation Gain: 5,760 feet
- Rating: Difficult

I’ve already covered this, but here’s a quick review on the pros and cons of Bright Angel vs. South Kaibab. While I always recommend hiking North to South for 1st timers in particular, if you do choose South to North and are debating which South Rim corridor trail to descend, here’s a review.
For South to North hikes, I would recommend departing on South Kaibab, mostly because of the superior views. Keep in mind though, there are a few important things to note about starting on the South Kaibab Trail.
- It is shorter, which also means a little bit steeper. Of all 3 corridor trails, I believe South Kaibab is the roughest to descend on the knees, so you will need to be mindful of your downhill training and your pace.
- There is no water on South Kaibab. Which is why I’d never recommend hiking up South Kaibab unless you’re hiking in the cooler months or at night.
- Private vehicles cannot access the South Kaibab Trailhead. Your options are to:
- take the free park shuttle from Grand Canyon Village (which only runs at certain times of the day)
- get dropped off at the gate and walk about 3/4ths of a mile to the trailhead
- or take the taxi from anywhere in Grand Canyon Village or Tusayan and get dropped off right at the trailhead. But know that you cannot reserve the taxi and there may be a wait.
I still think leaving on South Kaibab is the best option, but if for any reason you don’t like the logistics, or you are worried about the slight extra steepness and your knees, you can consider descending on Bright Angel.
Overview of the South Kaibab Trail
The best thing about the South Kaibab Trail has to be the views. If you are lucky enough to catch a sunrise on South Kaibab, the world stands still for a moment. It will probably be the highlight of your hike.
One thing to keep in mind is that the South Kaibab Trail is not only used for South to North Rim to Rim hikes, but also for Rim to River hikes. For more in depth details on a Rim to River hike, visit this sister post on hiking Rim to River in one day. For a typical Rim to River hike (South Kaibab – Phantom Ranch – Bright Angel), I do recommend using the South Kaibab Trail to start. The Rim to River hike is also a great alternative for those not ready for the full Rim to Rim, or those looking for a logistically easier Grand Canyon hike to plan.

South Kaibab Trailhead: Mile 0
Once again, you can’t get here unless you take the park shuttle from Grand Canyon Village, get dropped off at the gate and walk ~ 3/4ths of a mile to the trailhead, or take the taxi and get dropped off at the trailhead. Once there, you’ll find water and bathrooms. If you don’t have water yet, be sure to fill up here as you won’t have another chance until you reach the bottom.


Ooh Aah Point: Mile 0.9
The first viewpoint! Many say this is the best, but honestly I think all the viewpoints along South Kaibab are equally stunning. So if it’s still dark when you hit Ooh Aah, don’t worry about it!

Cedar Ridge: Mile 1.5
Another viewpoint, and bathrooms too. Some early hikers may start to see the sunrise here, and there’s no better place to witness it! Because the plateau at Cedar Ridge is very open, sometimes it’s hard to know where the trail continues. Just keep going straight to find the trail!


Skeleton Point: Mile 3
The viewpoints and views are never ending as you proceed down South Kaibab, with another one at Skeleton Point! Next up is the last named landmark before reaching the bottom – the Tipoff! And you can even just begin to make out the Colorado River far below from this vantage point!


The Tipoff: Mile 4.5
There are bathrooms here and a small shade structure. I like to break here for a quick bathroom and snack break, and also to shed any necessary layers if the sun is out and the temps are warming. After the Tipoff, you’re next stop is the bottom and the Colorado River, so enjoy this last big stretch of descent. You’ll have about 2.5 miles from the Tipoff until reaching Bright Angel Campground.


Before reaching Bright Angel Campground, just after crossing the Black Bridge, you’ll pass a row of informational signs that I highly suggest you stop and read. I love that these are placed here. Also, when you arrive to Boat Beach on the left side of the trail, before reaching Bright Angel Campground, there is a water spigot. Sometimes I like to stop and refill water here rather than wait in the lines that are sometimes at Bright Angel Campground. The water spigot may not be as noticeable, but don’t worry if you accidentally miss it, there’s another chance just a few minutes away in Bright Angel Campground.


Bright Angel Campground: Mile 7
You’re on the North side now! While Bright Angel Campground is where I normally like to break on a North to South hike, I generally like to keep going and break later if I’m doing a South to North hike, as I still have a good majority of the hike to go. If warmer temperatures are an issue, I would advise to keep hiking in order to clear the hottest parts at the bottom, like the Box and the Frying Pan, as early as you can, as take a longer break after Cottonwood Campground.
From here on, the trail report on the North Kaibab Trail basically mimics the North Kaibab portion of my North to South trail report. However, the mileage waypoints are obviously different, so I will report those, as well as some additional pictures.
Before leaving Bright Angel Campground and Phantom Ranch, I’d recommend filling up with water, since there is no more water until you reach Cottonwood Campground, about 7 miles away, and typically the hottest and most exposed portions of a South to North Rim to Rim. If you already filled up with water at the spigot on Boat Beach, then you can just make a quick bathroom stop here. And if you want to make one additional stop, be sure to check out the lemonade from the Phantom Ranch canteen, if it’s open (opens at 8am).


The BOX: ~ Mile 7.5
There’s no “official” starting point of the BOX, but it pretty much begins just past Phantom Ranch on a South to North hike. The BOX can be absolutely breathtaking and beautiful with its close walls and plentiful streams, but it is also potentially lethal. Have a plan in place for handling the heat, whether it’s proper timing coupled with proper pacing, monitoring your salt and electrolyte levels, wearing the right fabrics, etc. Better yet is to combine all of the potential strategies.
Aim to be through the BOX (and hopefully the Frying Pan as well) by 10am-ish, when you’ll still catch the shade in the BOX, and the temperatures will be less brutal. This timeframe is what makes a North to South hike somewhat easier as far as starting time, but it is completely doable to achieve on a South to North hike as well. You will probably just want to have an earlier morning departure from the South Kaibab Trail, if you’re hiking in the warmer months, which is pretty much May – September. You will also need to know your overall average pace in training, so you can determine how long it might take you to hike from the South Kaibab Trailhead to Cottonwood Campground (about 14.8 miles) in order to clear this portion as safely as possible. For example, if you’re hiking about 3 mph on downhills and flats, you should expect to be able to hike those 14.8 miles in about 5 hours. If you’re aiming to be through them by 10 am, a 4 am start could work if you’re allowing for breaks as well. It all boils down to knowing what your training hikes looked like so you can know how to replicate and anticipate on the real deal.
Plan on keeping your guard up until you reach Cottonwood Campground. While the BOX does not technically last the entire stretch until Cottonwood Campground, it is adjoined to the open and exposed “Frying Pan” as its come to be known. And it’s not really any better than the BOX. So while the walls of the BOX do open up, that exposure along the bottom can be dangerous in full sun and hot temps. Your first sign of relief will be Cottonwood Campground, with even more true potential relief coming at Manzanita Rest Area.
While you’re hiking along the bottom between Phantom Ranch and Cottonwood Campground, be in your mental and physical game and keep your awareness level up. Put into practice your heat strategies and training, because this is where it can count the most. Don’t take unnecessary risks.

Ribbon Falls / Cottonwood Campground: Mile 14.8
You’ll pass the turnoff for Ribbon Falls just prior to Cottonwood Campground. One advantage of a South to North hike is it’s actually easier to detour to Ribbon Falls from this direction. Though it’s still important to note that since the bridge is out, it involves steam crossings, bushwhacking, and some route finding. Depending on the person or group, it may eat up an hour of time, or even more. It’s beautiful, but I’d use caution if you’re a first time hiker, as the most challenging part of a South to North hike is yet to come. You may need to conserve time and energy, but ultimately it’s a personal call. For those that skip Ribbon Falls, you can spot it in the distance from the North Kaibab Trail. And there’s a couple smaller waterfalls right off the trail in the vicinity of Cottonwood Campground that you can enjoy.
Once you’ve reached Cottonwood Campground, you’ve basically made it through what is considered the most potentially dangerous portion of the Rim to Rim hike – the Box and the Frying Pan. There’s water and bathrooms here as needed.
It’s just a short ~ 1.4 mile jaunt from Cottonwood Campground to Manzanita Rest Area, which is my preferred spot to take my big break on a South to North Rim to Rim hike.
Manzanita Rest Area: Mile 16.2
Manzanita Rest Area sits at the base of the North Rim wall. The big, unrelenting climb starts immediately after leaving Manzanita. Which is why I like to take a big meal break here at the picnic tables in the shade. There’s water and bathrooms also, which I would definitely recommend taking advantage of before heading on. And don’t miss the message board in the middle of the rest area. Once you leave Manzanita, it’s a straight, no breaks, grueling climb up and out.
After leaving Manzanita and continuing up the North Kaibab Trail, you’ll pass the landmark of Roaring Springs. This towering cliff is graced by the springs cascading down its side, which actually is the source of all the water pumped along the inner corridor trails. The Roaring Springs Day Use Area is currently closed, so the next big landmark you’ll be passing is the Redwall Bridge in just over 2 tough miles.

Redwall Bridge: Mile 19
Only 2 more miles to go. Enjoy the brief flat crossing of Redwall Bridge as it extends over one of the many canyon chasms.


Supai Tunnel: Mile 19.6
Just a little over half a mile later you’ll reach Supai Tunnel, edging even closer to the top of the North Rim. There is a seasonal water station here and bathrooms, the last of either until you reach the trailhead. A little more than a mile and a half to go until you reach the top, full of ever thickening forests, ever redder canyon walls, and one last landmark before the finish – Coconino Overlook!


Coconino Overlook: Mile 20.8
When you reach Coconino Overlook, you should also get a big morale boost as you are almost to the top! It’s the last landmark before the finish, and it’s surrounded by beautiful forest, canyon walls, and my favorite – the aspen trees!


The North Kaibab Trail: Mile 21.3
And then you’re finished, often in complete silence, but that’s part of the appeal of the North Rim. There may be some others at the trailhead, but it might also be completely empty. The North Rim is known for being less touristy, less busy, and more peaceful, and you’ll probably feel that immediately upon exiting the trail, as you revel in the accomplishment of a South to North hike, which includes even more impressive elevation gain than a North to South!
If you are hiking from South to North, know what your plan is from this moment on, as that can catch some people unaware. The nearest lodging is about 2 miles to the Grand Canyon North Rim Lodge, and even further to Kaibab Lodge and Jacob Lake Inn, which are both pretty much out of walking distance for the average person following a Rim to Rim hike. Some people do hike those 2 miles to the lodge, others have someone waiting to pick them up, and others arrange to catch the shuttle back to their lodging for the night.
Whichever route you go, make sure you have a realistic plan! And make sure that you have lodging for that night on the North Rim. Never attempt to finish a South to North hike in time to catch an afternoon shuttle back to the South Rim! That kind of pressure can ruin a trip, and it also assumes that nothing will go wrong.
Water Fill Stations and Bathrooms on North Kaibab, Bright Angel Trail, and South Kaibab Trails
Water fill stations and bathrooms are critical to know about both trails, the North Kaibab and Bright Angel! Here’s a quick reference for planning purposes. You can also check out the helpful graphics with corresponding bathroom and water icons below for a quick visual!
North Kaibab Trail:
- North Kaibab Trailhead – WATER (and bathrooms)
- Supai Tunnel – seasonal WATER (and bathrooms)
- Roaring Springs (currently closed)
- Manzanita Rest Area – WATER (and bathrooms)
- Cottonwood Campground – WATER (and bathrooms)
- Bright Angel Campground – WATER (and bathrooms)
Bright Angel Trail:
- River Resthouse – bathrooms
- Havasupai Garden Campground – WATER (and bathrooms)
- 3 Mile Resthouse – WATER (and bathrooms)
- 1.5 Mile Resthouse – WATER (and bathrooms)
- Bright Angel Trailhead – WATER (and bathrooms)
South Kaibab Trail:
- South Kaibab Trailhead – WATER (and bathrooms)
- Cedar Ridge – bathrooms
- Tipoff – bathrooms
- Bright Angel Campground – WATER (and bathrooms)
South Kaibab Trail Overview
You made it! I hope that this guide provides every reader the knowledge and confidence to brave hiking the Grand Canyon Rim to Rim hike! It truly is a once in a lifetime experience, and the reward is enormous for those willing to put in the time and effort that this hike deserves! There is no moment quite like witnessing this natural wonder from its deepest depths to its highest plateaus! Complete the Rim to Rim hike at the Grand Canyon, and join an elite group of strong, determined, and committed hikers!

If you are ready to start planning your Rim to Rim hike, follow this CHECKLIST:
- Pick Your Dates
- Choose Your Direction and Corridor Trails
- Book Your Lodging/Transportation/Shuttle
- Start Training (use a plan like this Rim to Rim Training Plan)
- Get Gear (use this Rim to Rim Packing List)
- Let Someone Know Your Plans (you can use a handy Hiking Safety Contact Form like this one)
- Take Care of “Last Minutes”: check weather, backcountry updates, and confirm water sources on the trail (sometimes water sources are shut off – NPS will report this on their website!)
- Hike!
>MORE: Check out my entire collection of all things active travel, including R2R training resources! Get all the training calendars, checklists, trackers, and handy printables you will need to tackle any of your active travel goals!
How Much Would 4 Months of Accountability and Coaching Mean to You?
Did you know that I offer 1:1 Coaching for the R2R hike?
Need Expert Assessment on Whether You Are Ready for Your R2R Hike?
Take a look, and COMPLETE THIS INTEREST FORM to get started today!
Additional Grand Canyon Hiking Resources:
- A Complete Rim to Rim Training Plan
- Step by Step Rim to Rim Training Calendar PDF
- Rim to Rim Packing List
- How to Hike Rim to River in One Day
- Bright Angel vs South Kaibab
- How Long Do I Need to Train for a Rim to Rim?
- The Best Ways to Fuel and Hydrate for a Rim to Rim
- The Toughest Parts of a Rim to Rim
- How to Handle the Heat in the Grand Canyon
- Get to Know the 3 Inner Corridor Trails in Grand Canyon National Park
- Guide to the Widforss Trail on the North Rim of Grand Canyon
Have you completed a Rim to Rim hike at the Grand Canyon? Or have another favorite memory of the Grand Canyon? I would love to hear about your experience and any tips you picked up from your treks!

Curious how a native Texan like myself trained for a hike like the Grand Canyon Rim to Rim hike? Part of my training involved this at home “choose your own path” customizable strength training workout! It’s simple, straightforward, targeted, and can be done from anywhere!
And don’t forget to snag this example 16 Week Rim to Rim TRAINING CALENDAR!
PIN for LATER!

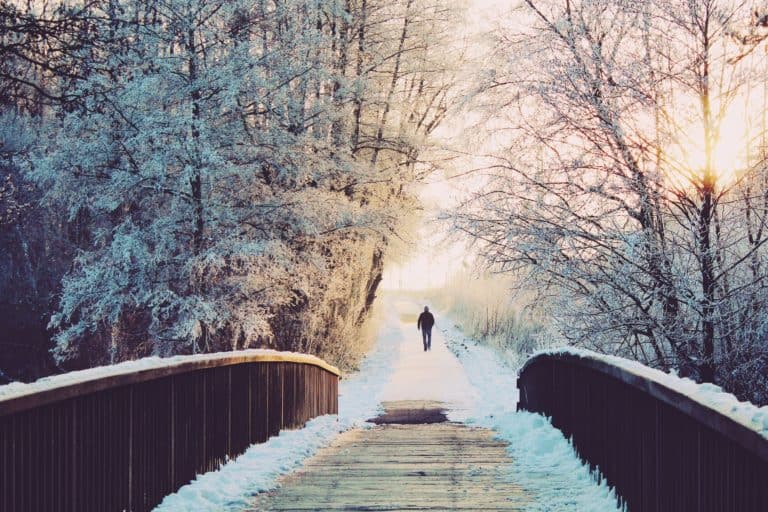

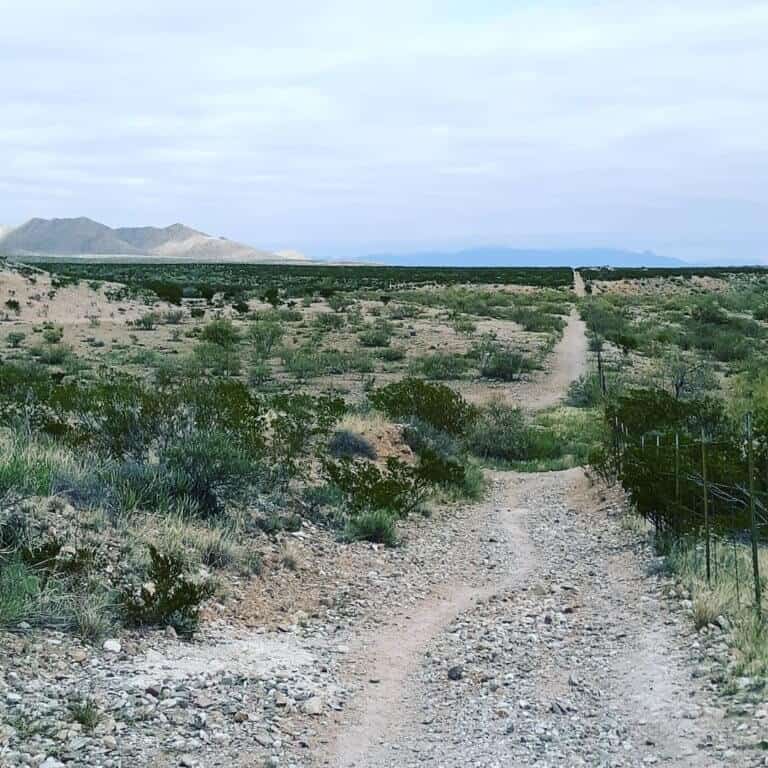


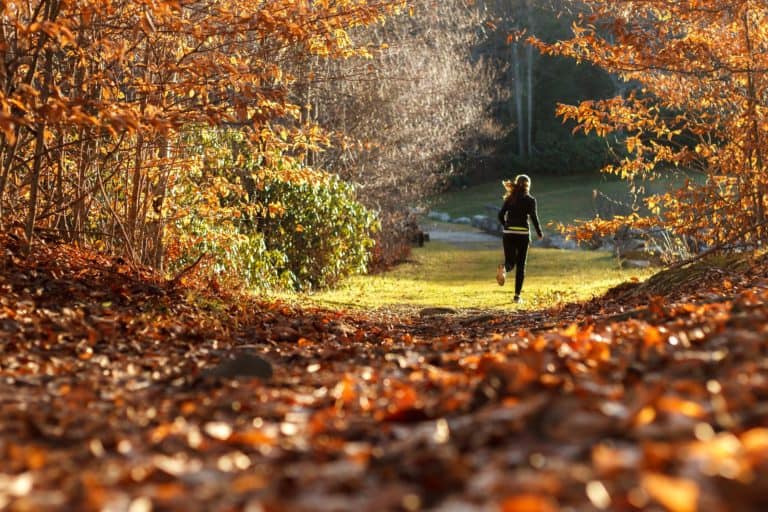
Greetings: Would you know of anyone who might be willing to lead an older but fit hiker on a rim-to-rim walk, with 2 nights spent at the base of the canyon for recuperation at the facility at the base of the south rim prior to taking the Bright Angel Trail up to the South Rim? (This rather than attempting a one day Rim-to-Rim trip as you’ve done multiple times? I’ve done the South Rim trip to the base of the canyon via the South Kaibab Trail & stayed overnight in the past before ascending via the Bright Angel Trail, though this was done during January. This is something I have long hoped to accomplish & am willing to spend some extra money for a guide if this is at all possible. Thanks in advance for any suggestions you might be able to offer. Bill
Hi Bill,
There are several options for guided hikes in the Grand Canyon, including multi day trips, that you can find by doing a simple Google search of Grand Canyon guides. I have not used any of these guides personally so I cannot recommend a particular one over another, but good luck on your future Grand Canyon hiking, no matter which way you choose to go about it!
Hi Kristen,
Thank you so much for sharing your experience in such a detailed fashion. We are a group of 5 getting ready to hike rim-to-rim in mid-Sept., and your post has been of great help. One question- how much time does it take to get from Phantom Ranch to the Bright Angel trailhead? You have mentioned 1.5 miles to River Resthouse but I presume that is from the Bright Angel trailhead?
Thanks,
Jas
Hi Kristen,
One more Q- I understand we do not need a permit for the one-day R2R hike but is there a separate entrance fee that needs to be paid? If so, do you know if there is a way to get it online, in advance? I called the nps office and the Grand Canyon office but I am unable to get a human to speak with me!
Thanks,
Jasrine
Thank you for very detailed info on Rim to Rim Hike . I was planning to do one day Hike and after reading your article , I Changed my mind .
I have done pikes peak in two days and half marathon in less than 3 hours and can walk 10-14 miles on weekend off and on . But seems None of this is enough.
Live in Houston and can’t find elevation except on treadmill .
Hi Sandhya,
It sounds like you have a similar background as me, with other big hikes and long distance running, which is a great foundation for hiking Rim to Rim. I also have faced the challenge of finding decent elevation, as I live in the Fort Worth area. Sometimes you have to get creative, and a treadmill can still help too, when inclined. Is there somewhere you can run stairs, like a stadium or stairwell? Are you doing exercises for leg strength? Are there any decent hills near you that you could run repeats on? Is there a trail you could find with a couple hundred feet of elevation at least, and do loops? These are all things I have had to consider too when preparing for the Rim to Rim. I think with your background you can still attempt Rim to Rim in one day!
Hi Kristen,
The question I have for you is that when you say the North Rim doesn’t open until May 15th, does that mean you literally can’t hike, I was hoping to do it in late April or early May. Thank you for your very detailed write up, it was very helpful.
Matt
Hey Matt, you can still do a R2R2R hike if you go South – North – South. The North Rim facilities, roads, etc, aren’t open until May. Basically while the North Rim is closed, you can still hike if your arrival and departure points are the South Rim. Hope that helps!
Your r2r in one day guide for first timers is great. I’m traveling to do this hike in late September and have been using your guide for months to prepare. I feel like I’ll be as prepared as I can be thanks to you sharing your knowledge . Thank you!
So excited to hear this Spike! I love knowing people are out there getting ready for the R2R, it is a once in a lifetime experience and I hope you enjoy it to its fullest, the struggle and all! Late September is coming up, you’re almost there! I’d love to hear how the hike goes for you~