
Your Complete Rim to Rim Packing List
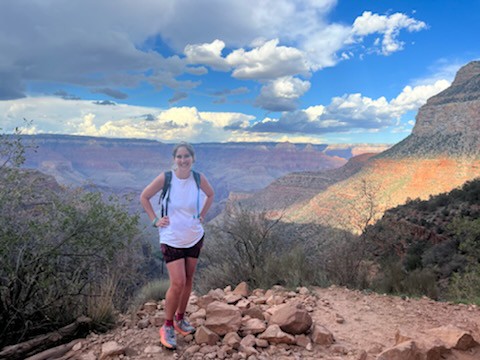
The Grand Canyon’s Rim to Rim hike is easily one of the most exhilarating hikes in the country, and one of the biggest accomplishments you can achieve in your hiking life. But it is also a hike that deserves the utmost respect and preparation, and a major part of that preparation is making sure that you have everything you need on your Rim to Rim packing list!

Disclosure: Below are some affiliate links-these are all products I highly recommend. I won’t make any recommendations on this page that I haven’t tested or personally used! Enjoy this Rim to Rim packing list guide!
Table of Contents
Building Your Rim to Rim Packing List
This guide includes:
- Tips for your Rim to Rim packing list
- Quick Links to Recommended Gear
- The Importance of Each Item of Recommended Gear
- Related Articles for Completing a Rim to Rim hike
Before getting into the details of building your own Rim to Rim packing list, there are a few important things to keep in mind:
- this Rim to Rim packing list is intended for DAY HIKES!
- this Rim to Rim packing list should not be the only part of your planning – you MUST TRAIN PROPERLY for a Rim to Rim hike!
- these are recommendations, but you should always practice with your gear before attempting a Rim to Rim hike – know what works for YOU!
- do NOT try or use any new gear the morning of your Rim to Rim hike! Know what works for you based on PREVIOUS EXPERIENCE, whether it is the recommendations listed below, or something else!
- familiarize yourself with the Rim to Rim hike itself IN DETAIL, in addition to completing your Rim to Rim packing list
Recommended Quick Links for Your Rim to Rim Packing List:
- Trail Runners: HOKA One One Speedgoats
No products found.
- Socks: Hilly Twin Skin socks
No products found.
- Water Hydration System:
No products found.
No products found.
- Daypack: Camelbak Helena 20 Liter Daypack
(Make sure you have plenty of carabiners attached to your daypack also)
No products found.
- Environmental Protection:
-
- Sunscreen
- Sunglasses
- Hat
No products found.
- Snacks:
-
- Sandwich
- Beef Jerky
- Trail Mix / Nuts
- Tuna Packets
- Applesauce Pouches
- Squeezable Peanut Butter
- Honey Stinger Waffles
- GU Energy Gels
- Banana
- Carrots
- RX Bars
- NUUN Tablets / Electrolytes
No products found.
No products found.
No products found.
- Emergency/First Aid Kit:
No products found.
No products found.
- The Right Layers:
-
- Non Chafing Shorts or Leggings
No products found.
- Navigation:
No products found.
No products found.
Emergency Shelter:
- (Another option is a SOL Bivy for emergency shelter)
No products found.
- Personal Items:
-
-
- Cash for Phantom Ranch
-
No products found.
Below is a summary of the recommended gear items for a Rim to Rim packing list

>>>MORE: Want this handy Rim to Rim packing list as a handy digital download? Grab it HERE!
The Importance of Your Rim to Rim Hike Packing List Items
If there was ever a time to take gear preparations seriously, this is the hike! You can’t switch out your gear, or wish you had brought something else along, once you’re sitting at the bottom of the Grand Canyon 14 miles into your Rim to Rim hike! Here’s what you absolutely MUST have on your Rim to Rim packing list to responsibly hike the Rim to Rim, and WHY!
- footwear! When you hear that there is almost 4,500 feet in elevation gain climbing out on the South Rim, that may lead you to think that hiking boots might be best, but I actually recommend trail runners for this hike, and here’s why. I have hiked in both hiking boots and trail runners, and I believe that the Rim to Rim hike is more suited for trail runners.
Though there is significant elevation, the actual state of all 3 corridor trails, the North Kaibab Trail (North Rim), the South Kaibab Trail (South Rim) and the Bright Angel Trail (South Rim), are very well maintained and not aggressively uneven, rocky, or “rooty”. These trails are relatively “soft” and mostly composed of gentle sand or dirt trails. While hiking boots are better for gripping and stabilizing on dicey, uneven, and unforgiving trails, the Rim to Rim hike does not encounter this type of terrain, therefore rendering hiking boots unnecessary in my opinion.
What I do think is waaaaaaaaaay more beneficial in this case, is to wear a lighter, quicker, trail runner! Trail runners still have grip and traction for the uphill and rare rough spot on the Rim to Rim hike, but the huge advantage is that trail runners are lighter, quicker, and a little less clunky than hiking boots. This is huge when you are talking about hiking 24 miles in a day quickly and speedily. Also, if you go with a super cushioned trail runner like these HOKAS, your feet will definitely thank you by the end of this grueling hike!
- footwear again! This time I am talking about socks! The condition of your feet will only be as good as the condition of your socks. 24 miles can wreak havoc on your feet if you do not have proper socks. The best thing you can do is surround your feet with a superbly breathable sock that will help proactively prevent blister development. I used to get blisters all the time on my long hikes and runs, until I discovered Hilly Twin Skin socks. The “twin skin” layers help to prevent the friction that causes blisters. Haven’t had a single blister since switching to Twin Skins. Be sure to pack a second backup pair that you can change into in the event of sand or dirt overload, or accidental soaking at one of the multiple stream crossings along the way on the Rim to Rim hike.
- water, water, water, water, water, water, water, water! Have a way to transport at least 3 liters of water on your person. There are multiple water filling stations along both the North Kaibab Trail on the North Rim and the Bright Angel Trail on the South Rim (more on Bright Angel than North Kaibab), but it is critical that you bring at least 3 liters at all times, as there are some stretches of several miles without a water refill station. I recommend hiking with a 3 liter water hydration bladder system like this Platypus model, which I love because the wide mouth makes it easy to fill and clean, and this form of transportation system allows you to hydrate on the go. And this hike is all about speed and efficiency. When it comes to water hydration bladders, be sure to test your bladder out before starting off to make sure there are no leaks. And on this hike, it is also not a bad idea to bring a portable, compact filter like this Lifestraw I personally love, because there are multiple natural water sources you will encounter on the Rim to Rim hike, in case of an emergency. Lifestraws are lightweight, compact, and easy to use, so there really is no detriment to packing on in your day pack as a backup water hydration system. You can even get a Lifestraw hard sided water bottle, or a Katadyn soft sided, collapsible BeFree, both with the internal filters, so you can fill up and immediately start hydrating straight from the water bottle!
- a day pack! A mid sized day pack, like the Camelback Helena model that I use on all my day hikes, is best for hiking the Grand Canyon Rim to Rim in one day. It comes with a 2.5 liter water bladder included, but a 3 liter water hydration bladder easily fits inside as well, which is what I personally use. A day pack of this size will also give you adequate room to pack the rest of the 10 day hiking essentials, plenty of snacks, and extras like a spare pair of Hilly Twin Skin socks.
- environmental protection! There are a handful of environmental protection items that you should include on your Rim to Rim packing list.
-
- the sun! When it comes to the brutality of the Grand Canyon sun, protect yourself with Chapstick, sunscreen, sunglasses, and a head covering of some sort, like a hat. You may also find it extremely beneficial to invest in a cooling towel, for dipping in the streams and then applying to your neck, head, and shoulders to help keep cool. Or, you can also do what I do and hike in a cotton shirt, that you can take off and soak in stream crossings. The cotton will hold the coolness from the water, and keep your core temperature lowered longer.
-
- gaiters for the trail! While hiking the Grand Canyon Rim to Rim in one day may not encounter a lot of uneven, rocky, or “rooty” terrain, you will encounter a ton of sand or finely ground dirt! Especially during the downhill portions when you will likely be going quicker and kicking up more trail, affordable and easy to use gaiters will keep the sand and dirt out of your socks and shoes! And if you can keep the elements out, you will have to stop less, and time is of the essence on this hike. Another benefit of properly protecting your feet – you are less likely to develop cringe-worthy blisters! Gaiters are a personal preference and take a little getting used to, so while they are optional, be sure to try them out on some practice hikes before the full Rim to Rim hike, to be sure you want to use them on the real deal.
-
- a headlamp for the dark! You may think you won’t need one, but there is a good chance if you are starting early, or if your hike takes you longer than expected into the early dusk or evening hours, that you may benefit from having the extra security of a lightweight headlamp like this no bounce Biolite headlamp. Remember, in ideal fall hiking season, like October, there is only about 12 hours of solid daylight.
- snacks, snacks, snacks! Snacks are important for energy, electrolytes, and sodium replacement when hiking the Grand Canyon Rim to Rim. Every item of food included on your Rim to Rim packing list should serve a purpose. I recommend going with snacks that are compact, lightweight, easy to eat on the go, easily digestible, energy packed, and salty! Salty is important in this case as you need to carefully monitor your sodium replacement. Here’s what the inside of my day pack looked like in regards to food:
-
- tuna packets – super lightweight and compact and a good source of protein
-
- almonds and trail mix– great source of easy to snack on energy
-
- beef jerky – a good salty food option
-
- RX bars – for a carb boost
-
- apple sauce squeezable packets – this is a personal favorite of mine, because I mostly just love applesauce, but they are nice for a little moisture content, and they are something that has always been easily digestible for me, and compact and easy to eat on the go!
-
- fruit snacks – more of a psychological treat if I just need a quick dose of sweet
-
- squeezable peanut butter packets– always a great option for a quick energy boost
-
- NUUN tablets – I don’t always end up using these, but I always bring them if I feel the need for an electrolyte level replacement and boost
-
- Salt tablets – I have used these on hot trails, as a way to monitor and replace possible sodium level loss and electrolyte loss.
-
- Banana – helps prevent cramping and give me a potassium boost
-
- Sandwich – a good old fashioned meat and cheese sandwich really hits the spot for me on my own Rim to Rim packing list. Easy to make ahead, keeps well for a couple of hours, and is lightweight. Makes for a perfect meal in addition to my snacks during my break at Phantom Ranch.
- Emergency / First Aid
-
- Always plan for things to come up, and for things to go wrong, especially in an environment like the Grand Canyon. Yes, it is a well trodden trail that is monitored by park rangers, but that does not mean you should lower your guard. Bring what you need for emergencies. This should include your salt tablets, first aid kit, blister protection, a whistle/signaling mirror combo, and Gear Aid tape for quick fixes. You should also bring some lightweight and compact emergency shelter gear, which is included later in this post.
- the right layers! Opt for moisture wicking and breathable materials on your Rim to Rim packing list! Sun shirts are a great option for the environment of the Grand Canyon, and there are lots of different options. Check out one of my favorites here. I prefer shorts, and a anti-chafing pair with extra storage pockets are always a bonus. As the temperatures at the top of the North Rim are often in the teens this time of year first thing in the morning, you may also want to bring along a warmer, breathable, outer layer for the first couple of miles of the descent down. Here are my favorite merino wool clothing item recommendations:
-
- head covering for sun protection
- Navigation
-
- next is a trail map! You will likely not have service on the North Rim at all, and possibly not on the South Rim until the last several miles. Both the North Kaibab Trail on the North Rim and the Bright Angel Trail on the South Rim are well marked, well maintained, and easily distinguishable, but you should still bring along a trail map, whether it is a traditional paper one, or a downloadable one from an app like AllTrails. If you plan to download, just be sure to do so before you start due to the lack of cell service.
-
- emergency communication device! As mentioned above, you won’t have reliable cell service for the majority of the Rim to Rim hike. In case of an emergency, have a way to signal for help with an emergency communication device like this one! Yes they are expensive, but the potential of the Grand Canyon should not be underestimated, and every year there are numerous hikers who are either grateful they hiked with an emergency communication device, or regretted that they didn’t have one when running into trouble in the Grand Canyon!
- Emergency Shelter
-
- Yes, you aren’t planning on spending the night on your Rim to Rim day hike, but there are the occasional emergency situations that will benefit from having some kind of shelter. Plus, emergency shelter gear included in this Rim to Rim hike packing list are lightweight and compact, so there is no real excuse not to include them in your pack. You have a couple different options of emergency shelter to include:
- Personal Items
-
- trekking poles! You’ll appreciate a extra helping hand of support not only on the long downhill from the North Rim, but on the arduously long and steep climb out on the South Rim! Especially since you’ll be reaching the climb out on the latter side of your 24 mile Rim to Rim hike. These Black Diamond hiking poles are the best out there and have unwaveringly supported me on many steep uphill climbs and summits, like the highest point in Colorado at Mount Elbert, or the long and rocky state high point hike of New York at Mount Marcy!
***Looking for more epic hikes in the U.S. that top the “toughest” list? Check out my guide to day hiking Mt. Whitney, the tallest point in the lower 48 states!
WAIT! Don’t forget to download your Rim to Rim Packing Checklist HERE!
CHECK OUT: for all things RIM to RIM related, be sure to visit these posts:
- First Timers Guide to Hiking the Rim to Rim in One Day
- Step by Step Training Plan for Hiking the Rim to Rim in One Day
How Much Would 4 Months of Accountability and Coaching Mean to You?
Did you know that I offer 1:1 Coaching Services for the R2R hike?
Take a look, and COMPLETE THIS FORM to get started today!

PIN for LATER!

Last update on 2023-08-09 / Affiliate links / Images from Amazon Product Advertising API


Hi Kristen! I’m very excited and nervous at the same time about finally committing to hike Grand Canyon three months from now. My question is : do I buy new trail running shoes now and continue to wear them until I “hopefully “ complete the rim to rim? Or train in my regular running shoes and buy new ones closer to hike day?
Hi Joni,
Sounds like you are planning on an October R2R? Perfect timing! I might see you on the trail myself also!
Personally, I’d give myself at least a month to break in new trail running shoes, but 3 would be preferable. Assuming you’re planning to do a long weekly hike each week between now and 3 months from now, you’d still be well within a new pair of trail runner’s optimal lifespan.
Are you training on trails, or running on pavement? Both can be beneficial, but if you still plan to train by running at least partly on roads, then keep using your regular running shoes too. But I would definitely recommend trail runners for the R2R, and I would definitely give yourself at least a month to break in a new pair before.
Hope that helps!