The Toughest Parts Of A Rim to Rim Hike
A common question that many potential Rim to Rim hikers want to know is “what are the toughest parts of a Rim to Rim hike?” While this is not a black and white answer for everyone, there are definitely some portions that undoubtedly warrant extra precautions, training, and preparations. These are the “toughest” parts of a Rim to Rim hike that you should be aware of before your trek!

Disclosure: Below are some affiliate links-these are all products I highly recommend. I won’t make any recommendations on this page that I haven’t tested or personally used! Enjoy this guide to the toughest parts of the Rim to Rim hike in the Grand Canyon!
Table of Contents
The Toughest Parts of a Rim to Rim Hike
What defines “tough” is inevitably going to vary from person to person. Some people love the downhills, while others dread them. Some people love the climbs, while others hate them. Then there’s the heat, exposure, and distance that also affect people differently. The time of year can also play a HUGE role in what makes parts of a Rim to Rim tough, most notably in the brutally hot summer months. Here’s a breakdown of what are generally considered to be the toughest parts of a Rim to Rim hike, and exactly why they’ve earned that reputation.

The Toughest CLIMBS on a Rim to Rim Hike
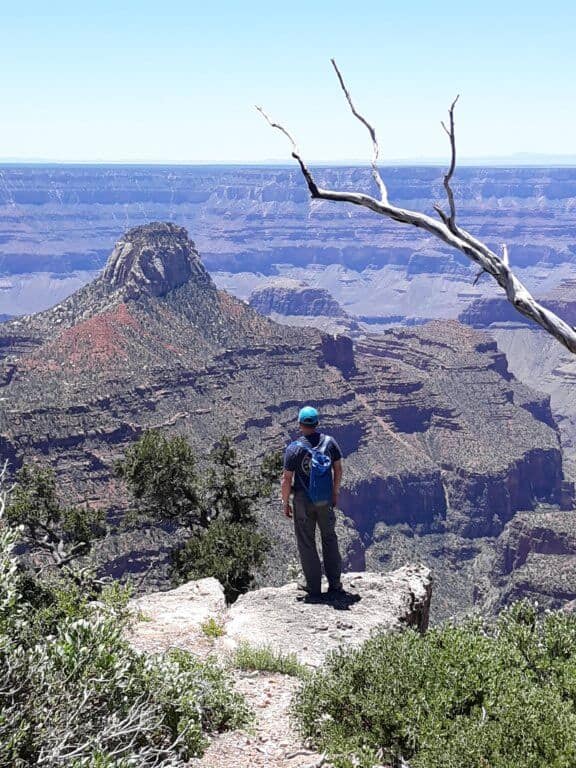
A Rim to Rim hike can take place on any of the 3 inner corridor trails in Grand Canyon National Park. So it’s important to address parts found on all 3:
- the North Kaibab Trail (North Rim)
- the South Kaibab Trail (South Rim)
- the Bright Angel Trail (South Rim)
All 3 of these trails connect at the bottom, at the Colorado River / Bright Angel Campground / Phantom Ranch. The direction you choose to hike (North to South or South to North) will affect which of these 3 inner corridor trails you will experience on your Rim to Rim hike.


As far as climbs, this may seem pretty obvious. The Rim to Rim is often described as a “reverse mountain”, meaning the ascent comes at the end. No matter which direction you hike, you will DESCEND first, and ASCEND second. And no matter which corridor trail you finish your ascent on, it won’t be easy. That is why training for the elevation gain is a huge part of a complete Rim to Rim training plan.
Back to the individual corridor trail climbs…
The North Kaibab Trail is the hardest ascent of all 3 corridor trails. It contains the most elevation gain and the steepest ascent as it climbs up the North Rim. Think over 3,600 feet of gain in just the last 5 miles, from the Manzanita Rest Area and the North Kaibab Trailhead at the top of the rim.
The South Rim sister corridor trails of Bright Angel and South Kaibab are just about tied on difficulty. The South Kaibab Trail is shorter, but a hair steeper with about 400 feet more of elevation gain than its longer Bright Angel Trail counterpart. By the way, the series of switchbacks that must be climbed on the Bright Angel Trail are known as Jacobs Ladder!
Overall, the TOTAL elevation gains are as follows:
- North Kaibab Trail: ~ 5,760 feet of elevation gain
- South Kaibab Trail: ~4,872 feet of elevation gain
- Bright Angel Trail: ~ 4,380 feet of elevation gain
But check this out – strictly speaking by the numbers, the top 3 miles of the North Kaibab Trail wins, followed by the top 3 miles of Bright Angel and then South Kaibab. But look at how close these numbers are! Bottom line is there are no “easy” climbs on the corridor trails in Grand Canyon, and no shortcuts to training!
- North Kaibab Trail: Redwall Bridge to Trailhead: 2,190 feet of elevation gain
- Bright Angel Trail: 3 Mile Resthouse to Trailhead: 2,112 feet of elevation gain
- South Kaibab Trail: Skeleton Point to Trailhead: 2,040 feet of elevation gain
In summary, no matter how you approach it, the last couple miles of hiking will be the hardest and steepest climbing of the Rim to Rim hike.

The South Kaibab Trail
As I mentioned earlier, it’s not just the climbs that make a section tough. The South Kaibab Trail has a few unique qualities that can make its entire 7 miles one way tough, depending on how you approach it.
- There is NO WATER on the South Kaibab Trail (between the trailhead and the bottom)
- It is FULLY EXPOSED
Bottom line – hiking any part of the South Kaibab Trail can be tough if you are doing it in the summer months and at a time of day where there is full exposure. It is NEVER recommended to finish a Rim to Rim hike by ascending the South Kaibab Trail for this very reason. Descending the South Kaibab Trail is much safer, particularly in the early morning. If you are planning an ascent, it’s best to do so at night, or not during the summer months.

The Box, The Frying Pan, and The Devils Corkscrew
In addition to the individual climbs up the respective canyon walls, undoubtedly the 3 additional hardest parts of a Rim to Rim hike are these 3: the BOX, the Frying Pan, and the Devils Corkscrew. Get to know each one of them!
So people ask me all the time what is the hardest part of the Rim to Rim hike. Assuming you’re talking about the North to South route (which I recommend for 1st time Rim to Rim hikers), the most common answer is usually a tie between the BOX, the Frying Pan, and the Devils Corkscrew, but for different reasons. It also largely depends on how prepared an individual is, as well as timing.
The BOX
The BOX is flat, but it’s HOT. And potentially lethal. And closed in, not unlike a giant outdoor oven. If you aren’t adequately prepared, or if you aren’t taking your timing and your pace seriously enough and get caught in the BOX during the hottest parts of the day, it’s gonna probably be your worst part of the hike.
The BOX is a portion of the Rim to Rim hike along the bottom of the canyon. Unknown to some, there is a long stretch of the North Kaibab Trail that meanders along the bottom, between the North and South rim walls. In fact, it’s about 8 miles in length. The BOX isn’t the entire portion of the bottom, but it is a big chunk. You’ll know if when you begin to enter into the high, narrow walls of the canyon bottom. In the dead of summer, temperatures can easily reach into the 120’s degrees Fahrenheit. Being in the BOX at the wrong time of year, at the wrong time of day, can be deadly, especially if you aren’t prepared with the right fuels, hydration, and gear.
If you’re doing a Rim to Rim hike, there’s NO avoiding the BOX – you will have to hike through it. How can you do so safely?
- Be through the BOX by 10am, before temps rise and the shade is lost
- Be mindful of your pace, to ensure getting through the BOX in a timely manner
- Start early enough to get through the BOX early (shoot for 10am)
- Have a solid hydration and fueling plan, that includes electrolyte and sodium replacement
- Combat the elements with proper layers, cooling towels, cotton shirts, hats, etc.
- Keep yourself cool by soaking with water

The Frying Pan
The Frying Pan is the immediate neighbor of the BOX. It is just as brutal, but for different reasons. Whereas the BOX is closed in between narrow, stifling rock walls, the Frying Pan is completely open and exposed to the sun. For all intensive purposes, you should consider the trek through the bottom of the canyon one big tough part, about 8 miles in length, composed of both the BOX and adjacent Frying Pan together.
If you are hiking North to South, you’ll encounter the Frying Pan pretty much right after Manzanita Rest Area, followed by the BOX. Between Manzanita Rest Area and Phantom Ranch, you’ll want to be on your guard for these two.
If you are hiking South to North, you’ll encounter the BOX first, followed by the Frying Pan. The BOX will begin pretty much right after departing Phantom Ranch. So between Phantom Ranch and Manzanita Rest Area, you’ll want to be on high alert for these two.
Keep in mind that there’s no avoiding these two on a Rim to Rim hike, you will have to deal with them!

The Devils Corkscrew
This ominously named portion of the Rim to Rim hike shows up on the Bright Angel Trail, between River Resthouse and Havasupai Garden Campground, specifically about 2 miles after crossing the silver suspension bridge over the Colorado River. While not nearly as aggressive in elevation gain or as long as the rim wall ascents, the Devils Corkscrew can still be extremely tough.
Why? This series of switchbacks is almost entirely exposed. And for many North to South hikers, you’ll hit these switchbacks during the second half of the day, as the temperatures are warming. Heat + exposure + steep climbing. Of all the tough parts of the Rim to Rim hike, this one actually tends to get to me the most. It doesn’t help that if you are hiking a North to South route, you’ll hit this section later in the day when you’re also potentially more tired.
So how do you handle the Devils Corkscrew? Much the same as the BOX and Frying Pan.
- Timing – leave even earlier to avoid climbing this section in the hottest part of the day. OR, hang out at Phantom Ranch / Bright Angel Campground longer and wait to climb the Devils Corkscrews later in the afternoon when there is more shade on the switchbacks. Just be sure to have a headlamp with you in case of a night finish.
- Change route – you can avoid the worst of the Devils Corkscrew by hiking South to North via the Bright Angel and North Kaibab Trails, thus encountering the Devils Corkscrew earlier in the hike, hopefully in the early morning, and going downhill. However, this is not the route I would most recommend. For 1st timers specifically, I recommend hiking North to South. For those that do hike South to North, I recommend using the South Kaibab and North Kaibab Trails. You can learn more about the reasons behind these recommendations in my complete 1st timers guide to hiking the Rim to Rim in one day.
- Be prepared with the right gear – there are natural water sources you can use to soak yourself and cool your core. I recommend cooling towels or even just a cotton shirt that you can douse in natural water sources, if you find you are struggling on this portion. Breathable layers, sun protection, hats, etc., of course are always important to utilize.
- Have a solid hydration and fueling strategy that includes electrolyte and sodium replacement. You can learn more about this crucial part of training and preparation in my Rim to Rim training plan.

How to Prepare for all Parts of a Rim to Rim Hike
While these may be the toughest parts of a Rim to Rim hike, when you add them all together it demands that you be entirely prepared! There’s no real “easy” part of a Rim to Rim, thanks to the distance, heat, elevation gain, and elements. Don’t count on “toughing it out” on the hardest parts, and then coasting through on the rest. The average person takes between 12 – 18 hours to complete a Rim to Rim (also depending on the direction you hike), and your body needs to be ready to go, go, go, for that amount of time.
To be prepared, make sure you address each of these following factors:
- Time on Feet
- Strength Training
- Uphill and Downhill Training
- Pacing
- Heat Preparation
- Gear
- Layers and Environmental Protection
- Hydration
- Fueling
- Electrolyte and Sodium Replacement
- Logistics
For more in depth resources on EACH of these, check out my:
- 1st Timers Guide to Hiking the Rim to Rim in One Day
- Complete Rim to Rim Training Plan – includes a FREE TRAINING CALENDAR!!!
- Rim to Rim Visual Guidebook for 1st Timers
- 1:1 Coaching Plans and Consults
- *COMING SOON – Rim to Rim ONLINE COURSE
- How Long Do I Need to Train for a Rim to Rim Hike?
- The Best Ways to Fuel and Hydrate for a Rim to Rim Hike
- Complete Rim to Rim Packing List
- Get to Know the 3 Inner Corridor Trails at Grand Canyon National Park
PIN for LATER!