Complete Backpacking Checklist: Must Have Essentials for Your Hike
Trust me, you do not want to figure out what backpacking essentials you need after it is too late! Preparing to survive outdoors is a daunting task, but it can be made easier with a complete backpacking checklist of all the ultralight backpacking gear you will ever need! Know before you go, and take the worry out of planning for your hike!

Disclosure: Below are some affiliate links-these are all backpacking essentials products I highly recommend. I won’t make any recommendations on this page that I haven’t tested or personally used!
Table of Contents
Why You Need a Backpacking Checklist
In my previous life, I was the unfortunate victim of being greatly underprepared in the backpacking essentials department, but that all changed when I got lost overnight on a hike in Utah’s Uintas! I learned the hard way how important it is to be prepared with a comprehensive backpacking gear list, which is when I began to formulate and perfect this backpacking checklist. You will find it all here, from the 3 big backpacking essentials basics, to all the sub-basics, clothing, technology, and more, that you will need to be successful, responsible, and safe on your trek!

Backpacking Gear Quick Links:
Hubba Hubba Lightweight Backpacking Tent
3 Season Lightweight Sleeping Bag
Hiking Boots and/or Trail Runners
Anti Blister “Twin Skin” Socks
Cuffed Beanie and/or Buff
Signaling Mirror / Whistle Combo
Bear Spray and Bear Canister (if necessary)
Emergency Tent / Emergency Blanket / SOL Bivy
Dehydrated Meals / Snacks
-
- Sandwich
- Beef Jerky
- Trail Mix / Nuts
- Tuna Packets
- Applesauce Pouches
- Squeezable Peanut Butter
- Honey Stinger Waffles
- GU Energy Gels
- Banana
- Carrots
- RX Bars
- NUUN Tablets / Electrolytes
Portable Hiking Stove and Propane
Lighter / Firestarter / Match Kit / Vaseline and Cotton Balls
Toiletries / Hand Sanitizer / Wipes / Anti Chafing Balm
Knife / Multi Use Tool
Duct Tape / Gear Aid

*****Want this handy backpacking checklist as a digital PDF? Get it HERE!
Essentials of a Backpacking Checklist: Pack, Tent, and Sleeping Bag
These are THE BIG 3 of any backpacking checklist: backpack, tent, and sleeping bag. When considering my choices for these three items, one of the most important factors is always weight. Always be mindful of investing in ultralight backpacking gear when possible, because you will be carrying every ounce of it on your back!

#1: Backpack
If you are going on an overnight or multi-day hike, then you are going to need a serious backpack. Backpacking basically equates to carrying your survival on your back, so selecting a comfortable and reliable pack in which to transport your backpacking essentials is key. Once again, you need to maintain a delicate balancing act with weight, so you need to invest in a backpack that is large enough to carry exactly what you need and just what you need!
I feel that the minimum size you should expect to be looking at for any overnight or plus hike is 40 liters. At my size, a 40 liter, like this REI Co-op Trail 40, fits comfortably and suits the purpose of most of my backpacking trips. Of course, you will need to determine what works best for you, and whether you need to look into a backpack that is closer to 50 or 60 liters. It is important to try on and try out your pack BEFORE departing on a trip with it!
Part of determining what size backpack to get involves knowing what your trips will typically look like. Are most of your backpacking trips one or two nights? Or do you usually go with a partner and you split some of the items that need to be carried? Then you might be fine with a 40 or 50 liter pack. Do you solo backpack or take on longer multi day or week long hikes? Then you will probably want to invest in a larger pack like a 60 liter option.
Whichever route you go, stick to a pack with an internal frame. Also ensure that your pack is equipped with sternum, shoulder, and waist straps for weight stabilization. If your water transportation system involves hydration bladders, then make sure that your pack has an internal sleeve for bladders.
Try on your pack and make sure that it is comfortable after making the necessary adjustments. If you are selecting your pack for the first time, try it on! Once you are familiar with what works for you and your frame, you will be better prepared to select your next pack without necessarily needing to try it out in person.
A few add ons that I really appreciate in a pack: a hydration sleeve for water hydration bladders, and a rain cover. These are two specific components I have come to value in a pack.
> Get the best backpacking backpack on the market here
#2: Tent
Tents are one of those big backpacking essentials that can hold the fate of your hike in their hands. A rough night of sleep in a tent equals a rough day of subsequent hiking. Or a tent that does a poor job of keeping out the elements may leave you stranded in the backcountry with wet layers and gear. There are a plethora of tents out there to choose from, but a few key factors to work out in order of importance to you are durability, weight, weather protection, roominess, and ease of setup. I personally value weight, weather protection, and durability at the top.
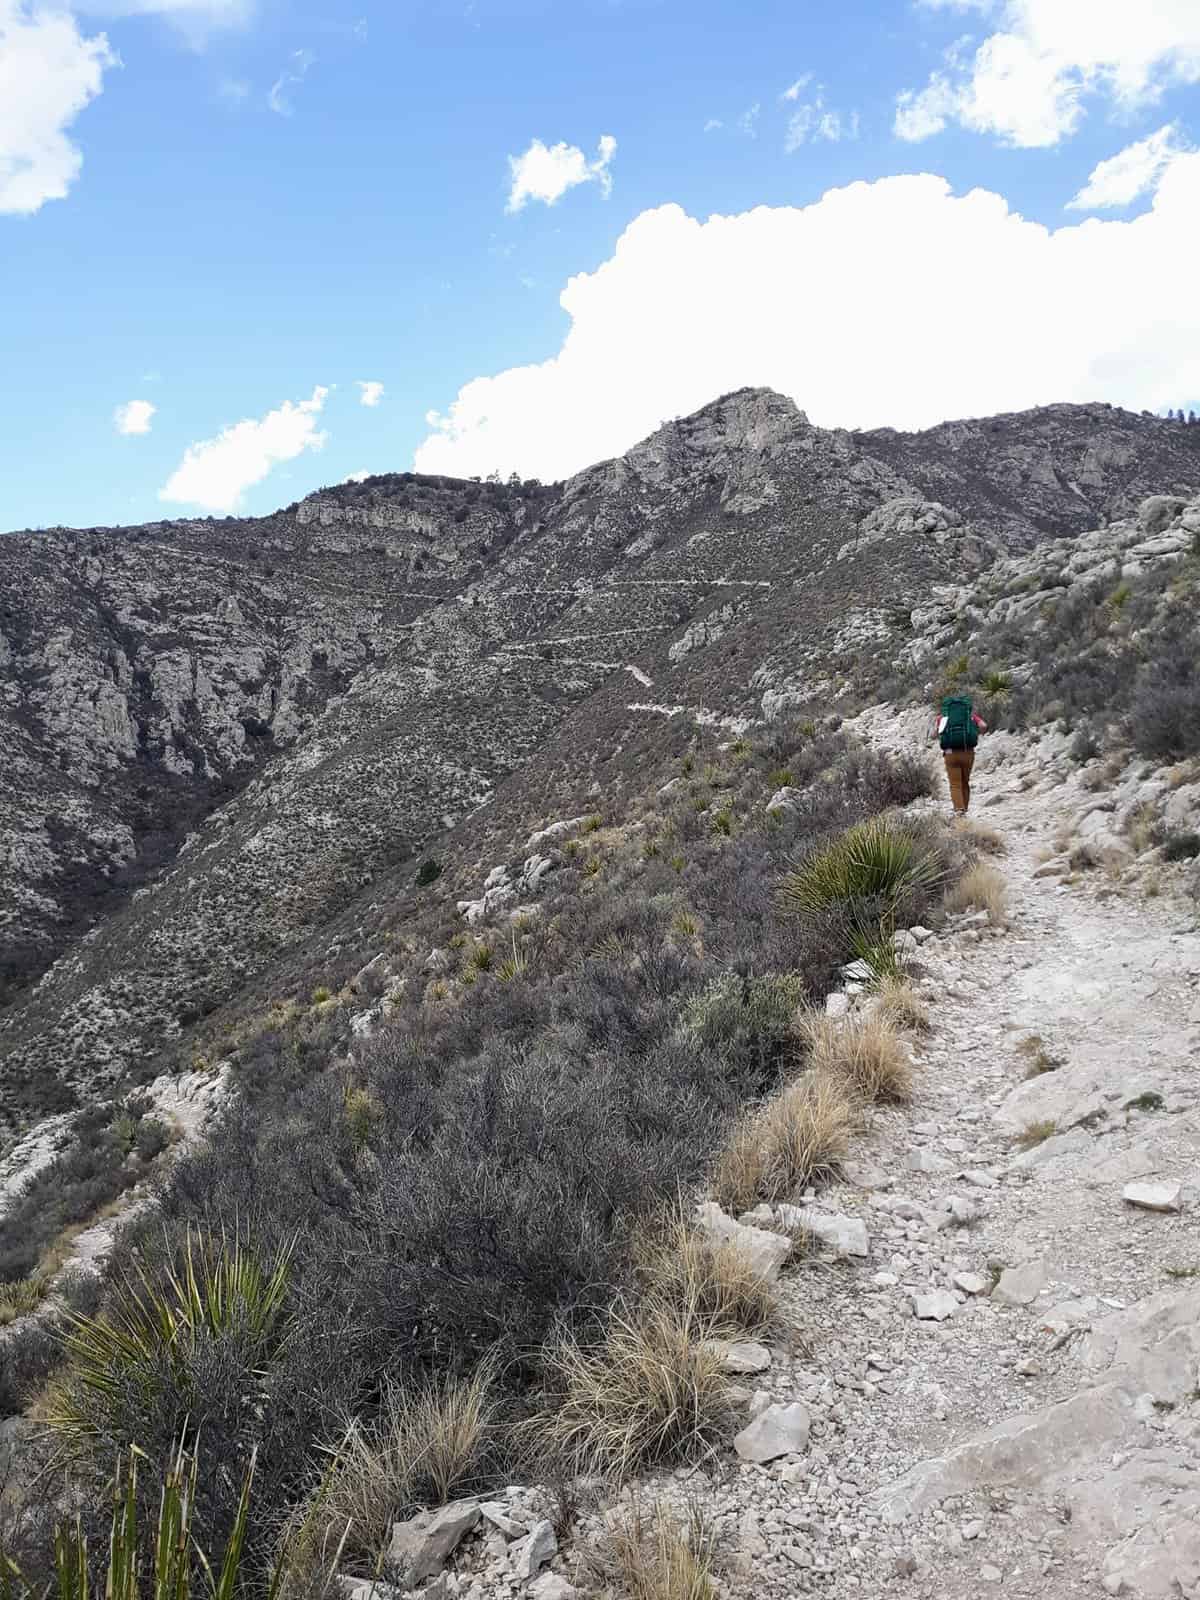
My top pick overall is the Hubba Hubba NX, listed here on Amazon, because having ultralight backpacking gear, especially a tent, is a top priority to me personally. This one weighs in at just over three pounds, without sacrificing anything in the durability, weather protection, or roominess department. This tent is waterproof, which is a key essential. It also comes in a one person option as well. It has performed at the top of Colorado mountains, to the humble standout state parks of Dallas, to the ruggedness Texas’s Guadalupe Mountains and Big Bend National Park, and more!
#3: Sleeping Bag
Sleeping bags are a close relative of the tent, in that they also can make or break your sleeping experience in the outdoors. Decide first if you want to have multiple bags for multiple situations, or select one that encompasses the majority of your outings. This is the difference between sleeping bags rated as 3 seasons and 4 seasons. 3 seasons usually means that the sleeping bag is rated for above 32 degrees, whereas 4 seasons means that it is rated for below freezing. And as always, intentionally select ultralight backpacking gear whenever possible, and that includes selecting a sleeping bag. It has to to be a fine balance between protection capabilities and weight.
I have a sleeping bag that I use strictly for car camping (because it weighs more), and another that I strictly utilize as one of my backpacking essentials, due to its lighter weight. Again, having ultralight backpacking gear is a priority to me when hiking overnight or for several days, and therefore I reserve my lighter bag for when I am carrying it, and my heavier one for when I am just car camping.
Also decide what kind of temperatures you want to be prepared for, and whether you desire multiple bags for each of those scenarios also, or a bag that will encompass all seasons. For my 3 season sleeping bag, I use a Hyke and Byke down sleeping bag rated for above 30 degrees. Hyke and Byke also makes a four season bag rated for 0 degrees, that is also a ideal option for colder nights. Both bags are lightweight, affordable, down filled, and water resistant coated.
I’ve slept in both and both are solid options, it is more a matter of your personal expectations. I always recommend high quality and ultra-lightweight for all backpacking gear, and this is no exception. You should never compromise on items that determine your comfort and/or survival, and I don’t think either of these are a compromise on the comfort level.
*** Recommended Add On: SOL bags! These handy contraptions are not what I would recommend using on a regular basis, but they are a fantastic shelter option in an emergency, and considering that they are budget friendly, compact, and meet the qualifications of being another piece of ultralight backpacking gear, they are definitely an additional backpacking basic I would strongly recommend hiking with. They will keep you safe and sheltered in a pinch if you are unable to utilize your normal tent and sleeping bag set up.
>Grab yourself a handy, lifesaving, SOL bag
Sub-Basics of a Backpacking Checklist: Footprint, Pad, Water Transport and Filtration
Tent Footprint:
A footprint is simply an additional protective layer between your tent and the ground, and comes in quite handy particularly in rainy conditions. Since I recommended the Hubba Hubba NX tent, you can get the coinciding Hubba Hubba NX Footprint here on Amazon.
Sleeping Pad:
A sleeping pad is one of the best items you can invest in to up your comfort level significantly, and for that reason I would highly, highly, recommend one. You’re only as prepared as you are rested on a responsible backpacking trip.
I opt for lightweight always, and am always conscious of compressed size and durability. For all of the above, lightweight, insulated, ease of compacting and packing, and durability, I go with the Klymit Static pad.
Water Transport and Filtration System:
Water in itself is obviously one of the backpacking essentials, but how you get it and transport it is up to you. I always hike with a full 3 liter Platypus bladder for starters. I like this model because it has the large opening which makes filling, drying, and cleaning much easier!
I am a big proponent of hydration bladders, and most backpacking backpacks nowadays come with a built in hydration sleeve for easy access. It really does make a big difference to be able to drink “on the go” versus having to stop and fish for a water bottle during a long day of hiking. The downside to water bladders is they can be more difficult to clean out and dry, but the above Platypus version has the larger opening to help with this problem. For me, the ease of being able to hydrate on the go is still a bigger payoff.
I often also chose to include a Life Straw equipped water bottle on my backpacking trips, as this allows me to fill up my bottle and drink immediately at any water source if I should ever need to. I can also remove the filter and use as a standard water bottle when filtering is not necessary. It is a easy and reliable backup water filtration system to have!
But for many hikes out there, it is a good idea, if not essential, to have a secondary way of acquiring water. There are a couple different options when choosing a water filtration system for your backpacking checklist. You can utilize a pump and filter system, a gravity system, a personal Lifestraw straw, a soft sided water filter like the Katadyn BeFree, or tablets for purification. Each has benefits and limitations, so it is really a personal choice of what you feel comfortable using and carrying.
Do not be afraid to utilize multiple water transport systems, because you cannot have enough water! I hike and backpack using multiple forms of hydration transport systems, depending on the length of the backpacking trip, including a full Platypus water bladder, a pump and filter system, and my Life Straw water bottle for backup.
Clothing to Pack for Your Backpacking Checklist: Waterproof, Wool, and Shoes
Layers are going to be a necessity. Whether you are planning on an overnight hike or a day hike, you should always be prepared for all spectrums of possible weather and temperatures within a given twenty-four hour period. Waterproof, not water resistant, can make the difference between life and death if you should ever find yourself trapped in precarious weather. Here’s the ultra-light, fully waterproof Outdoor Research jacket I use regularly! It’s easily the most compactable and lightweight fully waterproof outer layer you can find, and only weighs a couple ounces!
Wool is a solid option for warmth, and is great for layers. It’s what I personally hike, bike, run, and everything in between in. My favorite wool brand is IceBreaker, and a couple of my favorite lived in items are this lightweight IceBreaker tank for summer hikes, and this IceBreaker base layer top and base layer leggings that I utilize in winter months.
Basically, you want to stay away from cotton at all costs! It chafes and is poorly suited for wicking and drying. Wool remains my tried and true favorite material to wear for its quick drying, breathable, and moisture wicking qualities. And bonus, if you use a Merino wool such as what is used in the IceBreaker line, it is also odor resistant!
A note on layering: if you are going to be layering, start with wicking fabrics for your first layer, followed by fleece or wool for your second layer, and a wind resistant/windproof, waterproof shell for your top layer. This enables you to stay dry in the layers closest to your skin, trap heat in the fleece or wool layers in between, and keep out the elements on your top layer. Check out this step by step guide to effective layering.
For added safety measures, when choosing clothing, opt for reflective and bright colors when you can.
For multi-day hikes when you are going to be carrying a loaded backpack, I am recommending hiking boots with sturdy ankle support and a reliable sole that can grip and provide stability. These are imperative qualities when you are shouldering a load, or hiking up elevation or sketchy scree filled terrain. My “go to” that I have depended on for numerous U.S. state high point hikes and long distance treks are my Vasque Breeze III GTX hiking boots.
Another option to consider when it comes to backpacking footwear are a solid pair of trail runners. The choice is personal, but hiking boots or trail runners can both be effective. If you are heavily loaded up and facing sketchy and unstable terrain that requires good traction and ankle support, then a hiking boot might be better. If your load is lighter, your trail is gentler, and you are opting for more speed and “fresher” feeling feet, trail runners may be preferable. If you do choose to go with trail runners, you can’t go wrong with HOKA One One Speedgoats! The best traction and the best cushioning you will find in trail runners, and an undisputed brand reputation!
The final note on layering is to take care of covering your extremities, such as hands, feet, and head, and invest as such.
When it comes to the best hiking socks, nothing beats wool. Quick drying, odor resistant, moisture wicking (which means blister free), are all the important qualities.
For less windy and/or cold conditions, I’ll often stick with just a beanie, like my favorite Smartwool cuffed beanie. Again with wool, because it is unbeatable! If I know there’s going to be strong, cold gusts and extreme temperatures, I’ll up my head layering game with one of my favorite layering accessories, my Buff! Buffs are fantastic because they are multi purpose, which is a great quality for a backpacking essentials checklist where practicality is key!
Buffs can be used to cover the neck, or they can be pulled up over the head and around the ears, or they can be pulled up over the mouth for additional facial coverage if necessary. My Buff single handedly made my explorations in arctic Greenland comfortable instead of miserable in the extreme temperatures!
A pair of waterproof gloves are going to be important at higher elevations, colder climates, or anywhere you are backpacking where you expect you might encounter snow or ice. Rather than investing in multiple sets of gloves for multiple situations, I feel like it is better to just invest in a high quality, high grade, waterproof pair right off the bat, and then you will be prepared for any backpacking hike you want to take on!
>Get the best budget friendly, midweight, waterproof gloves here
Technology for Your Backpacking Checklist: Compass, GPS, Apps
A compass, like this one I use found on Amazon, is a small investment that can make a huge difference. If you invest in a compass, make sure you couple that with learning how to use it. It is useless if you do not possess the knowledge to go with it. Better yet, use it in conjunction with a hard copy map, such as one from MyTopo.
There are a lot of tracking apps out there these days, and there is no reason not to use them to be a more prepared and responsible hiker. My favorite is the AllTrails app. The basic version has GPS tracking, map layouts, and helpful reviews. The subscription version has downloadable maps, “no service” tracking capabilities, and a new “Lifeline” addition coming soon that allows notifications to be sent out periodically to loved ones who are then able to be notified of your progress. $99 for a lifetime All Trails subscription can provide you an additional layer of peace of mind.
If you want to take your technology to the next level (and I suggest that you do), investing in a satellite communicator could be the best thing you purchase. The Garmin In Reach line or the SPOT devices are my two recommendations. These devices allow their user to have GPS tracking abilities even in areas with no cell service, and can trigger emergency respondents to your exact location if necessary.
Backpacking Checklist Emergencies: First Aid, Whistle, Signaling Mirror, Bear Spray, Emergency Tarp
You may have all the experience in the world, but that does not make you a psychic. You cannot predict when something might go wrong, so be prepared at all times with a complete inventory of emergency backpacking essentials.
- Your backpacking first aid kit should contain items such as scissors, antiseptic wipes, bandages, butterfly closures, gauze and swabs, CPR apparatus, an emergency blanket, tape, gloves, safety pins, a tourniquet, and tweezers.
- If you should ever find yourself incapacitated and without voice, a whistle and a signaling mirror could be lifesaving devices to carry.
- Know before you go if you are entering bear territory, and take the necessary precautions to learn what to do in the event of bumping into a bear, and how to deter them. The best option for the latter is to bring bear spray, and have it easily accessible on your pack.
Insider Tip: in addition to these items on your backpacking checklist, ensure that you are well versed in hiking safety, and have a thorough safety plan in place, whether you are hiking alone, or hiking with a group.
Backpacking Meals: Snacks, Stove, Fuel, and Utensils
Food is an obvious essential. For a rigorous backpacking trip, food choice becomes much more intentional. You want to invest in backpacking meals and snacks that provide high energy, while being lightweight, easy to carry, and convenient to prepare.
- Some good options for snacking on the trail are jerky, nuts, trail mix, tuna packets, peanut butter, vegetables, dried fruit, instant oatmeal packets, and dehydrated meals. And remember, the goal is to achieve an inventory of ultralight backpacking gear, and that includes the amount of food you bring. Bring enough food, but not an excessive amount that will only weigh you down.
- Bringing the right food is only half the battle. You have to be adequately prepared to cook that food! I use these lightweight and super compact Etekcity portable stoves, but note that they do not accommodate large pots or pans. Propane and a lighter will be necessary to use these little gadgets.
- You can get as fancy as you want with utensils, as there are plenty of options and kits for backpacking meals out there. I keep it simple with a tin can and a spork.
Toiletries for Your Backpacking Checklist:
- Chapstick is first on my toiletries list because I could not live without it, especially in cold, windy conditions.
- Shampoo and conditioner now come in pods, perfect for backpacking and other forms of travel.
- Hand sanitizer is a must for obvious reasons.
- Some people bring toilet paper with them on backpacking trips, but I prefer to bring wipes, as I find them more compact and easier to store.
- And finally, if you are like me you will work up a pretty drenching, soaking sweat, and since bringing a bunch of clothing changes is not an ideal backpacking option, at least deodorant helps!
Backpacking Essentials Checklist Add Ons:
- Whether for safety or practical purposes, a good all purpose knife has been known to come in handy.
- If you are a weight watcher (and if you are backpacking you should be!), a compression sack might be appealing to you. It is an effective way to shrink down sleeping bags, clothing, etc, and maximize space in your pack so that you can get the most out of your ultralight backpacking gear.
- Bring a lighter along with other optional firestarters, which can prove helpful in less than ideal weather conditions.
- Cords and ropes are good back ups to bring along, because you never know what might snap or break or need to be repaired on the trail. Speaking of repairs, a roll of good old fashioned duct tape never fails at being a tried and true all purpose repair kit! Or try a step up from duct tape with Gear Aid Tape!
- Head lamps are not only a great addition to have for any nighttime duties, but they can prove invaluable in an emergency. This model is a perfect addition to your ultralight backpacking gear!
- Trekking poles are not what I would consider a necessity, but a valuable potential add on. I don’t know what kind of backpacking trips you have planned, but many of mine involve high altitude climbing and descending, coupled with sketchy, uneven, exposed summit terrain. For those reasons, trekking poles are valuable to me because they help save my knees and legs, if not more so on the descents than the ascents. So if you have graded hikes planned, these may very well become a permanent fixture in your own backpacking essentials checklist! Just make sure that the trekking poles you invest in meet the same qualifications of ultralight backpacking gear, like these trustworthy and light trekking poles. I like the cork handles that prevent slippage due to sweaty hands!
>Get the most reputable brand of trekking poles on the market here
So now that you have everything on your backpacking checklist, you are ready to get out there responsibly and prepared!
***Don’t Forget! Hiking gear isn’t the only backpacking essentials you need! No matter where you live, prepare for that big hike with these 6 hiking training exercises you can do from ANYWHERE, whether you live in the mountains or below sea level 😉

PIN for LATER!


Great recommendations!
Great tips here! I use a Lifestraw too for water filtration and it’s super convenient!
Joy, I still consider myself somewhat of a newbie when it comes to filtration systems, but Lifestraw is my go to! I have the individual straw, and the Lifestraw water bottle.
I’d love a multi-day hike! I love hiking but I cannot find the courage to go hiking by myself for several days! Your tips will be very useful in that case 🙂
It does take courage to hike alone, I’ll grant you that. You can always start small with day hikes, and then if you feel comfortable try an overnight. If you do, I also have a guide to solo hiking 101, I hope you will check it out! https://tpb.awf.mybluehost.me/solo-hiking-safety-101/
Thanks
What a useful post, thank you so much for all your helpful tips 🙂
Such a comprehensive list, thanks for being so detailed!! 🙂
I’m a well-traveled hiker myself and your tips are spot on! Thanks for helping those with less experience know what gear is needed out in the woods.
Shirley, thanks that means a lot coming from a accomplished hiker like yourself! I have a little envy over your Kilimanjaro hike, I’m hoping to make it there someday!
I’ve been thinking about getting into backpacking but it seems a little overwhelming reading about everything you need. This list seems a little more manageable! Maybe I’ll actually get around to some hiking when spring hits again 🙂
great information and guidelines
Thanks for sharing. I’ve been needing to repack my day pack, and I’ve been wondering if I had everything… which I don’t. Great suggestions. Thank you!
this is perfect, and your timing could not have been better!!
So helpful! I’m prepping for a 2 month backpacking trip to SE Asia so this is going to come in handy!
Emma, sounds like an amazing trip! I can only imagine how much prepping and planning go into living out of your backpack for two months, good luck and I’m sure you will have some awesome memories from that!
The best complete backpacking checklist I ever read. Yes, it can follow this. When I go for the next trip or tour. Thanks