
7 Safety Tips to Follow for Backpacking and Hiking Solo
To solo hike or not to solo hike? There seems to be some robust debate surrounding the topic of hiking alone and backpacking alone. My first hand experience on the topic came when I hiked King’s Peak, the highest point in Utah, and in the process, inadvertently got lost alone in the Uintas for a night and a day. After that experience, the topic of hiking and backpacking solo seemed to pop up frequently among my casual conversations, with more than a few opinions solidly against hiking alone. True, if I had been with the group I was intended to be with that day, I almost certainly would not have ended up in the situation I found myself in. On the flip side though, I have to acknowledge that I clearly see the perspective of solo hikers. You may not always find yourself conveniently with another person to share your passions with, and that cannot be a reason to not pursue them. And some people just really need that alone time hiking as a mind clearing de-stressor. Having experienced the single most dreaded outcome of hiking alone, I have to say I will continue my stance in favor of hiking solo, with the caveat that preparation and responsibility are key and should be the priority of any solo hiking and backpacking safety regimen. So here’s 7 safety tips to follow when hiking and backpacking solo.

Disclosure: Below are some affiliate links-these are all products I highly recommend. I won’t make any recommendations on this page that I haven’t tested or personally used! Enjoy this guide to hiking and backpacking alone!
Table of Contents
7 Solo Hiking and Backpacking Safety Tips
So what are the basic fundamentals of solo hiking and backpacking safety? I am going to break it down into 7 key points:
- Plan Ahead
- Notify Family and Friends
- Pay Attention
- Use Others
- Have the Right Gear
- Be Over Prepared
- Know Yourself
Now, what do each of these look like in more detail?
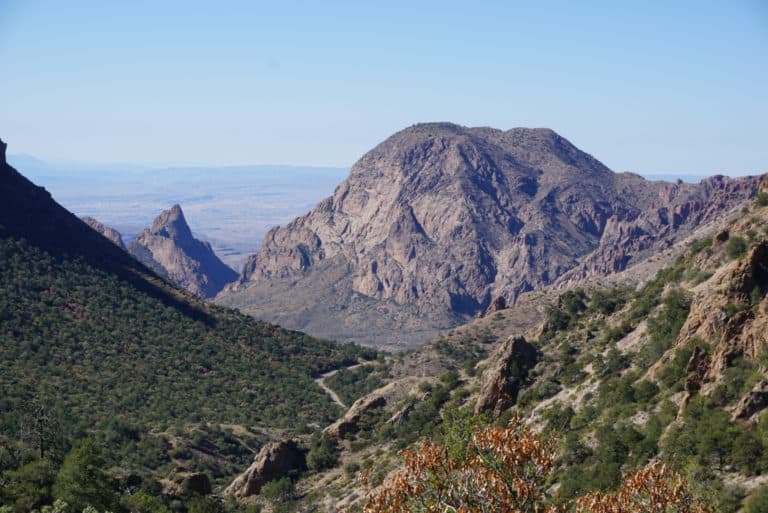
 A solo hiking experience at Guadalupe Peak, Texas
#1: Plan Ahead
Preparation is the number one best thing you can do to ensure a safe hiking solo experience. Preparation is such an overarching element, it inevitably finds itself interwoven into every other point on this list. Preparation means becoming well versed in the various elements of your hike: the route, the terrain, the weather, the wildlife, the vegetation, the difficulty level. Know before you go what to expect!
Planning a hike in unfamiliar terrain, especially a backpacking trip or a wilderness hike? Go to My Topo and create a customized map of your destination with topographical details, and then learn how to read it. Planning a hike in an area frequented by bears? Read up on what to do when encountering bears in the wild. Do you know which indigenous plant life might be poisonous? Do a little research ahead of time when hiking solo. Read reviews on your hiking apps. Be familiar with the route of the trail, and know if there are any landmarks to orient by. Know the type of trail (ex: out and back or loop trail?), the distance, and the elevation gain. These are just a couple examples of planning ahead.

Planning a hike at high altitude with steep elevation gain? Learn what to watch for in regards to altitude sickness signs, and then engage in more lower body and leg strengthening exercises prior. Check the many available resources for mountain weather forecasts the morning before a big hike, especially at higher altitudes where thunderstorms are more frequent. Weather at the base of a high altitude mountain can be drastically different than at the summit!
Basically, do not wing anything when hiking alone or backpacking alone!

#2: Notify Family and Friends
This can take multiple forms, especially in the age of technology. First, leave a detailed itinerary with at least one family member or friend. Provide the exact names and locations of campsites and trail heads. Be sure to give anticipated schedules for each day, and a “by this time” time frame. Meaning, let your person know when they should expect to hear from you if you anticipate not having cell service during your hike. Also, leave a hiking safety contact form in your glove compartment or console of your vehicle, to help expedite rescue if ever needed.
Take this one step further, and check in with the local ranger station in your destination. Let them know your plans, but be sure to touch base with them when you are done with your hike! If there are registries at the trailhead, be sure to sign in. Checking in with other hikers during your hike is not a bad idea either. I never like to broadcast to other hikers that I am hiking solo, but at the same time, it could be beneficial to leave an impression in someone’s mind. Should something happen and authorities are questioning others on the same trail or in the same vicinity, it could come in handy if they happen to remember the lady in the bright pink jacket and where she was hiking alone.
As I will discuss further, hiking apps like AllTrails now have special features, like the “Lifeline” feature, that can send updates to family members when a hiker reaches a certain point, so that family and friends can “track” progress.
One final precaution I will repeat again – as you depart your vehicle for your hike, leave a slip of paper, like this hiking safety contact form, with your intended plans, anticipated timeframe, and destination in the glove compartment or under the seat. Should an emergency occur, this is one additional step in speeding up rescue procedures.

#3: Pay Attention
One thing I see more and more of these days is hikers with earbuds in, lost in their own musical world, blissfully plodding down the trail. I get it, but if you are hiking solo, it simply can’t happen. Honestly, even if you are hiking in a group, you should not be listening to music. Every individual should be paying full attention to their surroundings, whether you are alone or with others.
Wildlife could be lurking nearby. You can’t hear a rattlesnake with music blaring. An immobile or injured person may have nothing but the volume of their voice to help them, and are relying solely on the ears of others to alert them to the situation. Music can distract you from taking notice of that landmark, which could be immeasurably valuable should you get disoriented and need to find a familiar marker. You can’t afford to not pay attention when hiking alone, bottom line.

#4: Use Others
I get it, one of the biggest draws to hiking solo is to get away from it all, to enjoy some peaceful solitude and reflect. But it is a good thing to utilize others whose paths you may cross. Again, I do not like to openly advertise to strangers that I am hiking solo. But if you pass others on the trail, question them about the terrain. Question them about the clarity of the markers and signs ahead. Gauge the difficulty level of the upcoming miles by their responses. Ask them about weather developments, wildlife sightings, downed trees, anything that can help you prepare for anticipated problems.

#5: Have the Right Gear
It’s all about technology when hiking solo. There’s rapidly growing resources in the realm of GPS trackers, maps with offline capability, apps, personal emergency beacons, communication devices, etc. Invest in a few (or all). Here’s a few of my recommendations:
AllTrails: the free version is GPS enabled, and is consistently accurate in my experience. You can pull up trails across the world, track your progress along an outlined trail, record progress, read reviews, and share reviews. There is a free version of AllTrails, and then there is the $99 that buys you a lifetime subscription, which comes with offline /downloadable tracking capabilities, as well as the ability to download maps straight to your phone. AllTrails also released a “Lifeline” update to the app, which allows family and friends to receive text notifications of your progress, for more peace of mind.
Hiking Project: There are many similarities between AllTrails and Hiking Project, which is why they are two of the most commonly relied upon hiking apps. Hiking project allows users to pull up and track trails in their location and around the globe, and there is also a similar user contribution where hikers can rate, review, and and contribute to maps. Hiking Project is free.
Gaia GPS: Gaia is another great hiking and backpacking apps, and is stellar in the actual details and imagery of the maps themselves. Not only can it help you with getting to know and staying on your trail, but it is great for other outdoor adventures like kayaking or anything that requires you to better know the lay of the land. Gaia has the ability to download maps, and there is a free and very affordable premium membership as well.
Personal locator beacons and satellite messaging devices are also finding a growing niche. These are “use only in emergency” types of devices, but could potentially be lifesaving in an emergency. My top recommendations are the Garmin In Reach, Garmin In Reach Mini, and SPOT devices.
Not all gear is as technologically rooted, but it is still invaluable. Invest in a good traditional compass, and then learn how to use it. Pair that with your topographical map that you created from MyTopo. Buy a whistle and have it easily accessible at all times on a hike. Not only can it be used to ward off certain wildlife, but as I mentioned before, an immobilized individual may only have the volume of their voice to garner help with. A whistle is that much better.
And then there are the basics, built upon the foundation of a complete hiking essentials checklist. This includes items like your pack, clothing layers, boots that are waterproof and dependable, or a pair of trusted trail runners, and other essentials like first aid and emergency items, depending on your type of hike.
Download your own handy Hiking Essentials Checklist HERE!
Be intentional when choosing what clothing to bring on your hike. Wear brightly colored clothes or reflective clothes for you hike. Choose synthetic materials that are wicking, breathable, and quick drying for the summer, and materials such as wool and fleece for winter warmth. As a basic overarching rule, avoid cotton! It can chafe, and does not dry or wick effectively.

#6: Be Over-prepared
When I got lost in Utah’s Uintas, I was grossly underprepared for spending a day and night alone in the forest. Fortunately for me, the weather, wildlife, and my own body cooperated with me more than I probably deserved, and I avoided any disastrous pitfalls. However, I do not plan on making that same mistake again of being underprepared, based on mistaken assumptions.
Even if you are planning on hiking solo for just a couple hours, bring all of the hiking essentials as if you were going for a day or more of backpacking alone. Bring more food and water than you think you will need. In fact, bring some form of portable water filtration system so that you are able to drink water no matter how long you are hiking. Bring the gear necessary to secure emergency shelter if need be. Bring clothing for all ranges of weather possibilities. Bring a first aid kit, and bring whatever technology you are using. I highly recommend also bringing a backup battery, because the worst thing that could happen would be to have a device capable of securing help or tracking your location, but not having a way to charge it. You can get all the checklists and recommendations for all your hiking and backpacking essentials below.
***BE OVERPREPARED with these handy hiking printables including hiking checklists, trackers, training calendars and more!

#7: Know Yourself
Be realistic with yourself and know your own abilities when you are hiking solo. Do not take on more than you can reasonably handle, especially when hiking or backpacking solo. Do the strength training cardio, and hiking exercises necessary ahead of time to prepare for a big hike. Practice on shorter trails and work your way up to the longer ones. Visit familiar trails before heading out on unfamiliar ones. Respect your own body’s capabilities and do not push it further than what it can reasonably handle when hiking and backpacking alone. And finally, trust your gut and what it is telling you to do.
Happy and safe hiking solo!
***Read More: if you are just starting out in your solo hiking and backpacking adventures, invest in a good resource for beginner hikers, like my guide to the top 5 mistakes to avoid as a beginner hiker.
***If you are upping the challenge level and planning on backpacking alone, check out my beginner backpacking checklist so you don’t forget anything on your overnight adventures!
***BONUS: no foundation for solo hiking or backpacking alone is complete without understanding and investing in the 10 hiking essentials. Get the knowledge and know how to develop your hiking essentials inventory with this checklist!

PIN for LATER!


Great article!
I love this post, I wish I read this before I hiked the Waimanalo Trail in Hawaii some weeks back!! Hardest thing I had to do Lol Typically I’m not an outdoorsy type of girl but had to because of my man is one!! Definitely asking people we saw coming down the trail was such a blessing because It told me if I needed to keep going on or just give in (Which I did – Sadly lol) Thank you so much for the recommendations, Will definitely be keeping this one handy on my next expedition.
I love this post, I wish I read this before I hiked the Waimanalo Trail in Hawaii some weeks back!! Hardest thing I had to do Lol Typically I’m not an outdoorsy type of girl but had to because of my man is one!! Definitely asking people we saw coming down the trail was such a blessing because It told me if I needed to keep going on or just give in (Which I did – Sadly lol) Thank you so much for the recommendations, Will definitely be keeping this one handy on my next expedition.
Amina,
Sounds like a challenging hike! I always like to put my feelers out too and get a read for what’s in store up ahead! It can definitely help with the decision making and planning process
Thanks for the tips! I’ve been thinking of hiking and backpacking so this article was helping in regards to going solo! Thanks!
Hi Kristen, I would like to take some time and thank you for sharing these great tips with the audience. One of my friend is planning for a solo hike and I think this article will really be helpful for her. I am glad that I came across this article as it will be of some help for my friend.
Glad to help! Where is the solo hike taking place?