What to Expect From a Mount Hood Guided Climb
Mount Hood is one of those mountains that takes your breath away when you first see it. Its abrupt prominence over the Oregon landscape is both intimidating and awe-inspiring. Unlike some states that have a connection to mountain ranges as a whole (like Colorado and the Rockies, for example), the entire state of Oregon has a special connection to this one particular mountain. Mount Hood is plastered everywhere you go, and it is spoken of with endearment by locals. But not many people can say that they have experienced a connection with this peak by actually hiking Mount Hood all the way to its summit! Climbing Mount Hood demands the upmost respect, preparation, and responsibility, and it is not an easy feat to pull off. As far as state high points in the U.S. go, to climb Mount Hood, which is the tallest mountain in Oregon, is among one of the hardest in the country to pull off. There is the prominence, the steepness, the unique terrain, and of course, the technical skills that are required. It is those mandatory technical skills that are the reason I would recommend anyone attempting to climb Mount Hood, to utilize a Mount Hood guided climb! This post will cover everything you need to know up front, and everything to expect when embarking on a Mount Hood guided climb!

Disclosure: Below are some affiliate links-these are all products I highly recommend. I won’t make any recommendations on this page that I haven’t tested or personally used! Enjoy this guide to climbing Mount Hood!
Table of Contents
Climbing Mount Hood: The Highest Point in Oregon
Mount Hood dominates the horizon as the tallest mountain in Oregon, from an elevation of 11,250 feet tall. Not the highest among state high point hikes, but when you consider the immediate surrounding area, you can easily see why this tallest mountain in Oregon is so prominent and challenging. It basically stands alone on its own, instead of one peak among many similar ones in a chain. That is why Mount Hood is so easily distinguishable, so recognizable, and so intimidating!
Mount Hood is technically a volcano, though dormant, which you will discover as you climb Mount Hood and get whiffs of the sulfur fumes seeping through its vents. Mount Hood is also a glaciated peak, which comprises most of the reasons for the technical skills you will need to use.
Climbing Mount Hood is another story. This peak has claimed its fair share of lives, and that is because hiking Mount Hood is very demanding, both mentally and physically. It requires a unique blend of skills preparation, physical endurance, and environmental understanding.
There are a unique few that naturally possess these skills, or have spent years learning them, but for the average hiker, whom this guide is primarily aimed at, a Mount Hood guided climb is the way to go! Knowing how to hire a guide, and then what comes next in the process, can seem a little overwhelming, but this post will walk you through all what to expect, from booking and gear, to summiting on climb day!
Location of the Tallest Mountain in Oregon
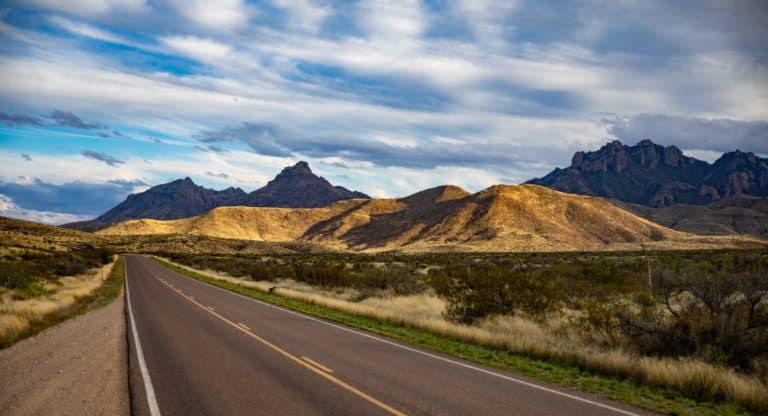
Mount Hood is located along Highway 26, in northwestern Oregon, about an hour and a half east of Portland, Oregon. It is an easy and convenient drive east from the Portland International Airport, for out of towners. Highway 26 contains several other noteworthy sights, like Multnomah Falls, as well as a handful of small mountain towns en route, perfect for visiting, or for making your home base during your time preparing for and climbing Mount Hood. Surrounding Mount Hood you will find plenty of other hiking trails, including the Pacific Crest Trail, remnants of the old Oregon Trail, and waterfall hikes! History, water, and forests abound here!
Location of the tallest mountain in Oregon and surrounding area
Some of these small towns include Mt. Hood Village, Welches, Rhododendron, and Government Camp. There are a few established hotels, and multiple vacation rental options between these Mount Hood villages. There are also plenty of local places to eat with characteristic mountain town flair!
The final stop along Highway 26, moving east through these mountain towns, will obviously be Mount Hood itself. Mount Hood towers over the historic Timberline Lodge, which is base not only for the multitudes of skiers, but for those hiking Mount Hood, and for those who have enlisted a Mount Hood guided climb.

Step One of Your Mount Hood Guided Climb
Like I said before, Mount Hood is unique among American peaks. It is a glaciated peak, meaning that hiking Mount Hood requires knowing your way around packed snow and ice, as well as crevasses, rock slides, near vertical grades, and fumaroles, just a few of the unique territorial dangers that come with the tallest mountain in Oregon. Climbing Mount Hood requires knowledge of crampon footwork, belaying with rope and harness, ice ax handiwork, and self arrest.
This knowledge is a MUST. It doesn’t mean that you need to have practiced these skills for a decade before attempting to climb Mount Hood, but it does mean that you need to know what they are and be familiar with them, and for that reason my strong recommendation, especially for beginners, is to hire a guide to walk you through it beforehand and during your attempt.
There are plenty of people who climb Mount Hood without a guide, and plenty of people that are knowledgeable enough to do it on their own. There are also people that perish on Mount Hood, and plenty of people that attempt and fail a summit. If you’re asking me, a Mount Hood guided climb is the way to go. It takes the pressure off of you, and allows you to put your trust in a guide who is able to lead you to a successful summit based on their knowledge and expertise, which they are trained to know how to impart to their climbers. Having their knowledge and expertise at your disposal makes an attempted climb up Mount Hood that much safer and likely. You can leave the route finding, conditions assessing, and safety protocols to them to then impart to you.
There are several options you can go with when looking into a Mount Hood guided climb, but I am going to go ahead and recommend the best one, and most frequently used. As this was #42 of 50 U.S. state high points for me, I have become familiar with trading stories and experiences with other “highpointers”, and I can tell you that we all have used the same guide for climbing Mount Hood: Timberline Mountain Guides.
Intro to the Mount Hood Summit Program with Timberline Mountain Guides
Timberline Mountain Guides offers several programs, but this post is going to focus specifically on the 2 day Mount Hood summit program that is offered. This program is able to be completed by those with little to no technical skills practice, as it will be taught prior to climbing Mount Hood.
Day 1 will consist of meeting your guide at Timberline Mountain Guides office at Timberline Lodge, reviewing and renting gear, an overview of the hike itself, and then several hours of training on the practice slopes, which may be a short hike from the lodge. Make sure to bring all the gear with you that you plan to use for the actual hike on Day 2, so your guide can review it and make sure it is appropriate. After reviewing your existing gear, you will be able to proceed with renting whatever additional is necessary. More detailed information on gear to come!
After gear check, this is when you will have a chance to put on your mountaineering boots and crampons, and learn the footwork, ropework, and ice ax work that goes into climbing Mount Hood, out on the practice slopes with your guide. All in all, our Day 1 lasted from 9 am – 1:30 pm. You will take all the gear home with you from Day 1, including the rented gear, so that you can show up with it ready to go for the actual hike.
Day 2 consists of the actual Mount Hood guided climb! This will be an early start, somewhere likely around 1, 2, or 3 am, depending on conditions. This means you may only have a few afternoon and evening hours between ending Day 1’s training, and getting ready for Day 2’s actual climb! Details covering the actual hike are discussed later in this post!

Booking a Mount Hood Guided Climb with Timberline Mountain Guides
Everything you need to book your guided climb with Timberline Mountain Guides can be started and completed online through their website. The first thing to know and decide on are dates. Timberline Mountain Guides begin their 2 day summit program in the spring. Our guide that we used for our climb in July 2021, said that the opening dates in the spring of 2022 would likely be April. 2022 dates were posted in August, 2021, according to the company website. The final climb dates are the beginning of July. In 2021, the final climb date was July 2nd (the day that we summited). So this gives you an idea of when dates are released, and how long the climbing season lasts.
The reason that the climbing season ends at the beginning of July is due to the warming temperatures, and the hazards that those conditions pose to the summit of glaciated Mount Hood. Rockslides due to melt became a more realistic threat, and Timberline Mountain Guides have a record of being very conservative when it comes to safety.
When booking, in addition to considering dates, keep in mind that this is a 2 day program, but you may want to give yourself additional days. I found it extremely beneficial to have a day before the practice Day 1 of the program, to complete an acclimatization hike. In our case, we did 3 miles on the Pacific Crest Trail, which encircles the base of Mount Hood. You can pick up the trailhead directly at Timberline Lodge, and this will give you a few miles of practice hiking around 7,000 feet elevation.

Additionally, keep in mind that on Day 2, the actual summit day, you will be starting your hike early in the morning. Start times vary depending on conditions at the time, but anywhere between 12:30 am (which was our start time on July 2, 2021), to 2 or 3ish in the morning. Which means you will likely finish hiking Mount Hood by lunchtime, if you maintain good pace and time.
While you technically have the rest of that day free from that point, you likely will be exhausted, and may want to plan the remainder of that day accordingly. I found that 3 days minimum for all the activities involved in climbing Mount Hood was good, but 4 was ideal! One day to explore the area, one day to acclimate with a hike, one day of training, and hike day!
Mount Hood guided climbs book and fill up, and its better to book them early if you can. My understanding is there can be 2 or 3 to a group. I booked our July dates the previous August and had really good choices of dates. That also gave me plenty of time to train, and plenty of time to acquire the gear I needed.
Cost! Hiking Mount Hood is not cheap, but it’s also not an easily forgettable memory and accomplishment! For the cost, consider that you are getting to learn new skills, benefit from the expertise of a guide, and accomplish the once in a lifetime achievement of summiting Mount Hood! Mount Hood is not a traditional hike in the sense that the “trail” is not well defined, you are hiking partly in pitch dark, and there are unique environmental factors at play. Being able to have a guide “navigate” us through the route finding, the darkness, the technical skills required, and the proactive responses to the environment alone were worth the cost. Timberline Mountain Guides 2 day Mount Hood program costs are listed here on their website. There is also a deposit required when booking.
One final thing to note when booking with Timberline Mountain Guides is that their communication and helpfulness is exceptional. I called several times and always spoke to someone in person the same day, with great answers to my questions. I emailed a dozen times over the year leading up to our climb, and always received a prompt response within the day. If you have questions, don’t be afraid to contact them as they are great at communication!
What Kind of Shape Do You Need to Be In Before Climbing Mount Hood?
Timberline Mountain Guides has their description of what kind of shape you need to be in, and I also find it helpful to hear other’s first hand experience with what to expect. If you want to better your chances of summiting successfully, you need to be in great shape! This mountain is steep from the get go. You may have one brief leveling off spot at Devil’s Kitchen, but that is going to be about it.
You need to be able to give consistent output on a steep grade, with minimal breaks, while carrying a 20lb minimum pack, while plugging away uphill for several miles, and several hours. When I climbed Mount Hood, it was 3 hours of hard, consistent working our way up the steep grade, followed by a brief break at Devil’s Kitchen, before another 1 and a half hours of slow but taxing vertical climbing, which is really going to burn your legs!
You will also be maintaining a healthy pace. There are weather conditions and environmental conditions to consider, and your guide will absolutely be considering those the entire hike. For that reason, getting you up safely and down safely is tied closely with maintaining a timely pace. Your guide will not want you up on the top still climbing Mount Hood at 4pm. You will need to be able to accomplish all the aforementioned tasks, while doing it in a timely manner! Again, you will need to maintain an aggressive pace and level of output.
How Did I Train for Climbing Mount Hood?
As a native Texan, finding elevation gain is somewhat of a challenge, especially when facing the daunting task of a steep uphill climb like hiking Mount Hood. It requires a bit of creativity, but it also requires a great deal of intentionality.
Before I get into the specifics of my own training regimen for climbing Mount Hood, I would highly suggest if you are considering this climb, to go ahead and grab a calendar and a pen, and begin scheduling in your training days (this is a step I recommend for all my training plans, including my targeted hiking training plan).
If you are starting from zero activity level, I’d give yourself a minimum year to 6 months of training prep. If you have a decent hiking foundation (regular 5+ mile hikes with elevation), I’d give yourself a minimum 3 – 6 months of training prep. No matter how much time you give yourself, you are going to want to schedule in your weekly training hikes and sessions in advance, and then stick with them!
When training for any big physical goal, the number one most helpful thing I have found that ultimately leads to success is to intentionally plan out your training. If you tell yourself that you’ll get around to that practice hike “when I have time”, you are much more likely to put it off or talk yourself out of it. Or something will come up and training will be put on the back burner. If you are looking at 3 months of prep time, then schedule out 3 months of training days and practice hikes in advance, in writing, on your calendar. You’ll be surprised how other things will work themselves around what you already have planned!
To prepare to climb Mount Hood, I started by completing a 5 mile hike, with as much elevation gain as possible, once a week for 3 months, starting one year out from my anticipated climb date. In addition to this, I biked 12 miles twice weekly, and completed cross training the other days of the week. Cross training could include going for a brisk walk, a HIIT routine at home, cycling, swimming/water aerobics, weight lifting, strength training, gym cardio like ellipticals or Jacobs Ladders, or yoga or Pilates, etc. Whatever I choose to do, though, I made sure to give it 100% and maintain the best pace possible for as long as possible, with as few breaks, and I knew I wanted to replicate the conditions and level of output I expected to climb Mount Hood under as closely as I was able.
If you lack natural elevation gain to train on, consider alternatives for getting in some stair climbing. Don’t skip this part – use stadium stairs, hill repeats, office stairwells, or gym equipment like ellipticals or Jacobs Ladders. This will help your long run game when climbing Mount Hood at a quick and aggressive pace.
Grab Your Own Customizable HIIT Home Workout Routine HERE!
At 9 months out, I began completing 7 mile weekly hikes, mixed in with a bit of trail running, with an elevation gain closer to several thousand feet minimum, maintaining the same quickest pace possible, with as minimal breaks as possible.
At 3 months out, I began doing 9 or 10 mile weekly hikes, with as much elevation gain possible (substituting targeted cross training when not possible), while continuing to mix in a little trail running as well. My goal was always to work up to being able to give a strong, consistent output for 3-4 hours minimum, without feeling a significant decrease in stamina or performance.
It also does not hurt to practice training with a 20 pound or so, or more, pack on, as that is a condition to expect climbing Mount Hood.
What Kind of Technical Skills Will I Learn on a Mount Hood Guided Hike?
Timberline Mountain Guides will tell you themselves, you do not have to have any prior technical experience, though obviously it does not hurt. Just reading up ahead of time on certain items and terminology will help get you mentally ready. Ultimately, you will learn and practice everything you need to know the day before your climb. That is why it is a 2 day summit program. One day to learn, one day to put into use and summit! Your guide will also be there to guide you the whole climb!
On day 1 of your 2 day summit program, (the day before the actual Mount Hood climb), you will meet your guide at Timberline Mountain Guide’s office, inside the Day Lodge immediately adjacent to Timberline Lodge. After reviewing gear (more on that later), you will head out with your guide for a couple hours of practice on the low lying slopes near the lodge.
When we began our practice day, we started out slow with the basic skills, and gradually worked our way up to some of the more technical skills. We started with reviewing the types of footwork to be used on the slopes, and how to work the crampons on our mountaineering boots.
Mountaineering boots and crampons, both individually but especially together, are a unique beast to get used to, especially if you are not used to wearing them. One thing I learned is that though they didn’t initially feel natural to me, you can absolutely trust in your boots and crampons to get the job done, and hold you in place! Just make sure to tie your shoelaces tight, as well as your crampons! You do not want your spikes getting tangled up in loose shoelaces or loose straps. Practice putting on and taking off your crampons several times before your hike, so you can do it quickly when it really matters!
You need to be very mindful of your footwork, in order to not get tangled up in your crampons, and more importantly, to avoid falls. We practiced the “duck walk” with our feet angled out for more stability, side stepping, and using toe holds in the slope wall with the front spikes of our crampons.
Next we learned both the short and long belaying system that would be used in conjunction with our body harnesses (which you will wear the entirety of the Mount Hood climb), and how to hook on and off of a belay, and maintain appropriate slack in the rope. Hint, you want as little slack as possible! Our guide explained thoroughly in what circumstances this rope system would be used, how to work the carabiners involved, and imparted a great amount of confidence in his abilities to keep us all secured using that method.
Finally, we got to know our ice axes. How to hold them, how to use the different parts of them for different purposes, and finally, how to perform self arrest. This is using the ice ax to stop a fall or subsequent slide down the slope. We walked away from that practice knowing that we absolutely could not afford to drop or lose our ice ax, as that would signal the end of a summit attempt!
What Technical Skills Will I Be Expected to Perform?
All of them! So pay attention. You may be thinking now, or even after you practice these skills, that maybe they won’t be used that much during the climb, or maybe they are more “worst case scenario” skills. You will be expected to use all these technical skills, and we absolutely did use each and every one of them on our Mount Hood guided climb!
We used the correct footwork, we used the belaying system and roped in and out via carabiners and harnesses, and we had our minor slips where it was necessary to catch ourselves with our ice axes! For that reason, take the practice Day 1 very seriously, and pay attention to every bit of knowledge! You will be expected to perform the technical skills that are taught and practiced on Day 1!
What Gear to I Need to Bring, Rent, and Use?
Timberline Mountain Guides has a post listing all the necessary gear you will need, as well as what is required for each individual to bring, and what can be rented. If you already are an avid hiker or climber, you may have many of these items already. If you don’t, but plan to use items from the list after the hike, it may be worth buying them ahead of time for your own inventory. And inevitably there will be some items you choose to rent. Either way, there were a few pointers I learned after going through my gear check with our guide:
- if you bring your own trekking poles, make sure they have snow baskets. I forgot to attach mine, and I ended up having to rent some trekking poles.
- you are going to need good layers! Follow the layering requirements carefully! You need base layers, a warm mid layer, an insulated outer layer, and a outer shell for precipitation and wind. You may not need to wear all of them the whole hike, but you need to have them all ready to go!
- sunglasses are a must! With a night start, it is easy to forget these, but you will need them on the hike down in the glare of the snow and sun!
- a 35+ liter pack is going to be best. Initially I tried to use my 20 liter pack, and it was not large enough to carry the necessary layers (you may not need to wear all of them the whole time, thus the need to be able to pack them) in addition to 2 liters of water, crampons, and snacks. If you do bring your own pack, make sure that you are able to pack or attach the crampons and ice ax to it or in it. Timberline Mountain Guides do rent packs, and they are specially equipped to carry ice axes and crampons.
- make sure your headlamps can last on a full charge for at least 5 hours! If you have backup batteries, bring them!
- make sure you have a pair of waterproof gloves! Your hands WILL have contact with the snow and ice!
- don’t forget sun and wind protection – bring sunscreen and Chapstick!
- Our guide provided blue bags for us, in case of bathroom emergencies, though luckily we did not have to use them on our climb!
- water needs to be in hard bottles. It was conveyed to us that 2 liters was the minimum preferred amount. Our guide told us that bladders “can” work, but they much recommend bottles because they are a little more reliable, and hoses can freeze.
- the “technical” gear – mountaineering boots, crampons, climbing helmets, harnesses, and ice axes, etc., will be provided for you by the guide if you do not already have them.
- bring snacks! You are going to want to focus on foods that are quick and easy to eat, with a high payoff! Initially we were going to pack a sandwich, but then we got to thinking it would be freezing cold by the time we ate, due to the conditions. Keep in mind the cold temps when deciding on snacks. Some good weather independent and shelf stable snacks are trail mix, protein bars, and beef jerky! All fine in cold temps, quick to eat, and quick energy! Your breaks will likely be short and concise, so you need to prepare with the right snacks!
Is Summiting Guaranteed with a Mount Hood Guided Climb?
No! Basically, you cannot guarantee anything with mountains! When I climbed both Arizona’s Humphreys Peak and New Mexico’s Wheeler Peak ( 2 other amazing U.S. state high point hikes), there were fire closures just days prior, and I barely squeezed in my hikes. There are storms, freak heat waves that cause excessive melt (think July 2021 in Oregon!), and individual hiker issues.
There is no guarantee you will summit. We watched another team tap out on the day of our hike up Mount Hood. Our guide warned us of potentially having to make that unpopular call. If your guide calls it, you have to have made peace with that possibility ahead of time, and know that they take your safety seriously. If a condition arises like a storm, or hiker inability, there is not a refund or rebook option.
As was our own personal situation, our guide was very honest with us during our Day 1 training that sometimes the decision to abort is made in sight of the summit. Often conditions are assessed once groups are climbing high enough to accurately assess conditions first hand, and then decisions are often made. Something to be aware of and keep in mind.
What to Expect on Climbing Day
First, expect an early start for sure! Hopefully, you took advantage of the few hours between finishing the Day 1 training, and getting up to get ready for your Day 2 hike, to get in a solid meal and a few hours nap! Our start, thanks to the freak heat wave in Oregon in July 2021, necessitated us starting at 12:30 am. We met outside Timberline Lodge at 12:30 am, rode up in the snowcat for the first 2 or so miles to the drop off spot, and then started hiking with our guide immediately in the pitch black and consistently uphill at a challenging grade.
**There is a bathroom on the outside entrance of the lodge, for a last minute stop before hopping on the snowcat. Indoors will be locked at that time of night.
When I initially booked our climb a year out, I did not know that the snowcat takes you up part of the way when you start. I found that out only a couple weeks before from my Highpointer’s Facebook Group, and it does bring a slight bit of relief to know you can plan to shave off a few miles, a chunk of ascent, and less pitch black hiking on the way up. Just another good reason to book a Mount Hood guided tour, as public citizens hiking on their own have to start from the very bottom!
On our ascent, we took several brief 1 or 2 minute breaks for water, but our first big break was about 3 hours into the hike, at the Devil’s Kitchen. This landmark is aptly named for the surrounding sulfur vents which let out a distinctive and strong smell. Up until that point, it was basically one foot in front of the other in the pitch black, just following by headlamp in the footsteps of our guide, maintaining a good pace up the steep incline.


The Devil’s Kitchen provides a stunning overlook back over the slope you just climbed, which at this point is probably the first glimpse you are getting of what you just accomplished, thanks to the emerging sunrise, which starts to peek out around 4:30 or 5 am.
The Devil’s Kitchen is a brief leveled off spot on a little ridge, at the base of the final push to the summit – an extremely steep, near vertical glaciated wall that requires belaying on ropes, plenty of ice ax work, and very careful crampon footwork. The final push up the wall took us about 1 and a half hours, putting us on the summit at 6 am!
At the time of our hike, the summit had dealt with a lot of melt, and there were a lot of exposed boulders. We had to be very mindful of our footing at the top, in order to avoid causing a rockslide. I was aware that in other years, there is more snow pack at the top. From the summit, you will be able to see a few other neighboring peaks, including Mt. Adams, Mt. Saint Helens, and Washington’s state high point, Mt. Rainier. You can also look back and down at the staggering climb you just made, overlooking the distant ski slopes at the bottom of Mount Hood!


Because the snowcat takes you up part of the way on the ascent, the descent is actually longer, and adds about 2 extra miles thanks to the lack of being able to use the snowcat coming down. We were able to take off our crampons and mostly pick our way through the rock moraines at the base of Mount Hood for those last 2 miles, but it does add some extra exertion to an already leg burning day! Save some energy for the last push on those last extra miles! And you will want to strip off some layers and put on your sunglasses for this part as well, as the sun will be out.
The exact location of the snowcat drop off does vary, but all in all, it was 3 miles up from the drop off to the summit, and 5 miles down with the extra mileage, for a grand total mileage right around 8 miles, completed in 9 hours! 12:30 am meetup time, 1 am load into the snowcat, 1:30 am drop off and start, 6 am summit, and back in the parking lot at 10:30, with time for a quick stop by the gift shop for a celebratory tshirt purchase!
Gear Recommendations for Hiking Mount Hood
There are some things you may already have for the Mount Hood climb, and there are some things you may inevitably rent, but here are my gear recommendations for what to show up to your Mount Hood guided climb with.
- socks! For strictly hiking, you can’t beat the comfort and cushion of Darn Tough wool hiking socks. I sometimes use a liner in mine to help prevent blisters, but either way you’ll be good to go with these. Your guide may recommend bringing two pairs to climb Mount Hood.
- you will need to wear a base layer. Depending on the temperature conditions, it could be a long sleeve or a short sleeve. Your guide will be able to give you more insight into this the day before your climb, during gear review and check. Therefore, it is a good idea to bring both options. My go to for all things base layers, whether I’m hiking, running, or biking, is wool. Wool is quick drying, moisture wicking, and odor resistant. IceBreaker happens to make my favorite Merino wool base layers. They’ve kept me moisture wicked and insulated on runs, hikes, and cycles around the globe, including the polar conditions at the Polar Circle Marathon in Greenland! Here’s my go to wool long sleeve base layer, and my go to short sleeve wool base layer shirt.
- mid layer / softshell jacket! Your softshell jacket could be considered your midlayer in this case. It’s main purpose will be to continue the work of the base layer in insulating and moisture wicking, and it sure does help if your softshell has some weather resistance to it. In that case, if your hike becomes warmer, you may just get away with your midlayer softshell being what you primarily hike Mount Hood in. This was the case for me, except on our breaks when I broke out my outer shell just to keep warm. I employ two different softshells, depending on conditions. Both are IceBreaker Merino wool. This snug, comfy Icebreaker wool midlayer is hooded, zippered, and pocketed, and is fantastic at insulating. It does not have any weather resistant capabilities, therefore, if you bring it, you would need an waterproof and windproof outer layer shell for Hood (which you are going to want anyways). This other Icebreaker Merino wool option is also hooded, zippered, and pocketed, with Merino wool lining, and it is also water resistant and wind resistant, so not a bad option with Mount Hood. If the weather is good, you may be able to get away with wearing this as your main layer for the climb.
- hardshell outer jacket! You need a fully waterproof and windproof outer shell, in case of inclement weather. Just how “heavy” this outer layer needs to be, depends on your climbing conditions, as well as your other layers underneath, and is a good question to run by your guide. In my case in warmer conditions in July, I was able to go with an ultralight and compressible outer shell to wear over my wool softshell midlayer. The lightest, fully waterproof and windproof jacket on the market is Outdoor Research’s Helium II jacket. Super convenient to have when you are trying to watch your pack weight.
- wool hat and/or Buff! Depending on your conditions and what you are used to hiking or climbing with, you can potentially go with both or either of these. I have to have good insulation over my ears, especially in windy conditions, like the summit of Mount Hood. Smartwool makes a simple yet effective cuffed beanie, that also is snug enough to fit comfortably under a climbing helmet, which you will be wearing! If you want to go the multi functional Buff route also, you won’t regret it. These accessories are one of my favorite hiking items in my inventory. You can use it to cover your ears, your mouth and nose, and your neck, whatever the need calls for. Or, fold them and use them as headbands that double as ear protection, sweat wicking, and insulation!
- snacks! It’s going to be a cold, long, yet fast paced day, so bring along snacks that will not deteriorate in the cold, that are quick and easy to eat, and deliver high energy! Individual packets of peanuts or trail mix, beef jerky, or protein bars like Luna bars or RX bars, which are a little more natural tasting for my personal preference.
- at least 2 one liter bottles, no bladders! Nalgene water bottles are the way to go! Have them filled and ready to go the night before your hike.
- eye protection! I checked before hand if the anticipated conditions would require goggles, and in our case, the answer was simply a good pair of polarized sunglasses. In fact, having a pair were vitally important for completing the Mount Hood climb. Keep in mind that the pair you bring should be snug enough to fit comfortably under your helmet.
- personal toiletries like sunscreen, Chapstick, Ibprofen, moleskin, bandaids, toilet paper, etc. Blue bags were provided by our guide just in case, though we luckily did not have to use them.
- a headlamp! Vitally important, as in, you probably won’t be attempting to climb Mount Hood without one! Climbing Mount Hood with Timberline Mountain Guides means a pre-dawn start, so you WILL be hiking up in the dark. In July, sunrise was around 4:30 for us. That meant 3 solid hours in dark, with another hour with a dawn backdrop lighting. I would make sure that your headlamp lasts at least 5 hours on a full charge, or that you have backup batteries. Test it out before your climb day! And make sure it is fully charged up the morning of your climb. I LOVE this BioLite headlamp for its lightweight yet functional capabilities. If you are a trail runner like me as well, these are actually right up your alley for adding to your inventory, as that is what they are primarily geared for. Super lightweight, with little bounce during running! Works great for hiking Mount Hood also, and tested out with over 5 hours of juice for me!
These are just a handful of the items you will need for climbing Mount Hood. This is not meant to be an exhaustive list of gear, just a few personal recommendations! Be sure to check carefully over the gear list from Timberline Mountain Guides for all the necessary items. Again, some you may have, some you will buy ahead of time, and some you may choose to rent. Either way, make sure that you have a plan to obtain everything.
If in doubt, REACH OUT TO Timberline Mountain Guides before actually hiking Mount Hood. They are very helpful in answering gear and clothing related questions, to make sure that you are good to go for your climb!
Major Takeaways from My Mount Hood Guided Climb
- summiting is not guaranteed!
- take the Day 1 training very seriously!
- bring all the gear you intend to use on your climb to Day 1 training, and review it all with your guide!
- take your layering system very seriously!
- do not drop your ice ax!
- watch your footwork, and make sure all straps and shoe laces are free from entanglement with your crampon spikes!
- eat a good, solid meal between Day 1 training and Day 2 climbing! And don’t forget to bring snacks!
- your guide is not there to be your friend or your chatting partner on your climb! They take their job seriously, and take listening to them and following their directives seriously!
- make sure your training is up to par prior to hiking Mount Hood! A failed summit attempt due to your own lack of ability is very demoralizing, and costly!
- you will NEVER forget the moment you stand on top of the tallest mountain in Oregon – that’s a guarantee!
And now you are ready for climbing Mount Hood!
**Interested in other state high point hikes in the U.S.???? Check out the rest of my completed hikes to date here!
***And check out this FREE U.S. State High Points Graphic!
RELATED ARTICLES:
- Hiking Mt. Whitney in ONE Day
- Guide to all 50 U.S. State High Points
- Guide to Hiking Kings Peak: the Highest Point in Utah
- Guide to Hiking Humphrey’s Peak: the Highest Point in Arizona
- Guide to Hiking Wheeler Peak: the Highest Point in New Mexico
PIN for LATER!