Guide to Hiking the Bright Angel Trail in the Grand Canyon
Looking for the perfect blend of thrilling excitement, stunning views, and easy accessibility? Out of all the trails in this natural wonder, the Bright Angel Trail in Grand Canyon National Park is one of the most beloved and most popular, and for good reason. It pairs challenge with high reward, and adventure with convenience. There are also a handful of ways you can customize hiking the Bright Angel Trail to suit your specific needs and preferences. Whether you are hiking the Bright Angel Trail as a day hike, an overnight trek, or to connect with another inner corridor trail, this guide will answer all your questions and have you completely ready to take on the Bright Angel hike in the Grand Canyon!

Disclosure: Below are some affiliate links-these are all products I highly recommend. I won’t make any recommendations on this page that I haven’t tested or personally used! Enjoy this guide to hiking the Bright Angel Trail in Grand Canyon National Park!
Table of Contents
Guide to Hiking the Bright Angel Trail in the Grand Canyon
This guide includes:
- Background on the Bright Angel Trail
- Location of the Bright Angel Trail
- What to Know Before Hiking the Bright Angel Trail
- Tips for Hiking the Bright Angel Trail
- How to Access the Bright Angel Trailhead
- Map of the Bright Angel Trail Route
- Overview of the Bright Angel Trail
- Full Trail Report on Hiking the Bright Angel Trail
- Camping Options Along the Bright Angel Trail
- Gear Recommendations for Hiking the Bright Angel Trail
- Hiking the Bright Angel Trail as a Rim to River Hike
- The Bright Angel Trail vs The South Kaibab Trail
- Hiking the Bright Angel Trail as a Rim to Rim Hike
- FAQS
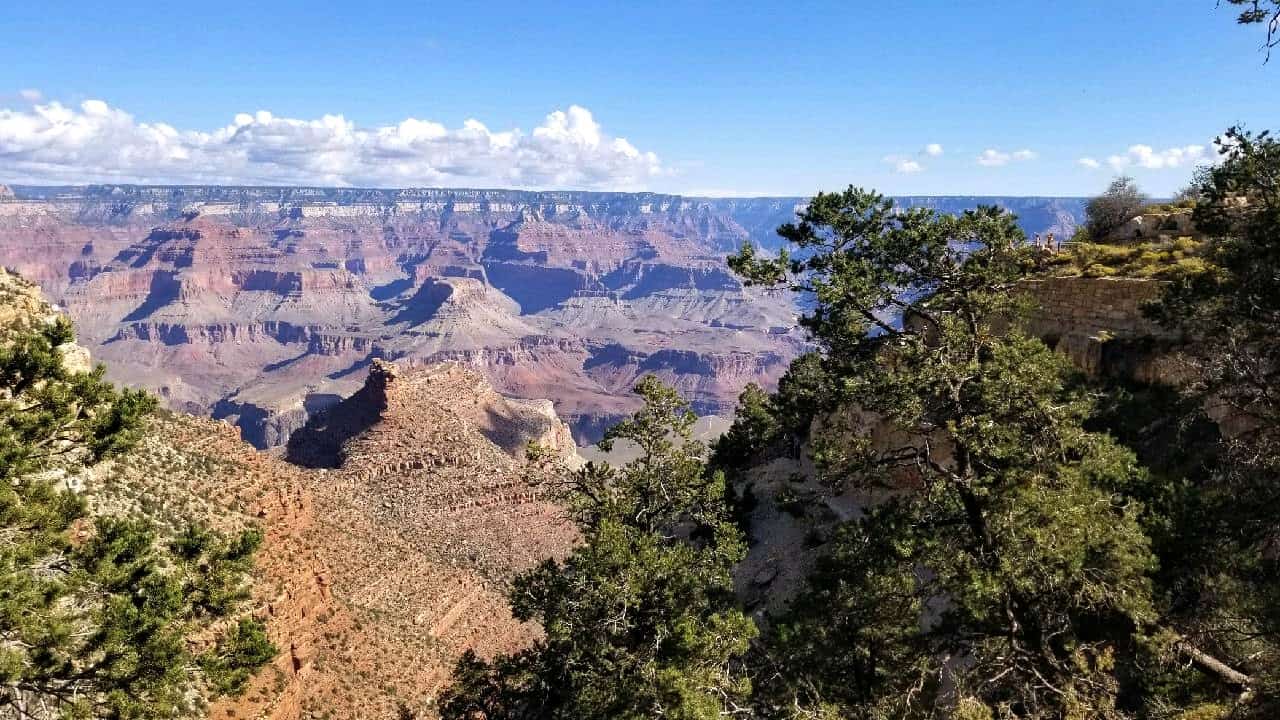
Background on the Bright Angel Trail
The Bright Angel Trail is one of 3 inner corridor trails in Grand Canyon National Park.
What is an inner corridor trail? An inner corridor trail is a trail that delves down into the canyon and back up, and also connects to other inner corridor trails at the bottom of the Grand Canyon, thus connecting the North and South Rims.
The 3 inner corridor trails in the Grand Canyon are:
- The Bright Angel Trail (South Rim)
- The South Kaibab Trail (South Rim)
- The North Kaibab Trail (North Rim)
The following maps show how the 3 corridor trails in Grand Canyon National Park connect at the bottom.


While the North Rim and South Rim of Grand Canyon National Park are approximately 5 driving hours apart from each other, these 3 inner corridor trails directly connect both rims, making it possible to hike across the Grand Canyon from one rim to another.
Out of the 3 inner corridor trails, the Bright Angel Trail is the most popular and most trafficked, though only a small percentage of hikers use it to hike all the way from rim to rim. The large majority of Bright Angel hikers day hike this trail to shorter “turnaround” spots, hike down to the Colorado River and back up again, or connect it with the South Kaibab Trail on the South Rim for a longer “Rim to River” hike. This is part of the appeal of the Bright Angel Trail – there are a lot of different options!

Location of the Bright Angel Trail in the Grand Canyon
The Bright Angel Trail is located on the South Rim of Grand Canyon National Park. It is located in the heart of the South Rim region, known as Grand Canyon Village. It is in very close proximity to multiple National Park lodges, as well as the Visitor Center, museums and exhibits, and dining and shopping facilities.
Location of the Bright Angel Trailhead and Trail on the South Rim of Grand Canyon National Park
Closest Town(s) to the Bright Angel Trail
- Tusayan, AZ: 15 minutes
- Williams, AZ: 1 hour
- Flagstaff, AZ: 1 hour and 30 minutes
Closest Airport(s) to the Bright Angel Trail
- Grand Canyon National Park Airport (Tusayan): 15 minutes
- Flagstaff Pulliam Airport: 1 hour and 30 minutes
- Phoenix Sky Harbor International Airport: 3 hours and 30 minutes
What to Know Before Hiking the Bright Angel Trail
Grand Canyon National Park Entrance Fees: $35 per vehicle (good for 7 consecutive days)
Hours: open 24 hours a day daily (the North Rim closes in the winter, but the South Rim is open year round)
Best Time of Year for Hiking the Bright Angel Trail: spring and fall (but can be hiked year round)
Trailhead Facilities: there is parking and bathrooms close to the trailhead
Permits/Reservations: there are NO permits or reservations required for a DAY hike of the Bright Angel Trail. Permits/reservations are only required for overnight camping along the trail at either the Havasupai Garden Campground, Bright Angel Campground, or Phantom Ranch.
Pet Policy: pets are NOT allowed on the Bright Angel Trail
Tips for Hiking the Bright Angel Trail
- Check the weather – the South Rim sees it all, from snow and ice, to scorching heat, to flash floods – even tornadoes!
- Make accommodation arrangements in advance – campgrounds, Phantom Ranch, and park lodges fill up quickly!
- Utilize the free South Rim park shuttle as needed
- Familiarize yourself with the entire Bright Angel Trail before hiking
- Bring all necessary hiking gear for Grand Canyon trails
- Bring plenty of water in a reliable water transportation system!
- Wear the right fabrics – breathable, moisture wicking, and avoid black!
- Protect from the sun – wear hats, sunscreen, and cooling towels
- Start early – especially helpful in the summer to beat the heat, but beneficial year round to beat the crowds
- Bring healthy hiking snacks
- Bring reliable trekking poles if preferred
- Check the NPS website for alerts/updates before hiking the Bright Angel Trail – you want to know if water is shut off on the trail, etc!
- Know your abilities and be physically prepared
- Train rigorously for the full Bright Angel Trail, and mimic hiking conditions if possible on practice hikes
- Bring a fully charged, comfortable, and reliable headlamp for early morning starts or late evening finishes
- Always stay on designated trails
- Pack it in, pack it out, and leave no trace
- Never enter the Colorado River!
- Respect wildlife
How to Access the Bright Angel Trailhead
Despite the immense size of this National Park, accessing the Bright Angel Trailhead is simple and easy.
First, it is within driving distance of several small towns and airports, including Tusayan, Williams, and Flagstaff, all of which are within a 1 hour and 30 minute radius from the Bright Angel Trailhead. Second, there are a handful of National Park lodges within walking distance of the trailhead, and many more hotel options located only 15 minutes south in Tusayan.

There are multiple parking lots located within walking distance of the Bright Angel Trailhead, and there is also the free park shuttle that runs throughout Grand Canyon Village, including the Bright Angel Trailhead.
The trailhead itself is located directly on the South Rim, indicated by a large stone sign.

Map of the Bright Angel Trail Route
The map below shows the roundtrip hike of the Bright Angel Trail, from the trailhead on the South Rim, to the bottom of the canyon at Bright Angel Campground, back up to the trailhead again.
Roundtrip route of the Bright Angel hike
Overview of the Bright Angel Trail
- Length: 19 miles roundtrip out and back
- Rating: Very Difficult
- Elevation Gain: 4,478 feet
- Estimated Time to Complete: 10 – 16 hours


Full Trail Report on Hiking the Bright Angel Trail
This trail report serves as a guide through each landmark on the Bright Angel Trail. Familiarizing yourself with this trail report will help you know what to expect from hiking the Bright Angel Trail, to ensure a safe and comfortable hike.

MILE 0: Bright Angel Trailhead
The trailhead is located on the South Rim, marked by the large stone sign.
MILE 1.5: 1.5 Mile Resthouse
After descending for a mile and a half, you will arrive at the first of 2 Resthouses located on the South Rim wall. There are bathrooms and water fill stations here.

MILE 3: 3 Mile Resthouse
Similar to the Mile 1.5 Resthouse, with bathrooms and water. You will be nearing the end of the steep descent on the switchbacks, and just prior to arriving at Havasupai Garden Campground, the next landmark, there will be a brief section of flatter trail.

MILE 4.5: Havasupai Garden Campground
A welcoming and surprisingly green little oasis halfway down the Bright Angel Trail. This is the first campground you will encounter on the trail, and there are bathrooms and water here as well. Following Havasupai Garden Campground, there will be a brief section of trail that follows along cliff walls and the Indian Creek, before arriving at the Devil’s Corkscrew.


The Devil’s Corkscrew is a switchback filled descent located in between Havasupai Garden Campground and Pipe Creek Beach / River Resthouse. There is a lot of exposure, but it is easier coming down than it will be going back up later.
MILE 7.7: River Resthouse / Pipe Creek Beach
The canyon walls will have converged as you proceed toward River Resthouse and Pipe Creek Beach, but they are about to open up to views of the Colorado River shortly! There is a bathroom at River Resthouse, but no water. Despite what you may see others doing, do not attempt to wade into the Colorado River at Pipe Creek Beach. It’s not that kind of beach!
As you pass Pipe Creek Beach, the canyon wall fully open to the immense span of the Colorado River at the bottom of the canyon. You will proceed on towards the silver suspension bridge and Bright Angel Campground, as you pass through a brief section of sandy trail, bordered by canyon walls on your right, and the river below on your left.


MILE 9.5: Bright Angel Campground
Just before arriving at Bright Angel Campground, you will first cross the silver suspension bridge over the Colorado River, one of the most thrilling parts of the Bright Angel hike! You can literally feel the thundering power of the river below as you cross the bridge.
Much like Havasupai Garden Campground, Bright Angel Campground is a surprisingly verdant and peaceful oasis at the bottom of the canyon. If you hike a few tenths of a mile further, you will see Phantom Ranch and the canteen, where you can mail a postcard, or grab some ice cold lemonade (remember to bring cash). The North Kaibab Trail also connects here, for those hikers utilizing the Bright Angel Trail to connect to the North Kaibab Trail for a south to north route of the Rim to Rim hike.
Before departing Bright Angel Campground, I recommend stopping for a longer break and a larger snack, or even an actual meal. I like to enjoy a sandwich or two, plus snacks, in the shade of the tall trees lining the Bright Angel Creek, which runs through the campground. I also recommend taking off your socks, soaking your feet in the ice cold water, and then putting on a new pair of socks. It is quite a morale boost! Also, be sure to use the bathrooms here and fill up on water. There’s a tough climb ahead.


To return to the Bright Angel Trailhead, depart Bright Angel Campground, return across the silver suspension bridge over the Colorado River, and proceed towards the RIGHT on the south side of the bridge. At the end of the bridge, you will see the sign indicating the junction for the South Kaibab Trail and Bright Angel Trail. Stay right for Bright Angel (it is not recommended to ascend the South Kaibab Trail since there is no water).
MILE 11.3: River Resthouse / Pipe Creek Beach
Once again you will arrive at River Resthouse and Pipe Creek Beach. Brace yourself, because the challenging Devil’s Corkscrew switchbacks come next. These switchbacks are steep and largely exposed, so pace yourself, use sun protection, and stop as necessary. Hydrate consistently, and snack to replenish electrolytes. I like to use either a cooling towel, or simply my cotton tank, to dip into the small streams found in this area, to help keep my core cool.
The good news is, the Devil’s Corkscrew is one of the hardest parts of the Bright Angel hike, if not what some people consider to be the hardest. Once you are through it, you will arrive at the welcoming Havasupai Garden Campground, the perfect place for a rest stop.

MILE 14.5: Havasupai Garden Campground
After tackling the impressive Devil’s Corkscrew switchbacks, I would recommend breaking in Havasupai Garden’s shade. Refuel, rehydrate, and rest for a bit, because another huge climb comes next. Take advantage of the bathrooms and water fill stations too.


Following Havasupai Garden Campground, there is a brief flatter portion of trail, before arriving at the bottom of the vertical South Rim wall, and the final set of switchbacks up what is often called Jacobs Ladder, on the South Rim wall.
MILE 16: 3 Mile Resthouse
3 miles left! Don’t forget, there are bathrooms and water at both 3 Mile and 1.5 Mile Resthouses if needed.
MILE 17.5: 1.5 Mile Resthouse
Only a mile and a half left to go, though it still might feel like an eternity! If you are close to running on fumes at this point, pace yourself and take as many breaks as necessary. You will get there. As you get closer to the trailhead, you will be able to start making out the outlines of the buildings that line the South Rim. You may even hear people cheering at the trail for finishers. If you notice that this part of the trail gets more trafficked, that is because a lot of visitors hike down Bright Angel and then turn around at either Resthouse, so not only are there roundtrip hikers here, but there are also shorter day hikers, and likely even some Rim to Rim finishers and Rim to River finishers! When you pass through the tunnel, you’ll know you are nearly there!

MILE 19: Bright Angel Trailhead
Done! Soak in the views from the top and revel in the accomplishment you’ve just completed! Only a small percentage of Grand Canyon visitors get to experience the Bright Angel Trail in its entirety.

If you are lodging on the South Rim, luckily accommodations are within a few minutes walk, including showers! There is also the free park shuttle you can use, though there is plenty of dining options within walking distance for those that need to immediately refuel. My favorite place post Grand Canyon hiking is the food court at the Maswik Lodge.
Camping Options Along the Bright Angel Trail
While it is completely possible to day hike the entire Bright Angel Trail roundtrip, and many hikers do, it is also possible to camp overnight at several locations:
- Havasupai Garden Campground: midway on the Bright Angel Trail (mile 4.5 from the trailhead)
- Bright Angel Campground: at the bottom of the canyon (halfway point of a roundtrip hike, 9.5 miles from the trailhead)
- Phantom Ranch: a rustic lodge located at the bottom of the canyon (halfway point of a roundtrip hike, 9.6 miles from the trailhead)
It is important to note that campgrounds and Phantom Ranch are hard to snag permits for, and Phantom Ranch is especially hard to score a reservation as those are awarded via a lottery system. It is advisable to make camping arrangements and reservations as far in advance as possible. It is also possible to camp in one of the rim campgrounds in Grand Canyon National Park, in addition to the 3 corridor campgrounds mentioned above.
Gear Recommendations for Hiking the Bright Angel Trail
It is absolutely imperative that you are prepared with the right hiking gear for the Bright Angel Trail, or any inner corridor trail in the Grand Canyon for that matter.
Your gear list should include all the day hiking essentials necessary for hiking in the Grand Canyon, including a daypack, emergency gear items, a water transportation system, a backup filter for emergencies, the right layers, accessories for environmental protection, footwear and anti blister performance socks, a headlamp, hiking poles if preferred, and plenty of healthy hiking snacks.
Most importantly though, make sure that you practice on training hikes with the gear you intend to use on the actual Bright Angel hike. Make sure that you know what works for you on long distance, grueling hikes, from your water transportation system, to your shoes, to your daypack, to your snacks!
Hiking the Bright Angel Trail as a Rim to River Hike
One way popular way that the Bright Angel Trail is used in conjunction with other inner corridor trails is in connection to its South Rim sibling trail, the South Kaibab Trail. Connecting these two trails to descend and ascend the South Rim is what is known as a “Rim to River” hike. Though a Rim to River hike is also possible by hiking either of these two trails down and up individually as a single trail, the standard Rim to River route involves both the Bright Angel and South Kaibab Trails.


Rim to River Hike at a Glimpse
- Length: 16.5 miles roundtrip out and back
- Rating: Very Difficult
- Elevation Gain: 4,747 feet
- Estimated Time to Complete: 10 – 14 hours

Overview of the Rim to River Hike
The recommended and most popular route for a Rim to River hike is down the South Kaibab Trail, and up the Bright Angel Trail.
Why should you descend the South Kaibab Trail? The main reason is there is NO WATER on the South Kaibab Trail, so it is not advised to ascend its steep trail at the end of a already long and grueling hike, with no water availability, on an exposed trail that gets quite warm throughout most of the year. For this reason, it is highly advised to DESCEND South Kaibab, and ASCEND Bright Angel on a Rim to River hike.
A Rim to River hike essentially combines the best of both South Rim corridor trails, while avoiding the worst (the no water situation on South Kaibab).
The South Kaibab Trail contains arguably superior views than the Bright Angel Trail, but it also comes with a few little quirks to be aware of. Aside from the differences in trail length, elevation, and bathrooms and water fill stations, the other main difference between the South Kaibab Trail vs the Bright Angel Trail involves logistics. While the Bright Angel Trail is easy to access, with plenty of parking and surrounded by the facilities and infrastructure of Grand Canyon Village, the South Kaibab Trailhead is more removed and harder to access.
The South Kaibab Trailhead is only about 4 miles (or a 10 minute drive) from the Bright Angel Trailhead. But you cannot park or leave a car at the South Kaibab Trailhead. The only way to access the Bright Angel Trailhead is by pre-arranged dropoff, or by utilizing the free park shuttle. The Orange Line of the park shuttle services the South Kaibab Trailhead, but it only runs at designated times throughout the day, and those times vary depending on the season. If you are planning to use the park shuttle to be dropped off at South Kaibab, be sure to check the times and know the pick up spots on Grand Canyon Village (there are several).

The Bright Angel Trail VS the South Kaibab Trail
While it is highly advised to follow a standard route of descending South Kaibab and ascending Bright Angel when connecting these two South Rim inner corridor trails, if other purposes or situations arrive, it is helpful to summarize the main pros and cons of these two trails.

Again though, when hiking a Rim to River, you essentially get to combine the best of both of these trails, creating a truly unforgettable and epic experience!
Hiking the Bright Angel Trail as a Rim to Rim Hike
If you are ready to take on one of the toughest hiking challenges in the country, you are ready to use the Bright Angel Trail for hiking a full Rim to Rim hike!
You will see the Rim to Rim hike squarely on any list of toughest trails in the U.S., and for good reason! The distance, the elements, the elevation gain, the exposure, the switchbacks! If you are contemplating a Rim to Rim hike, know that the Bright Angel Trail plays a crucial role in the most popular Rim to Rim route.
There are numerous ways you can complete a Rim to Rim hike:
- South to North via Bright Angel and North Kaibab
- South to North via South Kaibab and North Kaibab
- North to South via North Kaibab and Bright Angel
For first time Rim to Rim hikers, the last route is the most recommended: hiking North to South via the North Kaibab Trail on the North Rim, and the Bright Angel Trail on the South Rim. My detailed Rim to Rim guide goes into all the reasons for this recommendation at length. This graphic below also provides a summary.

If you opt to hike South to North, you will have the choice between which South Rim corridor trail to use: the Bright Angel Trail or South Kaibab Trail. You can refer back above to the pros and cons of these two trails, though many people break down the choice to these factors:
- South Kaibab has the better views, but is harder to negotiate logistics due to having to arrange a drop off, or use the free park shuttle, which only runs at designated times. It is also shorter, but has no water.
- Bright Angel is easier to access, and has more amenities immediately nearby, but has a longer distance, and slightly subpar views. It does have water, bathrooms, and a campground.
*Note that if views are your biggest deciding factor, an early, pre-dawn start (which is recommended for most Rim to Rim hikers) may make that a moot point, assuming it might be too dark to actually see much of the views!
Overview of the Rim to Rim Hike
- Length: 21 or 24 miles (depending on direction and/or which South Rim corridor trail used). Recommended route of North to South via the North Kaibab Trail and Bright Angel Trail is 24 miles roundtrip.
- Rating: Very Difficult
- Elevation Gain: 5,574 feet
- Estimated Time to Complete: 12 – 18 hours
The most recommended route for first time Rim to Rim hikers is hiking North to South on the North Kaibab and Bright Angel Trails. Though it is possible to use the South Kaibab Trail to ascend the South Rim, as mentioned before, this is highly advised against due to the no water availability on the South Kaibab Trail.

A full Rim to Rim hike traverses the forested North Rim with its stark red rock walls and yellow and white aspen trees, then delves down into the canyon past the Supai Tunnel, Redwall Bridge, Cottonwood Campground, and Ribbon Falls, before finally arriving at the bottom of the canyon at Phantom Ranch and Bright Angel Campground. After crossing the silver suspension bridge over the Colorado River (the separator between the North and South Rims), you will come to the junction of the South Kaibab and Bright Angel Trails. Proceed to the RIGHT to take the Bright Angel Trail up the South Rim, past Pipe Creek Beach, the switchback filled Devil’s Corkscrew, the surprisingly lush Havasupai Garden Campground, and then the final push up the South Rim wall!


If you are considering a Rim to Rim hike, take your preparation very seriously! Utilize a thorough Rim to Rim training plan, and invest in the right Rim to Rim gear list!
Looking at hiking the epic Rim to Rim hike?
How Much Would 4 Months of Accountability and Coaching Mean to You?
Did you know that I offer 1:1 Coaching for the Rim to Rim hike?
Take a look, and COMPLETE THIS INTEREST FORM to get started today!

FAQS on Hiking the Bright Angel Trail in the Grand Canyon
What shoes should I use for hiking the Bright Angel Trail?
I highly recommend trail runners. You can absolutely hike a Rim to Rim in hiking boots, but I believe trail runners, with their superior cushioning, leave your feet feeling more energized and “fresh” on a long distance hike like the Bright Angel Trail. This trail is well maintained – you shouldn’t be doing any boulder hopping or scrambling. My favorites that I hike and run all my long distances in are HOKA One One Speedgoats. You can’t beat the cushioning, and they have incredibly reliable grip and support. Just look around at other hikers feet, and you are bound to see a lot of HOKAS.
Can I camp on the Bright Angel Trail?
There are 2 campgrounds, Havasupai Garden Campground and Bright Angel Campground, along the trail, in addition to Phantom Ranch. Havasupai is halfway down Bright Angel, and the Bright Angel Campground is at the bottom of the canyon.
Where do I park for the Bright Angel Trail?
There are multiple parking lots within walking distance of the Bright Angel Trailhead, in Grand Canyon Village.
Do I need a permit or reservation for day hiking the Bright Angel Trail?
Nope. Only for overnights.
Which South Rim trail has better views, the Bright Angel Trail or South Kaibab Trail?
South Kaibab has slightly better views at viewpoints like Ooh Aah Point and Cedar Ridge.
Is the Bright Angel Trail kid friendly?
As a whole, no, not unless you’re talking about older teenagers. If you have younger children, I’d recommend a shorter turnaround point, like 1.5 Mile Resthouse, for a 3 mile roundtrip hike. It will still be challenging going uphill with children though, and they should be monitored at all times!
Is the Bright Angel Trail pet friendly?
No, pets are not allowed.
Are there bathrooms on the trail?
Yes, there are several bathrooms located every couple miles along the trail.
What is the hardest part of the Bright Angel Trail?
Going back up the Bright Angel Trail is the most difficult part, specifically the Devil’s Corkscrew switchbacks, located between River Resthouse / Pipe Creek Beach and Havasupai Garden Campground, and Jacobs Ladder, the final set of switchbacks climbing up the last miles of the South Rim wall.
Is there shade on the Bright Angel Trail?
Mostly no. Depending on the time of day, you may get some welcome shade from the shadows of the canyon walls. For example, in the late afternoon as you proceed up the South Rim wall, you will find you start to receive more shade from the shadows of the South Rim. But overall, you need to use sun protection and be prepared for lots of exposure.
Where is water located on the Bright Angel Trail?
At 1.5 Mile and 3 Mile Resthouses, Havasupai Garden Campground, and Bright Angel Campground.
What is the hottest part of the Bright Angel Trail?
The ascent up to Havasupai Garden Campground, through the Devil’s Corkscrew, is the hottest part of the Bright Angel Trail.
RELATED ARTICLES:
- Hiking Gear for Grand Canyon Trails
- First Timers Guide to Hiking the Rim to Rim in One Day
- Guide to Hiking the Rim to River in the Grand Canyon
- South Kaibab Trail vs Bright Angel Trail
- Complete Rim to Rim Training Plan
- Complete Rim to Rim Packing List
PIN for LATER!