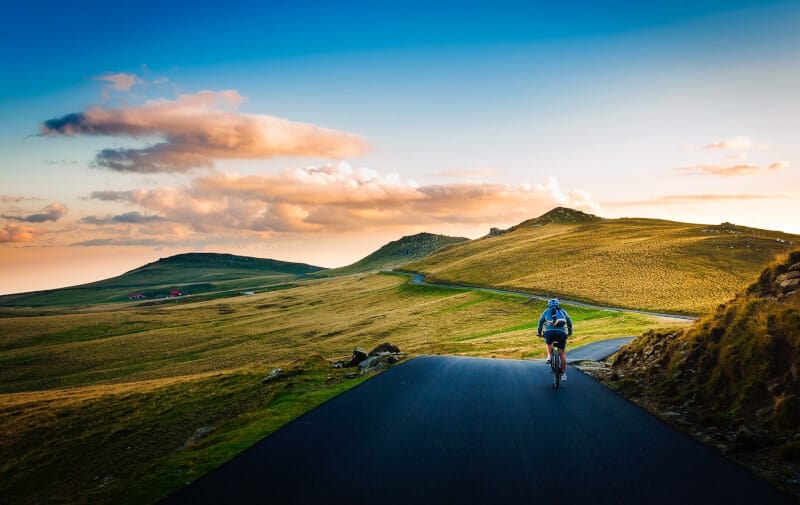
Road Cycling for Beginners: Pedal That Pavement
There is a lot to consider when hopping on a bike for the first time, or after a long interval! In my case, I had not ridden a bike since I was a child, and then in my 30’s, I began venturing into the arena of competitive road cycling! Getting started can be overwhelming, from choosing the right road cycling bike, the right cycling equipment and cycling gear for beginners, and learning the rules of the road! But once you have figured out the foundation of road cycling for beginners, it can open up a world of exciting opportunities! It might even lead you to taking part in your own competitive cycling events across the country!
Disclosure: Below are some affiliate links-these are all products I highly recommend. I won’t make any recommendations on this page that I haven’t tested or personally used!
Getting Started With Road Cycling
The reasons to start on a path to road cycling are many, including the physical benefits and the ensuing opportunities for active travel!
Physical Benefits
The physical benefits of cycling extend throughout the whole body system. It should be no great secret that as a form of aerobic exercise, cycling touts the same proven benefits:
- a deterrent against disease
- a way to maintain healthy weight (which is a deterrent against disease)
- aging prevention
- injury prevention
- increased bone strength and muscle strength
- a way to burn fat and build muscle
- a boost to your cardiovascular health
- low impact exercise
Cycling not only burns calories and fat, but due to the resistance factor, it also is incredibly effective at building muscle. It utilizes multiple muscle groups, and increases stamina. Working those pedals increases aerobic exercise, particularly in the power phase of pedaling.
During the power phase, the rider is engaging in the downstroke of the pedaling rotation, and this phase in particular activates muscles in your rear, thighs, and calves. During the upstroke, hamstrings and hips are engaged.
Cyclists have a unique amount of control over how challenging they want their cycling workout to be, by choosing the type of terrain they ride on. The benefits of cycling will be increased if you are consistently taking on some hills on your rides!
Cycling is great as a stress reliever as well, which ultimately touches on all other aspects of physical and emotional health.
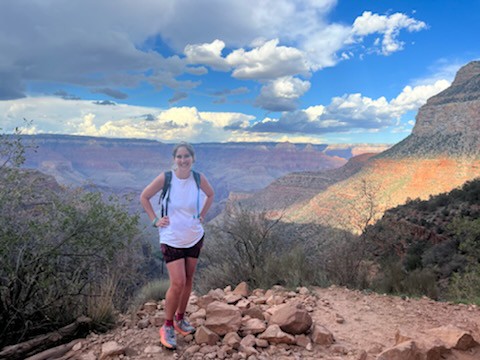
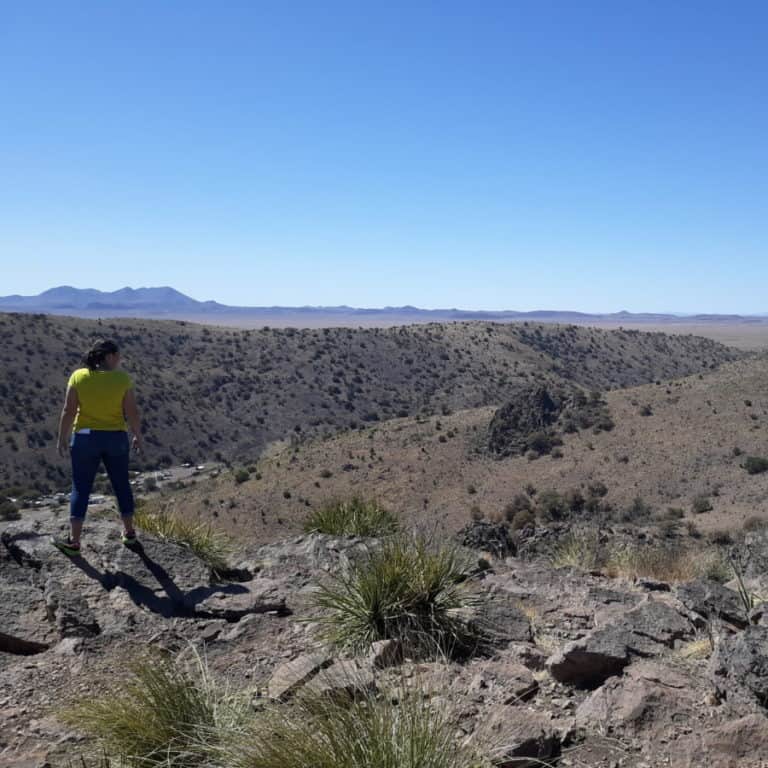
Cycling is an incredibly beneficial form of exercise on its own, but it is also incredibly beneficial as a form of cross training, when paired with other forms of exercise. For example, I simultaneously cycle, hike, and run long distances on a regular basis. Even when I am primarily training for a long distance hike or run, I still cycle regularly as I have found the benefits only amplify my performance in running and hiking. And vice versa.
Finally, for those that may be feeling the effects of aging, overuse, injury, etc., cycling is a great form of low impact exercise and training. In fact, I initially started cycling when I was going through a bout of overuse injury in my knees, coupled with early signs of osteoarthritis. Cycling not only allowed me an outlet for low impact and long distance exercise and training, but it actually improved the condition of my knees, and allowed me to continue comfortably running and hiking long distance more than I was prior to cycling.
Running vs. Road Cycling
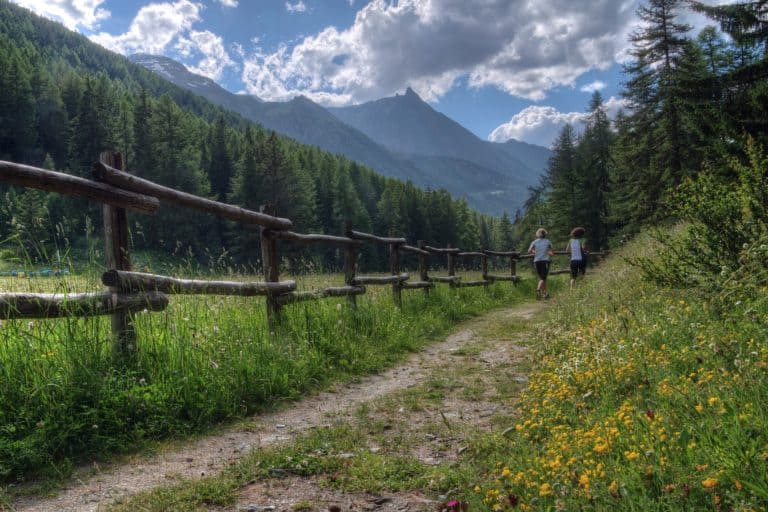
As a long distance runner as well, I could not help but compare the similarities and differences between long distance running and road cycling. Both are necessary components of my de-stressing routine. Both are effective methods at burning calories, burning fat, and building muscle.
One area that road cycling has the upper edge on is impact on the body. Road cycling is a lower impact form of exercise when compared to running. Runners bear full weight on themselves, whereas cyclists have a bike to bear full weight. Studies have shown that cycling tends to result in lower instances of overuse injuries, such as muscle strains and inflammation, when compared to running.
Having run now for almost half my life, I can begrudgingly admit that I notice the effects that weekly running has had on my joints. I have had my fair share of overuse injuries. My recovery regimen took on a new look in my 30’s, and will continue to do so I assume into my 40’s, and involves more collagen, more anti-inflammatories, more cross training and stretching, and more rest. And, more cycling.
I actually introduced road cycling into my regular exercise and active travel routine in order to reduce some of the impact on my joints, while still being able to engage in the active travel lifestyle. Cycling started out as a form of cross training for my off days from running, but slowly morphed into an equally enjoyable activity that now simultaneously benefits my running game, and my hiking game, as well. The bottom line is this: if you are someone who has experienced the complications that can come from higher impact running, or from aging, or from both, road cycling may be a great addition or alternative to your current regimen.
One thing to keep in mind though, is that just as it is important to implement cross training as part of a healthy running program, it is important to strength train and cross train on the side of your cycling routine, to ensure healthy bone density, a strong core, proper engagement of all muscle groups, and injury prevention.
>>>MORE: Looking for some cross training ideas? You may be interested in some at home HIIT workout routines!
Active Travel Opportunities
I was pleasantly surprised at all the active travel opportunities that road cycling has opened up for me. While I still feel that, generally speaking, there are more organized running events in society today (here’s the quickest way to find those cycling events near you), there is no shortage of organized cycling events locally and across the globe. As someone who uses my goal setting to take me to new places around the world, I have had no trouble marrying this concept with road cycling.
There are many great one day and multi day riding events across the country, found everywhere from major cities to rural small towns. There is something to fit every road cyclist at whatever stage of cycling they currently are in. I am currently looking forward to participating in the LBJ Bike Tour in Hill Country, Texas!
Common forms of organized road cycling events are century rides (100 miles), half century rides (50 miles), and some smaller increments (these tend to vary, but include distances like 30 miles and 60 miles). Organized cycling events are often categorized by the type of surface that riders will cycle on, such as pavement or dirt.
>>>MORE: Wanna participate in a century or half century ride, but don’t know where to start training? Check out the shop for century and half century training calendars!
My goal is to work my way up to some of the more famous multi day rides, like the annual Seattle to Portland cycling event!
Basics of Road Cycling for Beginners
So, how do you go about actually getting started with road cycling? It can seem overwhelming to know how to pick out the right bike, how to actually ride it without falling off, what to do if you actually do fall off, how to understand gears and road cycling equipment, and how to ride safely on roads with other vehicles. What I can say is that is can be overwhelming, but if you take it small and take it in steps, you will gradually begin to increase your knowledge, confidence, and ability.
To be clear, there are two different kinds of biking out there: road cycling and mountain biking. The purpose of this post will focus on road cycling for beginners. All cycling equipment recommendations, road rules, and road cycling tips will focus specifically on road cycling.
How to Prepare for Road Cycling
Preparing for a start in road cycling comes with a certain amount of preemptive leg work. There are several key things to take into account, including the costs to get started, the necessary cycling equipment, the knowledge of the road, and the upkeep of your road cycling bike.
Picking out a Road Cycling Bike
Before I purchased my own road cycling bike, I was under the misinformed idea that road bikes came in a one size fits all. There are different sizes, heights, and builds to road cycling bikes, and it is important to take that into account when picking yours out. Road bikes may also be built differently based on gender, so if that becomes an important qualifier for you, than be sure to check if a bike has gender specifications.
The road cycling bike I ultimately chose was a Cannondale Synapse Carbon Disc 105 SE Women’s bike. It is easily the most expensive item I have ever purchased in pursuit of my active travel and exercise goals. But I have been completely pleased with my decision, and here is why. It is lightweight, comfortable, and comes equipped with some impressive cycling gear, including Shimano disc brakes, hidden cable routing, and a solid yet lightweight frame.
I contemplated spending less to begin with. What if I ended up not being good at road cycling? What if I did not end up using the bike or cycling as much as was my intention? What if I never got good enough to compete in an organized event? These were the types of questions that plagued me as I tried to make a decision on my road cycling bike.
In the end, I decided to buy the bike that I knew would uphold the goals I had for it, and nothing less. I was not going to buy a bike to leisurely ride through my neighborhood on Sunday afternoons, I was buying a road bike to try and set personal records in, to ride on for hours in the Texas heat so I could train for a race, to take on progressively bigger and bigger hills, to learn all about gears and pedals, and to race competitively with! So I bought the bike that I felt best supported these goals. For me, a compromise on performance might have led to a compromise in my goals down the road.
I know purchasing a road bike can be an expensive commitment, and it is hard to pull that trigger. But I would encourage you to buy the bike that is going to keep you in pursuit of living up to its full potential! I have not regretted that decision, as it has led to a lot of exciting new doors to pursue!
Keep in mind that with an expensive purchase of an expensive road bike, comes extra responsibility. Upkeep and maintenance of your road bike is a crucial part of ownership and use. It is one of the considerations you should make when deciding to embark down this path. Road cycling comes with a lot of unique and exciting opportunities when compared to other forms of exercise (say running), but it also has the real potential to come with a bigger long term price tag.
How to Determine the Right Size Road Cycling Bike
There are different ways of measuring the right size. In addition to doing your own due diligence, I would highly recommend getting sized at your local biking store. They can assist you in determining the right road bike and other specifications. They can also provide hands on troubleshooting, such as figuring out if your bike allows for the correct amount of bend in the knee when extended (should be about 30 degrees), or if your saddle height needs to be adjusted.
In picking out your first road cycling bike, I would also go to a cycling store first to try out some bikes first hand. Use this guide to help you narrow down your search and funnel down to a few top choices, then go try them out!
If you are not able to do so, there are resources available that can help you choose the correct size road cycling bike online. Also, check out this helpful short video that explains some of the basics of road cycling for beginners.
Road Cycling Gear for Beginners
Owning a road cycling bike can be an intricate art form. There are numerous pieces of cycling equipment that work in conjunction with rider and bike, to perform harmoniously together! Coming from the world of long distance running, it was a bit of an adjustment to get used to the sometimes overwhelming web of interconnected cycling equipment, but I was able to work my way through to the basics of cycling gear for beginners. Below are quick links to my top recommended gear items, and then following is a deeper dive into each.
Quick Links:
- Best Road Bike: Cannondale Synapse
- Best Helmet: Giro Aether
- COMPREHENSIVE PERFORMANCE AND PROTECTION: Engineered in Giro’s helmet test lab.
- Best Saddle: Selle Italia

- COMFORT- The Superflow technology in this road bike saddle drastically reduces most physical limitations caused by prolonged pressure in the perineal area when riding
- Best Pedals: Shimano Ultegra

- The PD-R8000 is a Pro-level Road Bike Pedal: Professional-level performance for all riders
- Best Road Biking Shoe: Pearl Izumi

- Upper Material: synthetic, seamless
- Best Cleats: Shimano

- Genuine Shimano replacement part
- Best Insulated Water Bottle: Hydro Flask
- Straw Lid Is Leakproof And Makes Cold Refreshment That Much Easier

- Water Bottles Fit: 23/24/25/26/27/28 OZ water bottles can fit snugly, other bottles like 30 oz, If the bottle is tall, then yes. accurately, it is decided on the bottle diameter, min bottle diameter is 2.75inch(68.9mm), max bottle diameter is 3inch(76.2mm). The cage designed to flex enough to insert and hold standard water bottle securely, you can collapse to snug up bottle.
- Best Hydration Pack: Camelbak Lobo

- Pockets: 3 exterior

- Steel barrel with ergonomically designed comfortable handle
- "SUPER-FIT" Clever Valve - No adaptors needed. Automatically locks onto both Schrader and Presta valves, no leaks, no valve changing needed. IMPORTANT: doesn’t come with separate valve adaptors because it locks onto both Presta and Schrader valves automatically.

- 1. The PREMIUM VALVE ADAPTER KIT-valve adapter kit includes 3 types of adapters, bicycle tire valve adapters, air pump needle valve adapters for various sports balls, inflatable toys and swimming ring valve adapters.
- SUPER BRIGHT LEDS & FOUR MODES - Your new bike light 🚴 set features extremely bright LEDs which illuminate the entire road. Featuring four different modes of lighting which you can switch with the click of a button. Say goodbye to bulky bike lights with excessive wiring.
- Best Biking Shorts: Pearl Izumi Elite Pursuit

- ELITE transfer In-R-Cool fabric powered by cold Black provides superior cooling and reflective sun protection
- Best Jersey: Pearl Izumi Escape Short Sleeve

- Best Cycling Socks: Giro Comp Racer

- Ultra-compact 2 bike carrier for traveling and commuting.Ultra-compact 2 bike carrier for traveling and commutingFolds up small and fits inside carrying bag or backpack3 padded legs rest against vehicle; 3 adjustable security strapsTie downs and padding keep bike secure and separate from vehicleFits sedans, hatchbacks, minivans, and SUVs. Important, please consult manufacturer web page for specific vehicle fit.Allen's warranty does not cover items purchased through third-party sellersImportant, please consult manufacturer web page for specific vehicle fitPadded lower frame protects vehicle from a bicycle.Fully assembled, set up, and installed in seconds.
- Best Cycling Headband: GORE Windstopper

- Windproof unisex headband for all weather conditions

- One pack of three 0.15-ounce ChapStick Moisturizer Original Lip Balm Tubes, SPF 15 and Skin Protectant
Cycling Equipment #1: Helmet
The most important road cycling, protective item of cycling equipment is your helmet. A helmet is an absolute necessity, always. Not only is this piece of cycling equipment vital for preventing injury, but most organized races require one to participate. There are a lot of different factors that facilitate your choice of helmet, including MIPS rating, aerodynamics, ventilation, style, color, etc. But the two most important factors are how well it fits and how safe it is.
Technology continues to improve in the safety category. Look for a helmet that has a rating for protecting against rotational forces, such as MIPS rating. The Giro line has a solid reputation for safety and protection. The best helmet in the Giro line is the Giro Aether MIPS helmet. It comes at a hefty price, but this is one piece of cycling equipment you cannot put a tag on for its worth.
Cycling Equipment #2: Saddle
The saddle is your bike’s seat. The saddle that comes included on road cycling bikes will be standard, and depending on your comfort level, it may be something you wish to upgrade. It is not a necessity to get changed out the door, but after a couple months of riding, you may desire something with a little more comfort, depending on how long your rides have progressed at that time. I knew I needed a little bit of an upgrade right around when I started hitting 20 mile long rides.
Cycling Equipment #3: Pedals
Choosing pedals was second only in overwhelming-ness to selecting the road bike itself. I was completely clueless that:
a). my bike I purchased did not automatically come with standard pedals and I had to select them myself, and
b). what in the world were clip in pedals?
I literally had never heard of the concept of clipping in to pedal. I spent what felt like hours researching this concept so that when I went to my local bike store to pick up my road bike and select pedals, I would hopefully not look like a completely lost fool.
Turns out that going in person and simply talking to the experts was exactly what I needed do in order to understand how to select the right pedals (and consequently, the right shoes).
So in a nutshell, pedals were one of the most intimidating items of cycling equipment I had to pick out when setting up my road cycling bike. As a road cyclist, you have the choice to go with a clip in or non clip in pedal. I will explain the difference between the two in more detail.
Clip In vs. Non-Clip
Before you attempt to decide which route to go, a quick video tutorial for the visual learners out there. I found the bit on figuring out which is your leading leg extremely intuitive as well!
So as you can see, clip in pedals and clip in cleated shoes look completely mind boggling at first. Yes, you will want to practice first on an empty road or up against a wall or tree. Yes, you will fall down the first couple times. Yes, coming to a complete stop will be a whole new level of terror the first couple of times. Yes, you will get the hang of it and this unnatural and terrifying feeling does go away, and, as a kind bike shop employee told me, it really does become like muscle memory if you just keep practicing and do not give up on it. I recommend clip in myself.
As you saw in the video, the clip ins technically involve both your road bike pedal and your cleated cycling shoe. You cannot function as a clip in rider with one and not the other. So when choosing your pedal, know that you will be buying the coordinating shoes as well.
So what does a clip in pedal (and shoe) look like? A clip in cycling shoe will have “braces”, also referred to as cleats, that screw into the bottom of the shoe. The clip in pedal will have a built in “receptor” for that shoe’s cleat, so that when the shoe is put into contact with the pedal, they snap together and attach. Your shoe and foot therefore become essentially attached to your pedal.
To attach your cycling shoe’s cleat to your clip in pedal, push off as usual, and apply some pressure on each foot to the pedal to get them to snap together. Disconnecting takes some more practice, and is more based on muscle memory. When you begin slowing down, turn both feet outward at approximately a 90 degree angle, and the pedal and shoe will disconnect.
To maintain the most efficient and timely connections and disconnections, it is important to check the screws or bolts in the bottom of your shoe frequently. Over time and multiple disconnections, the screws may begin to loosen, which weakens the integrity of your cleat, and may also make disconnecting more difficult. I tighten my screws after each ride.
So how do you know whether you are a clip in rider or not?
The way I see this decision being made should be determined by your intentions with your road cycling bike. If you are strictly planning to be a leisure rider, doing a few miles here and there every week, on mostly flat terrain, with no pursuit of power driven rides or intentional pacing, a standard non clip pedal is probably sufficient. Your shoe and therefore your feet will be used to power your bike, but will still be independent from it.
The advantage is that you can put your feet down immediately when necessary to regain balance or to stop suddenly. The downside is that for more competitive driven, power seeking riders, your feet do not transfer as much power on aggressive rides with a non clip in. Your feet can also slip from the pedal, which can cause you to lose momentum, power, and balance.
I would recommend a clip in pedal personally. The reason being, is that you are not limited by your pedal. You can start out as a leisure rider, but then have the potential to morph into a competitive rider if desired. It also will give you more power in your ride.
At first I wondered if the clip in pedal would really leave me feeling like I had an edge, but now that I am taking on hills, engaging in more power rides, and standing up to pedal those really tough inclines, I can see how having a clip in gives me more confidence. Confidence that I can pedal to my fullest without worrying about my foot slipping and losing all that power. Confidence that that small difference in pedal can help me be successful on larger, longer, and more aggressive hills.
Cycling Equipment #4: Shoes and Cleats
Another duh moment I had when I was a brand new newbie to road cycling was thinking that I could just go out and ride my road bike in my old Brooks I used to run in. Surely you could, but for long rides, power rides, and competitive rides, a specialized road cycling shoe suited just for your bike and pedal is better.
The important thing about road cycling shoes was discussed in conjunction above when mentioning clip in pedals. If you are going with a clip in pedal, it is important to pick out the right cleat to go with your road cycling shoe.
When it comes to cleated shoes and their receptive clip in pedals, brands go with brands. For example, I selected a Shimano SPD-SL road clip in pedal, so I got the corresponding Shimano SPD-SL cleat for my road cycling shoes as well. This particular cleat is compatible with all Shimano SPD-SL clip in pedals.
The final say on footwear is your road cycling shoe. Some shoes are either 2 or 3 bolt compatible, so pay attention to which one you need based on what type of cleat you have. Or you can purchase a road cycling shoe that is compatible with both. One such model is the Pearl Izumi Sugar Road Cycling shoe. This is a great beginner shoe that is well ventilated, lightweight, 2 or 3 bolt compatible with clip in pedals, carbon fiber plated under the ball area of the foot, as well as sporty and stylish.
This is another time where going in person to make these selections will be beneficial because a knowledgeable bike store employee can point you in the right direction and monitor the proper selection.
When wearing cleated road cycling shoes, take care not to walk around in them too much, as this can wear down and loosen the clip on the bottom. Use them as much as possible just on your bike.
Also, it is important to check the integrity of the screws holding the cleat in place to the bottom of your shoe. Over time and with use, those screws can start to loosen, which makes detaching your shoe from your pedal less smooth (which decreases your chances of stopping successfully). Check the integrity and security of your cleats before every ride, and tighten them as necessary.
So we’ve covered the complex web of clip ins, cleats, pedals, and shoes, here’s a recap of the complete package!
Cycling Equipment #5: Bottle Holder
It is important to stay hydrated on your rides. I will admit, when I first started riding, I only rode in short loops, and placed a water bottle at my designated break point along the way. I did not have the confidence to take a sip mid-ride, only when I was at a complete stop. So my bottle holder was a cycling equipment item I lived without for some time.
Then, as I gained confidence and started to take on new and longer courses, I realized I needed to up my confidence level to be able to drink mid ride, which necessitated an investment in a bottle holder. This is a relatively inexpensive piece of cycling equipment that is easy to install on your road bike, and it is crucial to your biking performance. Road cycling bikes will have pre drilled holes in which to screw in a water bottle holder, so it is very intuitive and user friendly to be able to install.
Learning how to cycle with one hand and have one hand free to drink with is another story, and one that takes practice and confidence!
Cycling Equipment #6: Tires
The most intricate part of my road cycling equipment to date has been my tires. It is also the piece of cycling equipment that I have had to maintain the most. A properly inflated tire has an important effect on your biking experience, and that is why it is vital to be knowledgeable about the proper inflation numbers for your particular tire, as well as how to spot and repair potential issues that may pop up.
Just as with clip in pedals, the decision for what type of tire you choose depends mostly on what your intentions are for getting into road cycling. You will have the decision to choose between a traditional road cycling tire (which is what will more than likely come standard on your road cycling bike purchase), or a tubeless tire. And if you are like I was when I was just starting to research road cycling, the term “tubeless” was a foreign language to me. So what exactly does going tubeless look like?
Traditional versus Tubeless Tires
A traditional road cycling tire is what it seems, and will come standard on a typical road cycling bike. When I bought my first road cycling bike, I learned that tubeless tires were gaining in popularity, due to some of their inherent advantages. Tubeless tires are internally coated with sealant which means they are naturally better at preventing punctures and flats, because the sealant can plug the rupture from the inside. Tubeless tires do cost an extra expense to install on a standard road cycling bike. Mine ran me about $50 a wheel to change over to tubeless.
Tubeless tires also come across as way more intimidating to figure out how to install properly, so I would absolutely recommend letting a professional install and seal your tubeless tires the first time, or first couple times! Tubeless tires involve messing sealant, stubborn seals, and the occasional finicky inflation.
I opted to go with tubeless myself, and it has required upkeep. Initially, in the first couple of months of ownership, I noticed the air pressure in my tubeless tires struggling to stay consistent. It seemed as if I was losing air pressure quicker than normal between my rides. After a visit to my local bike shop, I was informed that there was no defect in my tubeless tires. Instead I was told that with tubeless tires, it sometimes takes time and repetitive use to get the sealant in the tires to circulate, cover, coat, and seal the inside of the tire. In the meantime, I had to air up my tires a little more frequently than originally envisioned. Which leads me to my next important piece of road cycling equipment.
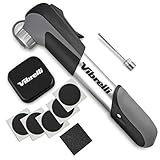
Cycling Equipment #7: Tire Pump and Repair Kit
Bike pumps come in a variety of options. You can get an electric powered, or hand powered. You can get a full size pump, or a compact travel pump. I prefer hand powered, as I do not have to rely on an electric source. And I prefer a portable pump, to be able to bring with me on longer rides and on races.
Though you can get something bigger, I would recommend going ahead and investing in a portable pump. Odds are you will need it when you are out on the road someday. Opt for one that can be mounted onto your bike frame for super convenience, and one that includes an adapter and does not require a converter to air up tires, like this one found here on Amazon.
An added bonus is that many portable bike tire pumps also include portable repair kits for punctures. Opt for these if you can. If you go tubeless you have less to worry about, but it is always better to be safe than sorry. In addition, many organized and competitive racing events require both of these items to be on your person for you to be eligible to participate.
When pumping bike tires, due your research on the proper tire pressure limits, which should be labeled on the tire itself. Do not over-inflate your bike tires.
Cycling Equipment #8: Tire Valve Adaptor
There are two main kinds of tire valves on road cycling bikes: Schrader and Presta valves. Schraders have a more screw look to them and are wider, whereas Presta valves are narrower and look more delicate. My Cannondale road cycling bike has Presta valves.
Depending on what kind of tire pump you purchase, you may need an adapter to pump your tires. These are inexpensive and usually only cost several dollars. Check whether your pump comes equipped with adaptability to convert to either Schrader or Presta, or whether you need to buy this additional inexpensive adaptor item to secure onto your valve before inflating.
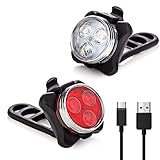
Cycling Equipment #9: Bike Lights
Invest in bike lights to install on your bike, for an additional layer of protection. I would opt for one that blinks and is waterproof for increment weather. It is best to get both a head light and tail light to protect from traffic on both sides of the road.
Cycling Equipment #10: FlipBelt
I wear a flip belt, found here on Amazon. These things are super utilitarian and practical for many uses. It is the same brand that I wear for running, to carry small personal items with me, such as keys, Chapstick, and my phone. It is great to be able to carry these small items on my bike rides as well, without it being cumbersome or in the way.
Cycling Equipment #11: Gears
Understanding how the gears on your road cycling bike work takes practice. Practice and experience are the best teachers in this case. For a quick breakdown, there are left and right hand gear shifters on each handle of your road cycling bike, which operate changes between the small and large sprockets.
The rule I learned with gears, is that you have to apply the opposites rules. This helpful video will hopefully help break this concept down. Do not be afraid to play around with your gears. Learn what each does, and how to operate them on uphills, downhills, and neutral sections of road.
Cycling Equipment #12: Bike Shorts
I would highly recommend, for your own comfort, that you invest in a specialized bike short. These will come with special padding, contoured specifically for a bike seat. They will save you on a long ride.
Pearl Izumi is a big name in the road cycling arena, and they make a superb cycling short that is lightweight, reflective against the sun, utilizes cooling and compression materials , contains a small pocket in the hem, and has ventilation.
Cycling Equipment #13: Bike Jersey
Bike jerseys are specifically made for cyclists, and help to offset wind and improve aerodynamics. If you are riding to compete, improve time, and participate in organized events, I would recommend investing in a bike jersey, such as these long sleeve and short sleeve options found as part of the Pearl Izumi jersey line:
- Long sleeve Pearl Izumi jersey here
- Short sleeve Pearl Izumi jersey here
- Pearl Izumi tank jersey here
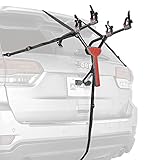
Cycling Equipment #14: Bike Rack
If you have a truck or a large SUV, you may be in luck with being able to more easily transport your road cycling bike. If not, you may want to invest in a bike rack, so that you can extend your routes, and bring your bike to exotic racing destinations! I promise, you will soon outgrow your own neighborhood and yearn to discover new routes!
Road Cycling Rules for Beginners
Road rules are unique for road cyclists. They mimic many elements of vehicle rules, and it is important to know how to share the road with other drivers, and well as successfully communicate signals and intentions when on your road cycling bike.
Signaling
Here is a quick breakdown of signaling basics:
- to signal a left turn, extend your left arm out sideways with all fingers or your index finger extended
- to signal a right turn, extend your left arm out sideways, bent up at a 90 degree angle at the elbow OR extend your right arm out sideways, with all fingers or your index finger extended
- to signal a slow down or stop, extend your left arm out sideways, bent down at a 90 degree angle at the elbow
Officially, a right turn signal is taught as left arm out. It has become accepted that to signal a right turn one can extend the right arm out sideways with fingers extended, as this seems more intuitive to drivers.
You should always signal your turns and stops to others on the road! Do not rely on drivers to be able to judge your next move.
Starting and Stopping
Starting and stopping on my road cycling bike was probably the most intimidating part of cycling for me. Know that you are probably going to fall several times before getting the hang of starting and stopping, especially if using clip in pedals. Here’s what you can do when you do happen to fall off your bike!
When learning to take off from a standstill, the first thing to figure out is your “preferred” or dominant leg. Just like you are most likely either right or left handed, you will have a preference for right or left footed. Without thinking, practice taking off a few times and notice which foot you subconsciously go to lead with.
Or, as demonstrated earlier in the video, have someone stand behind you and give you a slight push, and then notice which foot you bring forward first to stop your forward movement. This will be the dominant foot you will want to lead with and clip in your shoe first while pushing off.
Once you have established your leading or dominant foot, when you are ready to push off, bring that corresponding pedal up to a perpendicular position to the ground, place your shoe into the pedal, then push off, put pressure down on that foot, and connect that leading foot to the clip in before repeating with the other foot on the other side.
I personally am right footed, just like I am right handed. Which means that I bring my right pedal up to a perpendicular position to the ground before taking off, press down and connect my right foot when I take off, then connect my left foot in.
In the beginning, give yourself plenty of unobstructed room when possible to start. It takes practice to get going from a standstill. Often, in the initial stages of my practice, it would take me several rotations before both feet were attached and pedaling as normal.
On several occasions, I would not give myself enough chance at gaining momentum and would lose balance. It is important to know that this is ok and normal in the beginning, and to keep on practicing. Do not panic, and stay calm as you work on maintaining balance. It will become like second nature eventually and part of your muscle memory.
One way to practice taking off, especially if clipping in, is to prop yourself up, seated on your bike, against a wall or other tall structure. I used our mailbox. While seated and propped up, practice attaching your shoe and getting in the correct stance for taking off. You can also practice detaching your shoe from your pedal from this position also.
One additional thing to keep in mind, is knowing a strategy for where to start and stop. I would avoid trying to take off in the middle of an uphill while you are still in the learning stages. What might appear to be a very slight grade is harder to navigate when emerging from a standstill, while trying to get the hang of clipping in, gaining balance, and gaining momentum.
On the other hand, keep in mind where you choose to stop. Often, it will be in the middle of that horrible hill that you will feel the strong urge to want to stop and take a break. But keep in mind, that you will have to eventually take off from a standstill on that hill. For me, it has proven much easier to stop on an uphill than it is to start, and now I use that as motivation to get over the crest of those hills without stopping!
Now when I approach an unfamiliar hill or an ascent I have not practiced on yet, I typically stop on neutral ground to take a break before taking on the hill, to regain my breath and my energy, so that I do not have to push off from the middle of the hill. Some of my most precarious road cycling moments occurred before I figured this strategy out. This is also why it is important to pay attention to your surroundings at all times when on your road cycling bike, to be constantly scoping out and preparing a mental strategy to help you best achieve success.
Stopping on your road cycling bike can catch you off guard the first couple of times. Especially if you are a runner, used to being able to stop immediately. You cannot stop on a dime on a road cycling bike, without the likelihood of losing balance and falling. In particular, if you are clipped in, it is imperative that you give yourself extra time to detach and slow down, especially when you are a beginner.
Unclipping your shoe from your pedal involves turning your foot at a 90 degree outward angle, away from your bike frame. Visualize that your heel is moving out away from your tires, and your toes are moving in towards the tires. You will feel the click and the release of your shoe clip from the pedal once you have angled enough. It does take practice and muscle memory, so the first couple of times give yourself plenty of coasting space to practice with.
Use Caution
As a runner, it is easier for me to hop to the side of the road quickly if I encounter an obstacle, or stop quickly on a dime. It is not so on a bike, and that takes some getting used to. As much as I would like to think that other drivers are aware and considerate of the special circumstances that road cyclists are in, that is not always the case.
I have unfortunately been cut off by vehicles, or had obstacles pop up unexpectedly in my path. Drivers may not always be aware that cyclists cannot stop on a dime the same way a runner or walker can, and that maintaining proper balance is more precarious on a bike.
I can also guarantee that vehicle drivers have no idea what it is like to be clipped into a bike pedal, and the heightened sense of spatial awareness and caution that brings on for the cyclist. That being said, be aware of other road traffic at all times, and know that drivers will not always give you the considerations you might expect. Constantly be mentally preparing for that next stop or next maneuver.
Another critical component of road cycling that I have discovered is the importance of paying close visual attention at all times. Taking my eye off the road even for one second has put me in jeopardy of veering off the road into a side ditch, or almost running over large rocks in the road.
Because you are maintaining proper balance at all times on your road cycling bike, a big proponent of that is keeping your eye on the road ahead at all times. Because it takes more time to stop safely on a road bike, it is critical to pay attention to any obstacles that appear on the road, and give yourself as much time as possible to process your safe stop. Do not take your eyes off of the road, bottom line!
Hydrate
Because road cycling comes across as more “high speed” than running does for me, I often do not notice as much how greatly I am perspiring. It is important to hydrate appropriately on your bike rides, whether you are in the stage of stopping to get a drink, or you have built up the confidence to be able to take a free hand and grab your drink mid ride!
Posture
Always be aware of whether your cycling posture feels comfortable. If not, it may necessitate something like a saddle adjustment.
Another element of posture that was tricky for me was working up to being able to “stand up” in the saddle for those power uphills. For a long time, I struggle-bused it from my seat, because standing up made me feel like I was going to lose my balance. If that is you, do not beat yourself up about it too much. It took me three whole months to be able to stand up in the saddle and pedal up those ascents.
Once you are there, know that that posture move will help you be able to progress successfully on those daunting uphills. The key word there is progress, because no matter how you dice it, uphills still suck! But they are where the biggest payoff comes from.
How to Overcome Road Cycling Fears
No matter what stage of road cycling you are currently in, there are the fears that tempt you never to start, and the fears that may always still exist in the back burner of your mind as you are out on the open road. The first step to confronting these fears is to recognize what they are, and then to not let them slow you down. Here are a few “fear deflators” I discovered on my own road cycling journey. If you follow these pieces of beginner advice, you will inevitably feel better equipped to get out on your own.
Fear Deflator #1: Practice on Empty Roads
Completely empty roads are probably not a reality for everyone. But do your best to find the “emptiest” roads, even if that requires driving out a little ways. Or, practice on a road during “non-peak” times. Just do not practice on the roads leading to the interstate at 8 am on a Monday morning!
Fear Deflator #2: Map Your Route Out Ahead of Time
Get in your car and visually scope out and map out some routes ahead of time. I used to drive around the roads of my neighborhood to help me get the lay of the land, determine how large the hills were, and where my designated break spots could be. I knew before I ever got in the saddle where I was planning to go that day, and whether I felt confident I could handle the types of hills I knew I would encounter. It is funny how acutely aware you become of hills and grades when you get into road cycling!
When I was starting out, I tried to limit the amount of surprises I was going to encounter on the road. If you do not have a chance to do a quick drive by of your intended route, alternatively you can always pull up your GPS on your phone and use that to help you scope out a suitable route.
Fear Deflator #3: Be Aware of Weather
I have gotten caught in my fair shower of weather when out running. While that is not the safest situation, the worst that has ever happened to me when running in rain is getting drenched clothes and soggy shoes.
With road cycling, however, weather can also affect your bike, which jeopardizes your security while on it. Rain weakens your braking and steering abilities, for example. It makes the road and the pavement slicker and less predictable. Depending on the road cycling bike you choose, whether your cables and such are internal or external, can all be affected by bad weather.
These are all things you can learn to compensate for with experience, but as a road cycling beginner, I would not recommend practicing in inclement weather. Do not throw any unexpected surprises or new elements into the mix when you are just starting out.
So, what can you do if you really want to stick to your cycling schedule? Perhaps you are training for your first century ride, and you really want to get a training ride in today, but there are thunderstorms outside? Enter the Wahoo Kickr! Find out what makes this machine such an incredible addition to any serious cyclist’s inventory, and just how it is able to so closely replicate the real cycling experience! This is what I use for my indoor cycling training days, when outdoors is not an option!
Fear Deflator #4: Start Slow
Literally and figuratively, start slow. Do small loops. Do shorter routes. Pedal slower. Up your mileage in slow, easy increments, just as you would when training for a long distance running event. Brake more on the downhills and do not accelerate too fast.
And when you are ready to start training for longer distances, check out these training calendars I personally developed and use myself:
Fear Deflator #5: Designate a Break Spot/Easy Turn Around Spot
If you mapped your intended route out in person, this will be an easier task. Know where there is an easy spot to turn around or take a break on your intended route, without having to cross lanes or traffic or other intimidating obstacles. Cul de sacs will become your new best friend! As a beginner, I would also recommend stopping for a break no longer than every 5 miles. Be sure to hydrate on your breaks.
Fear Deflator #6: Let Family or Friends Know Your Route
Familiarize a family member or friend on your routes and routine. Do you tend to bike at a certain time of day? Do you have a particular route? Do you tend to do your loop in a counterclockwise or clockwise circle? Always make sure that someone knows where you are planning to bike and for how long, and when to expect you should be finished.
Fear Deflator #7: Bring Phone
I wear biking jerseys like this one that are specifically designed with built in pockets in the back, to be able to bring my phone. Mostly, I want it on hand for emergencies. But it also comes in handy when I need to reference my GPS map for distances or to know which road to go down.
So there you have it, a beginner’s guide to road cycling and all of the cycling gear recommendations, tips, and tricks that go with it! While this may seem like information overload now, if you take all of these tips into account and implement them slowly and intentionally, with patience and a persevering mindset, you can become successful at road cycling, and enjoy a whole new realm of exciting exercise and active travel opportunities!
>>>MORE: You can take a deeper dive into all the beginner gear you need HERE!
Are You Ready to Train for your 1st Road Cycling Race?
Grab your 16 Week Half Century Training Calendar HERE
AND
Your 16 Week Full Century Training Calendar HERE
PIN for LATER!
Last update on 2023-08-09 / Affiliate links / Images from Amazon Product Advertising API